The Process of Creating a Watercolor Painting
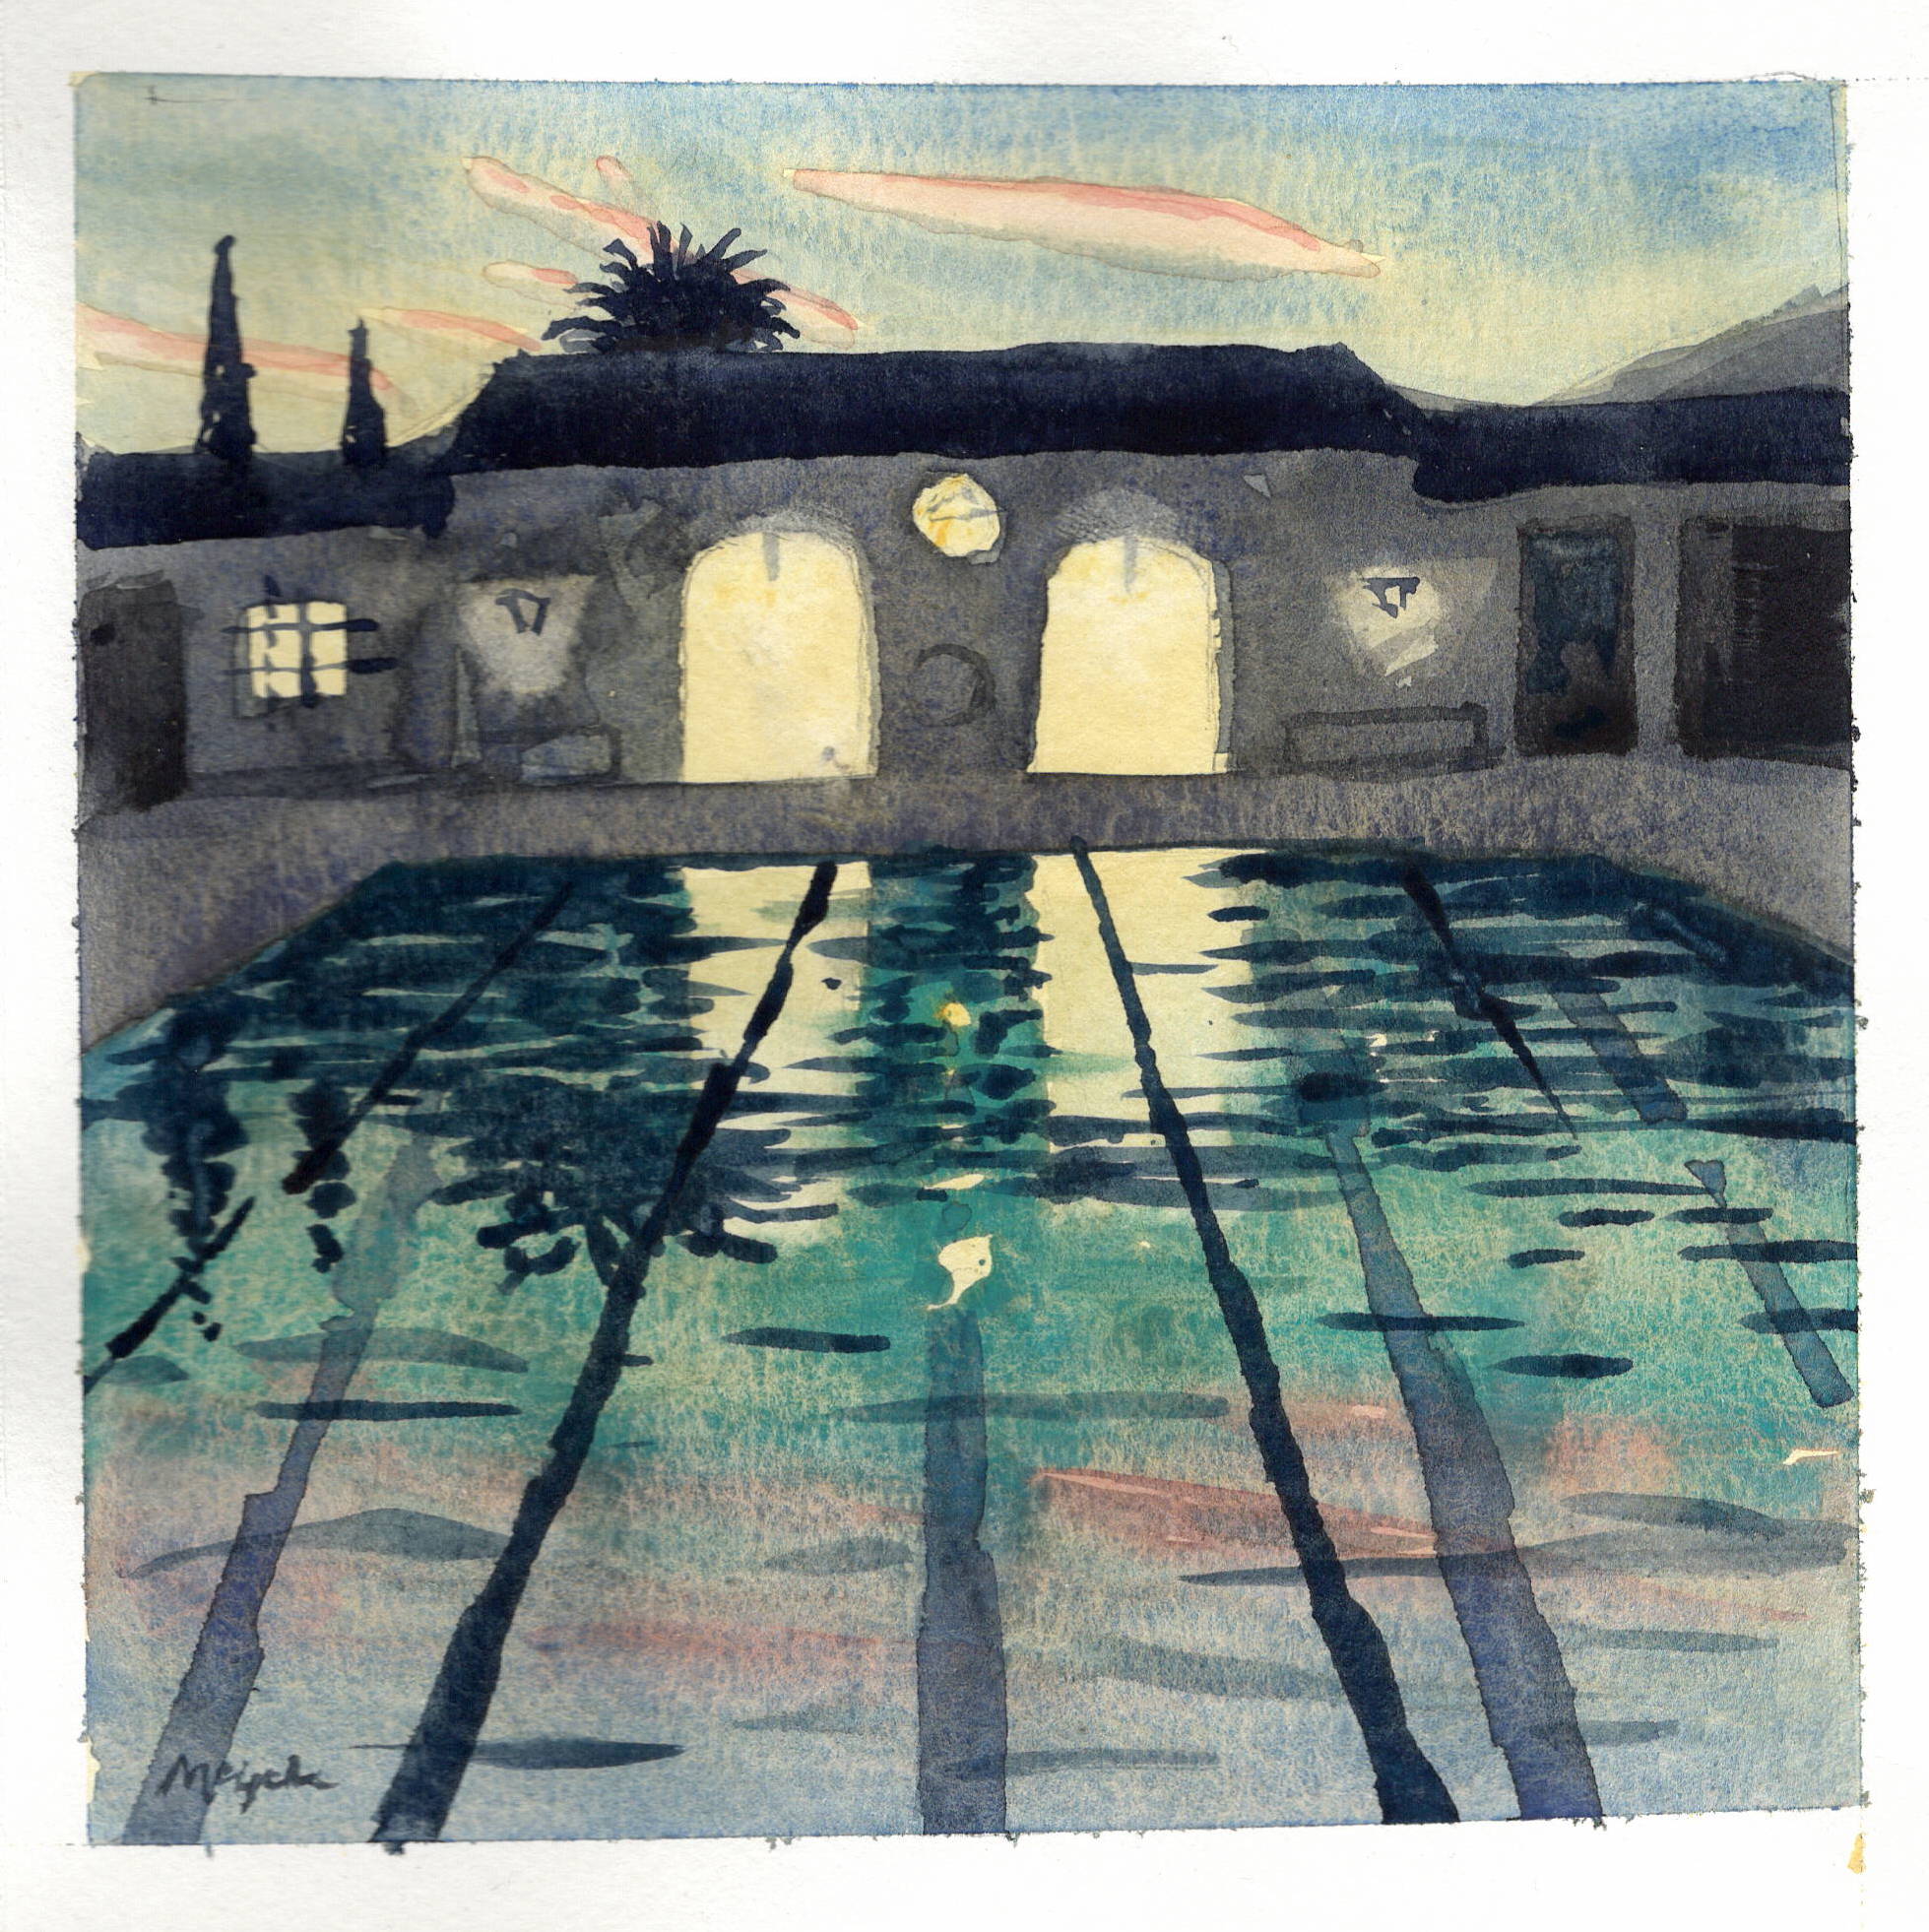
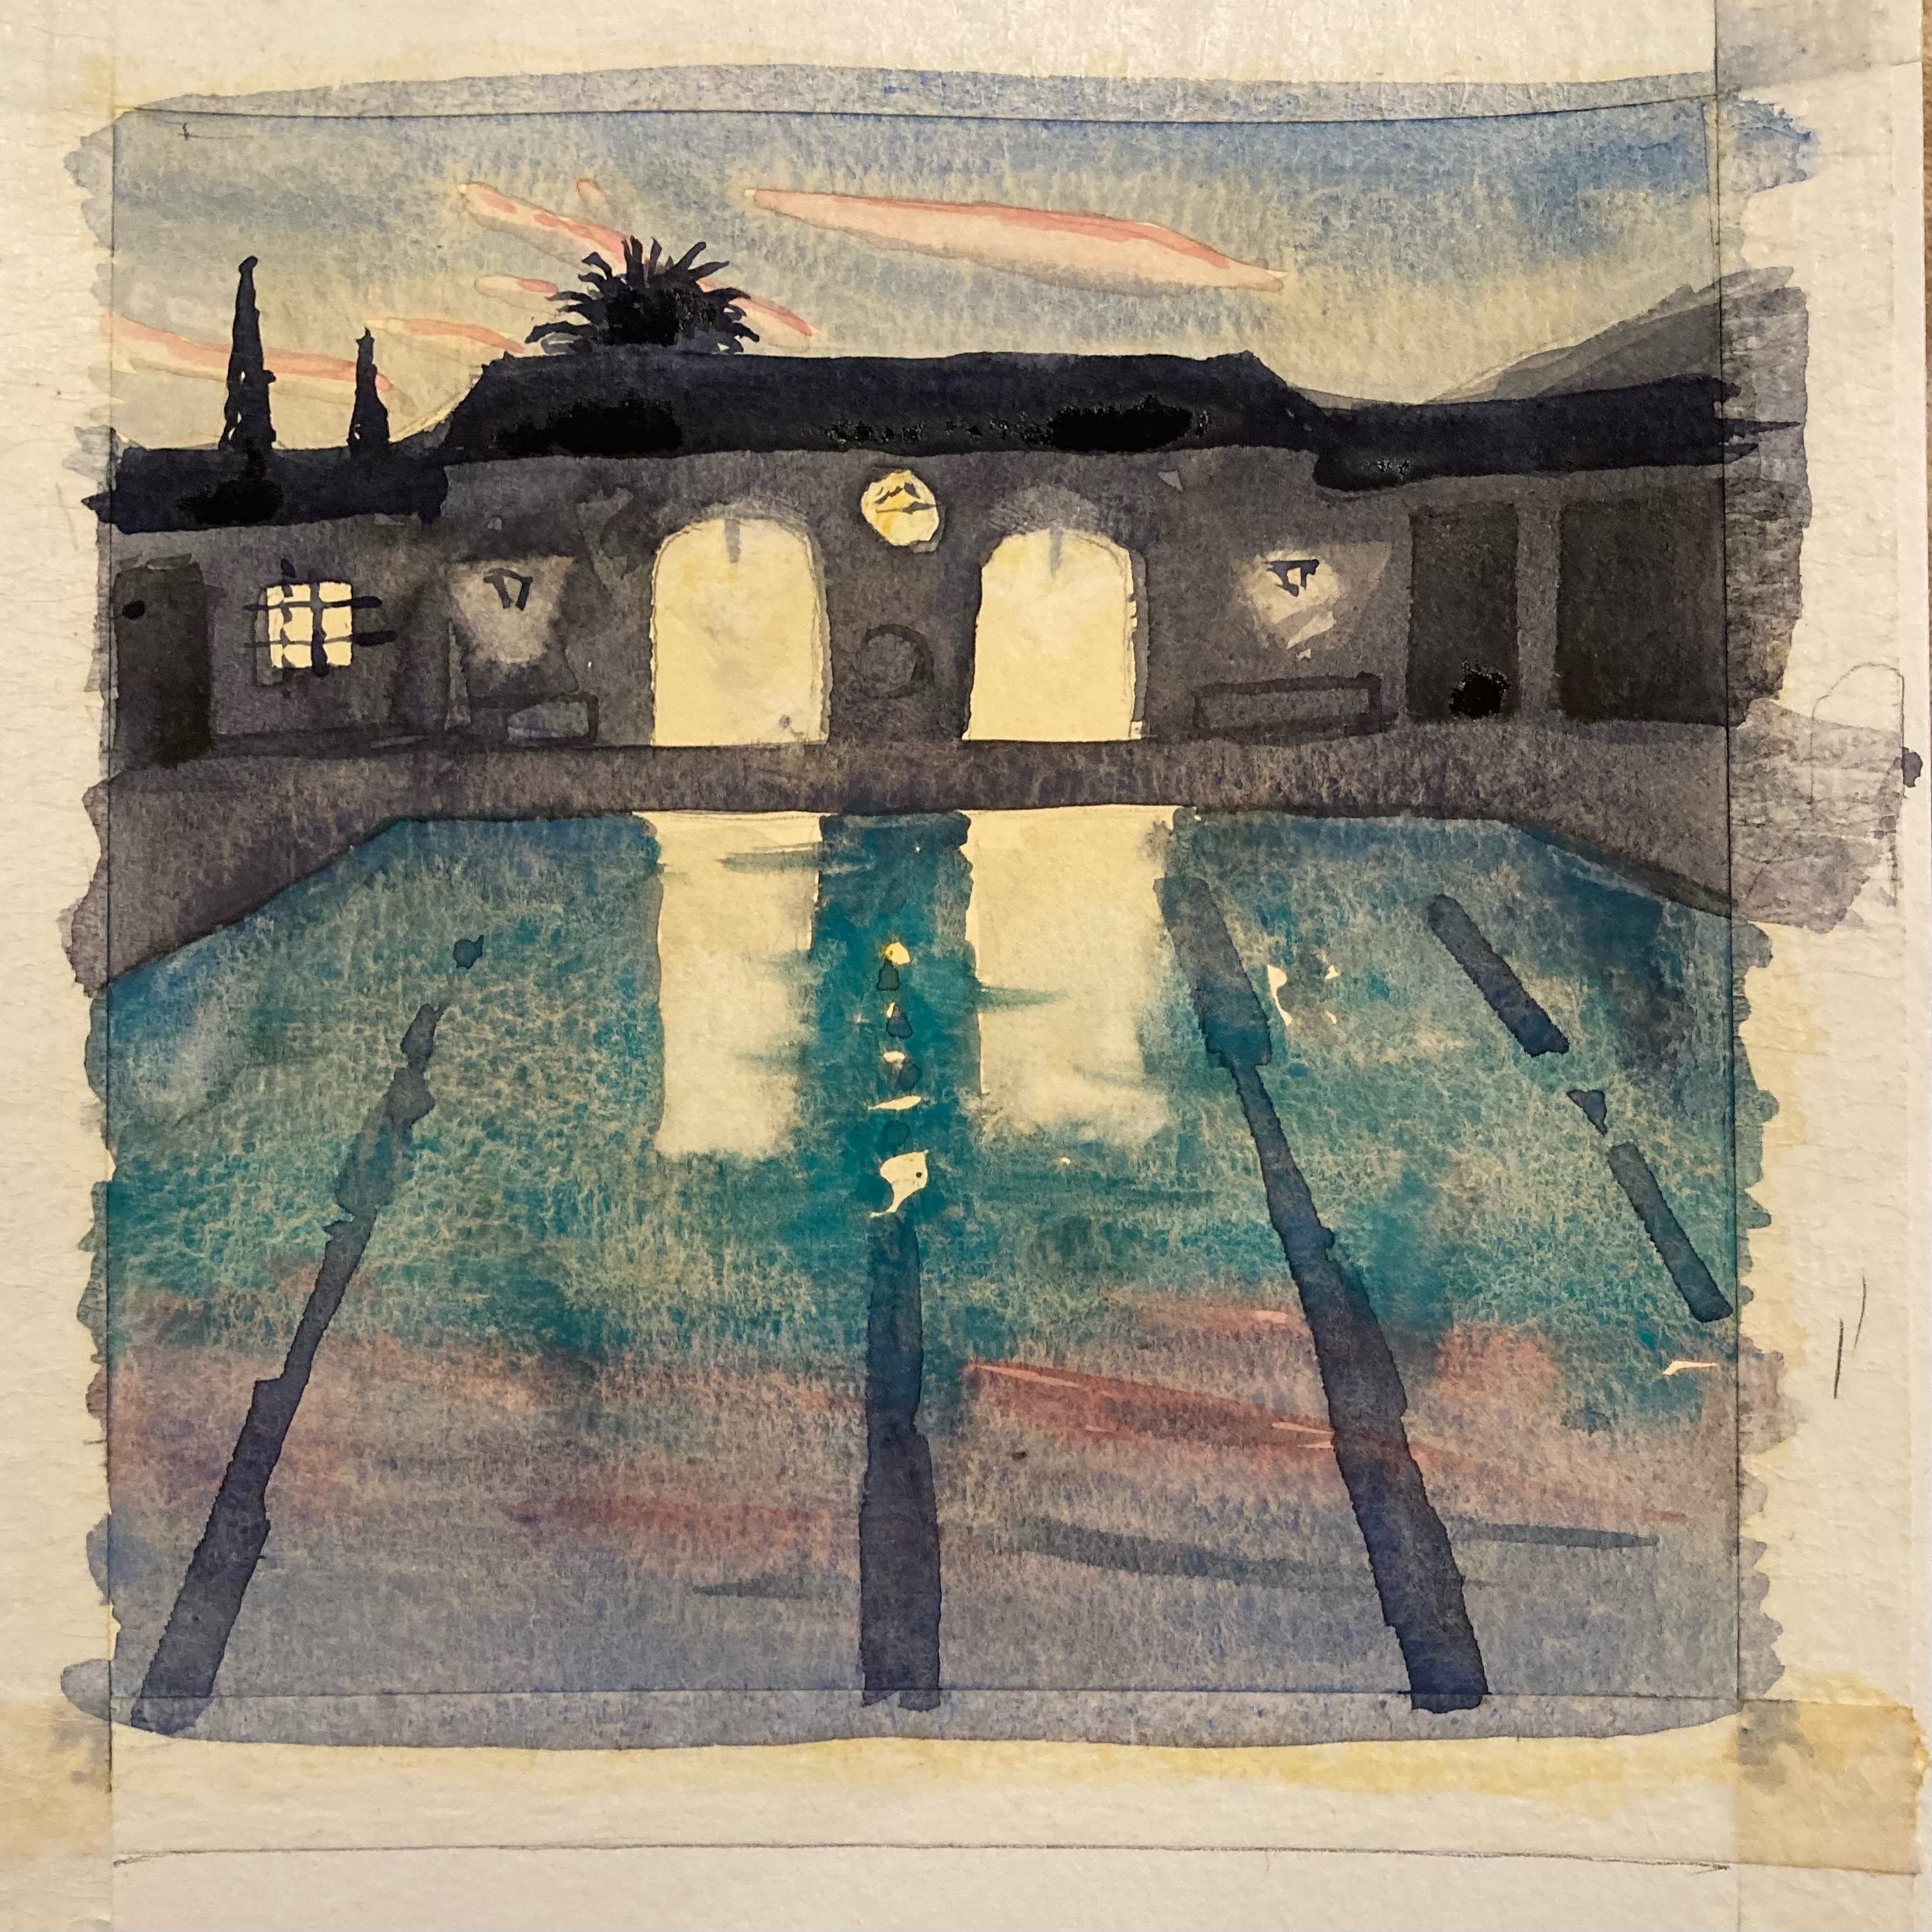
Here I demonstrate the process of layering washes of watercolor from lightest to darkest values giving the illusion of depth and enhancing the luminous quality of the night sky.
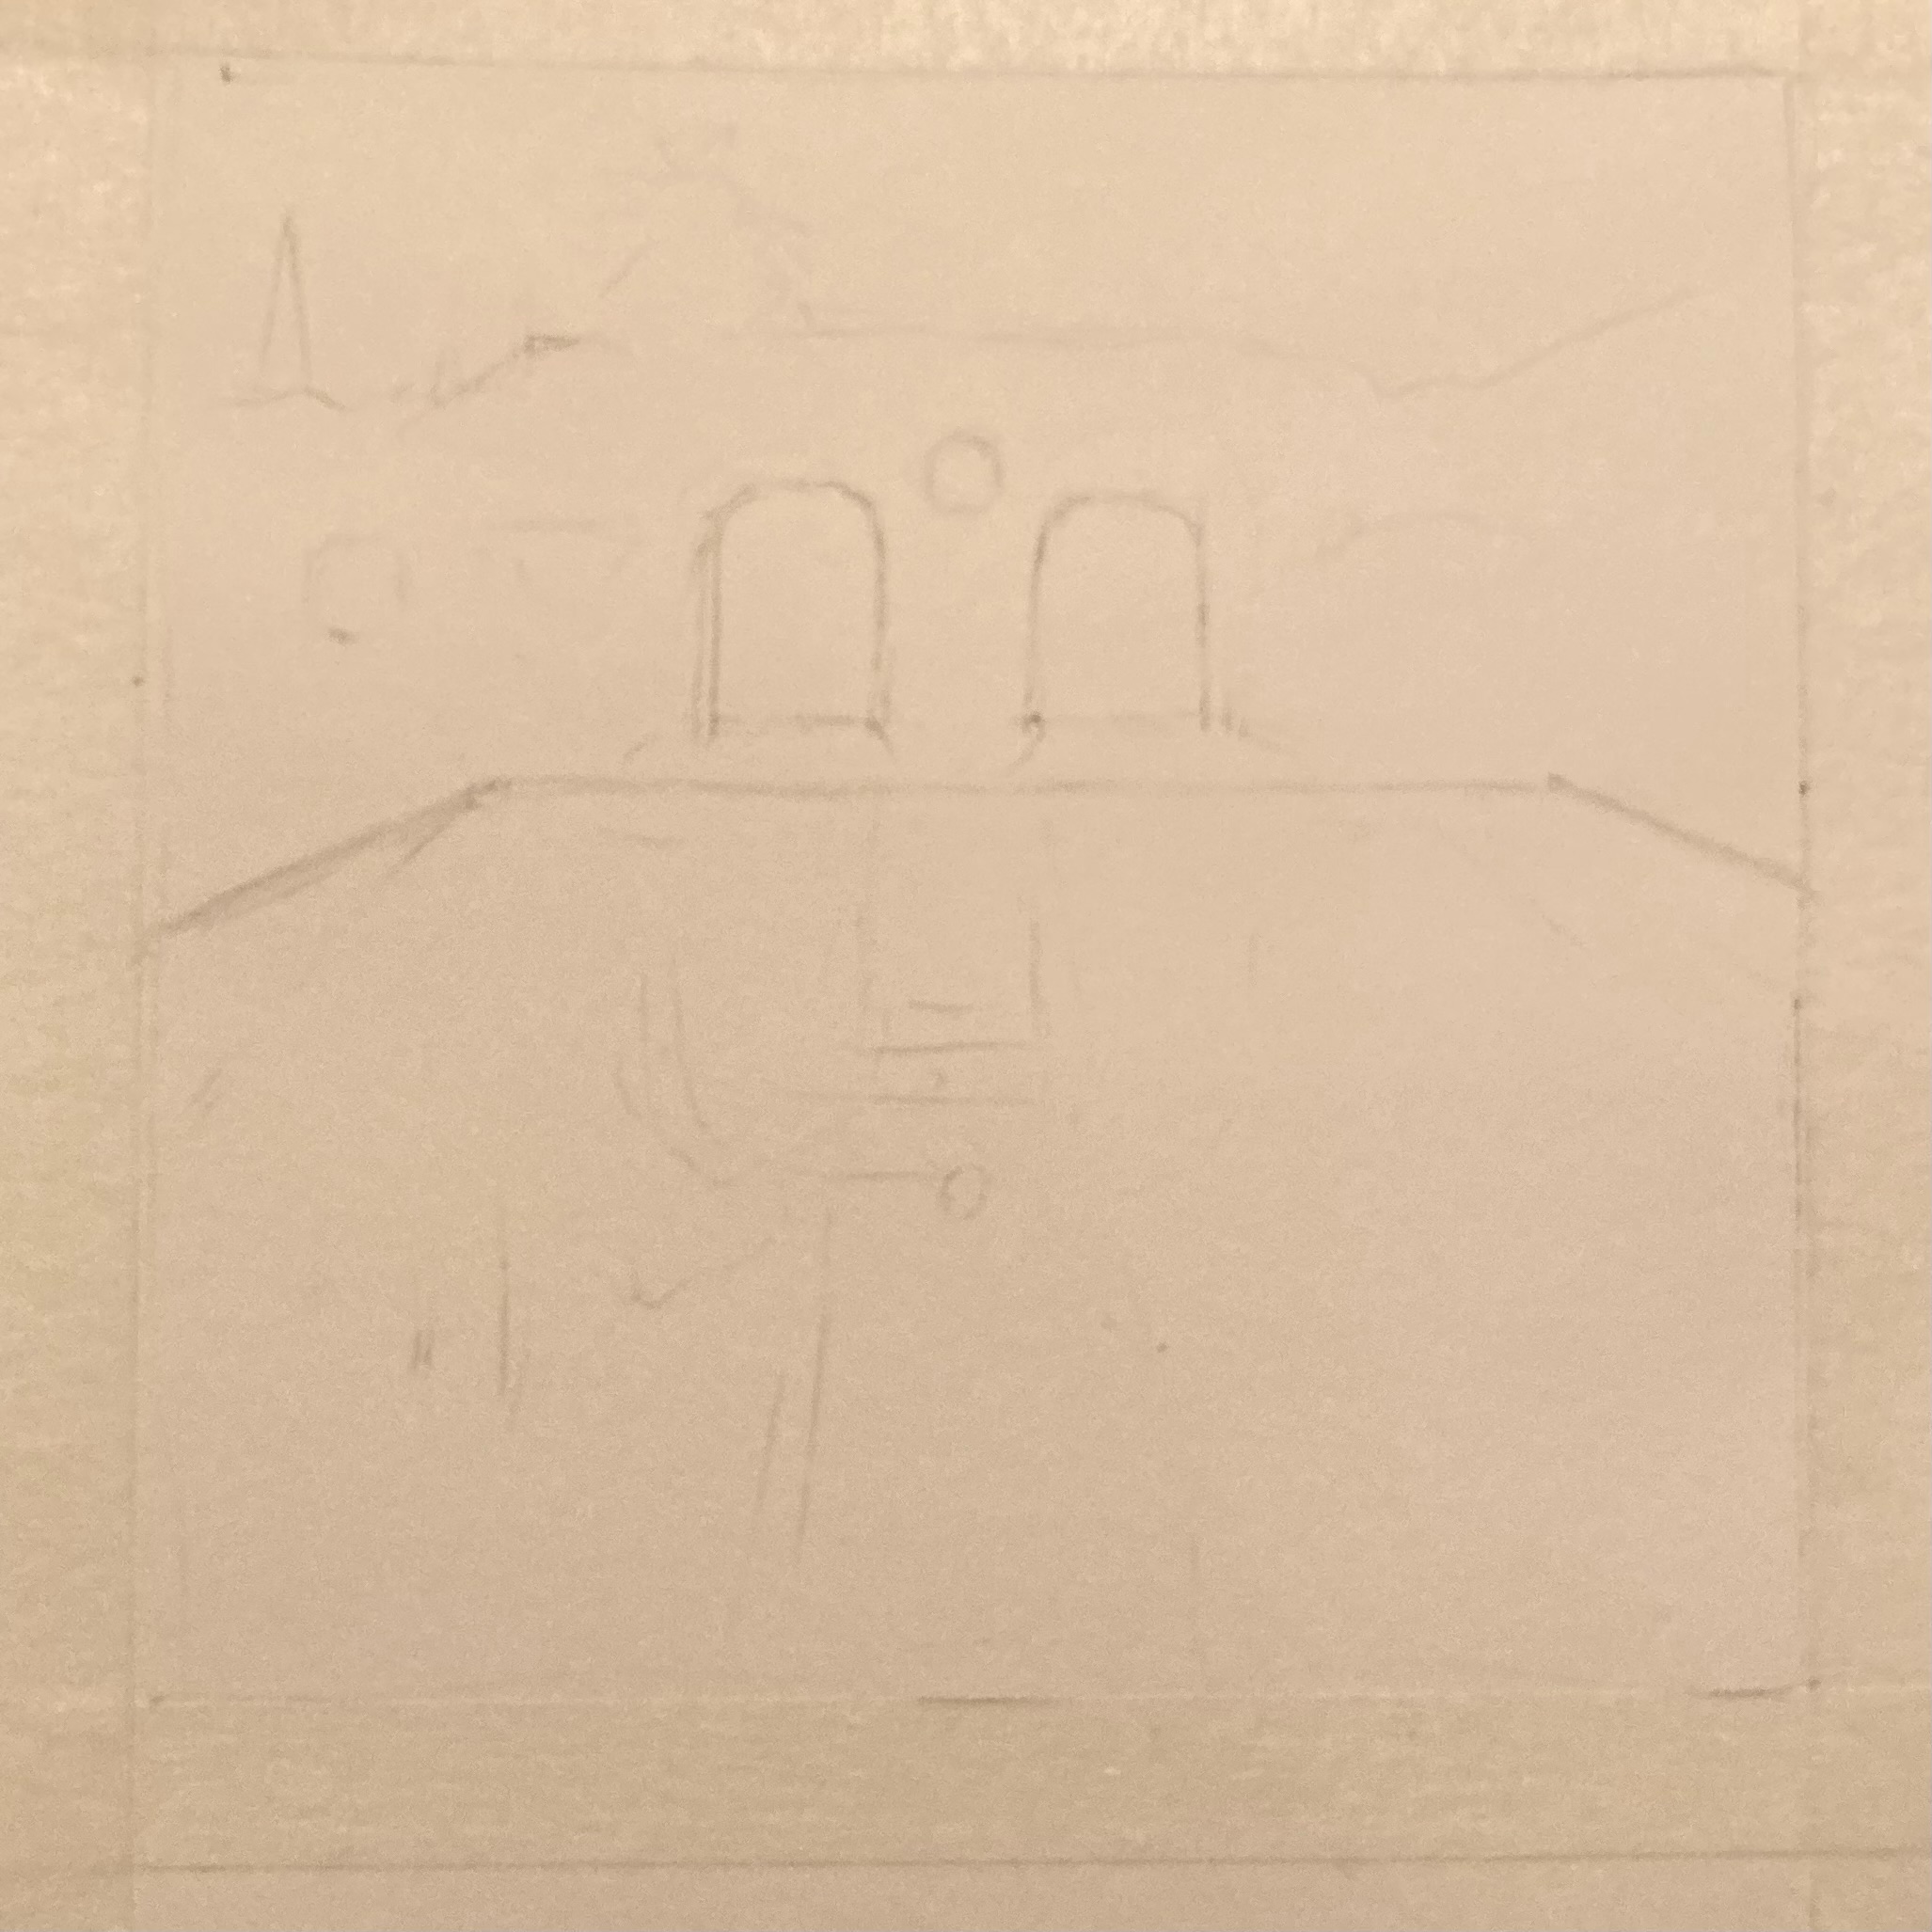
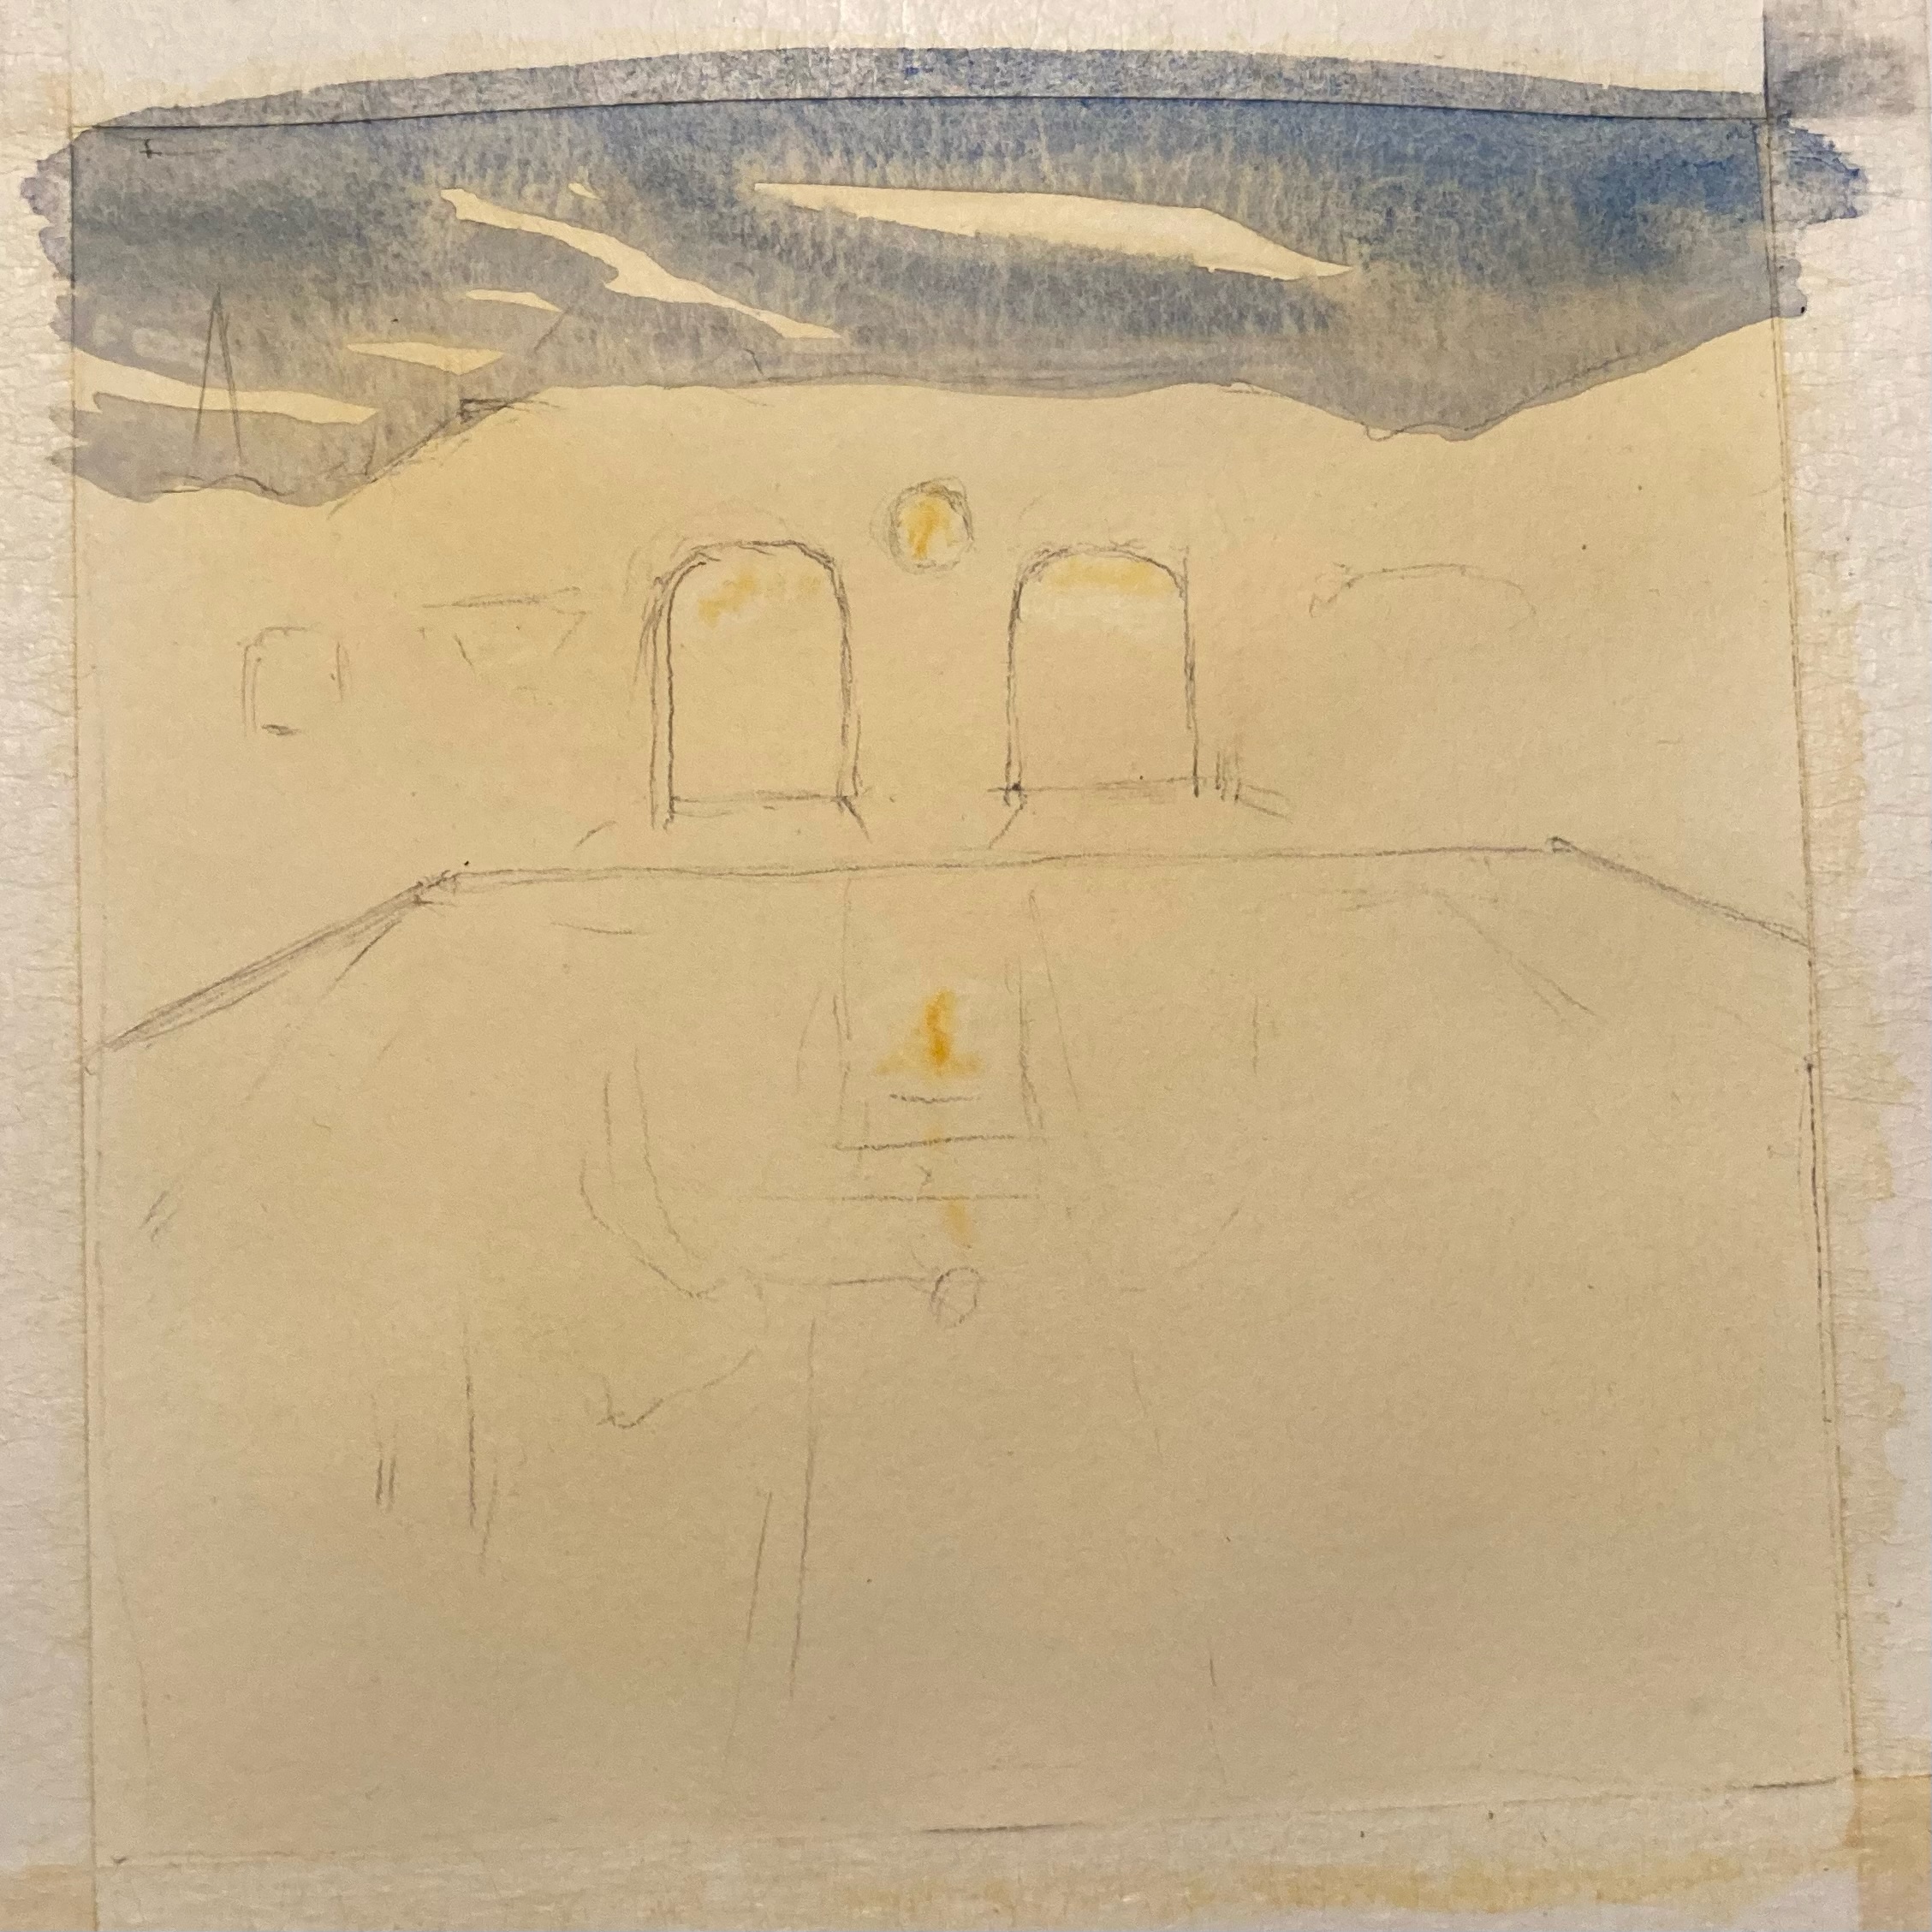
A simple drawing with little detail allows me to see the big shapes and helps me keep the perspective accurate to what we would normally see in reality.
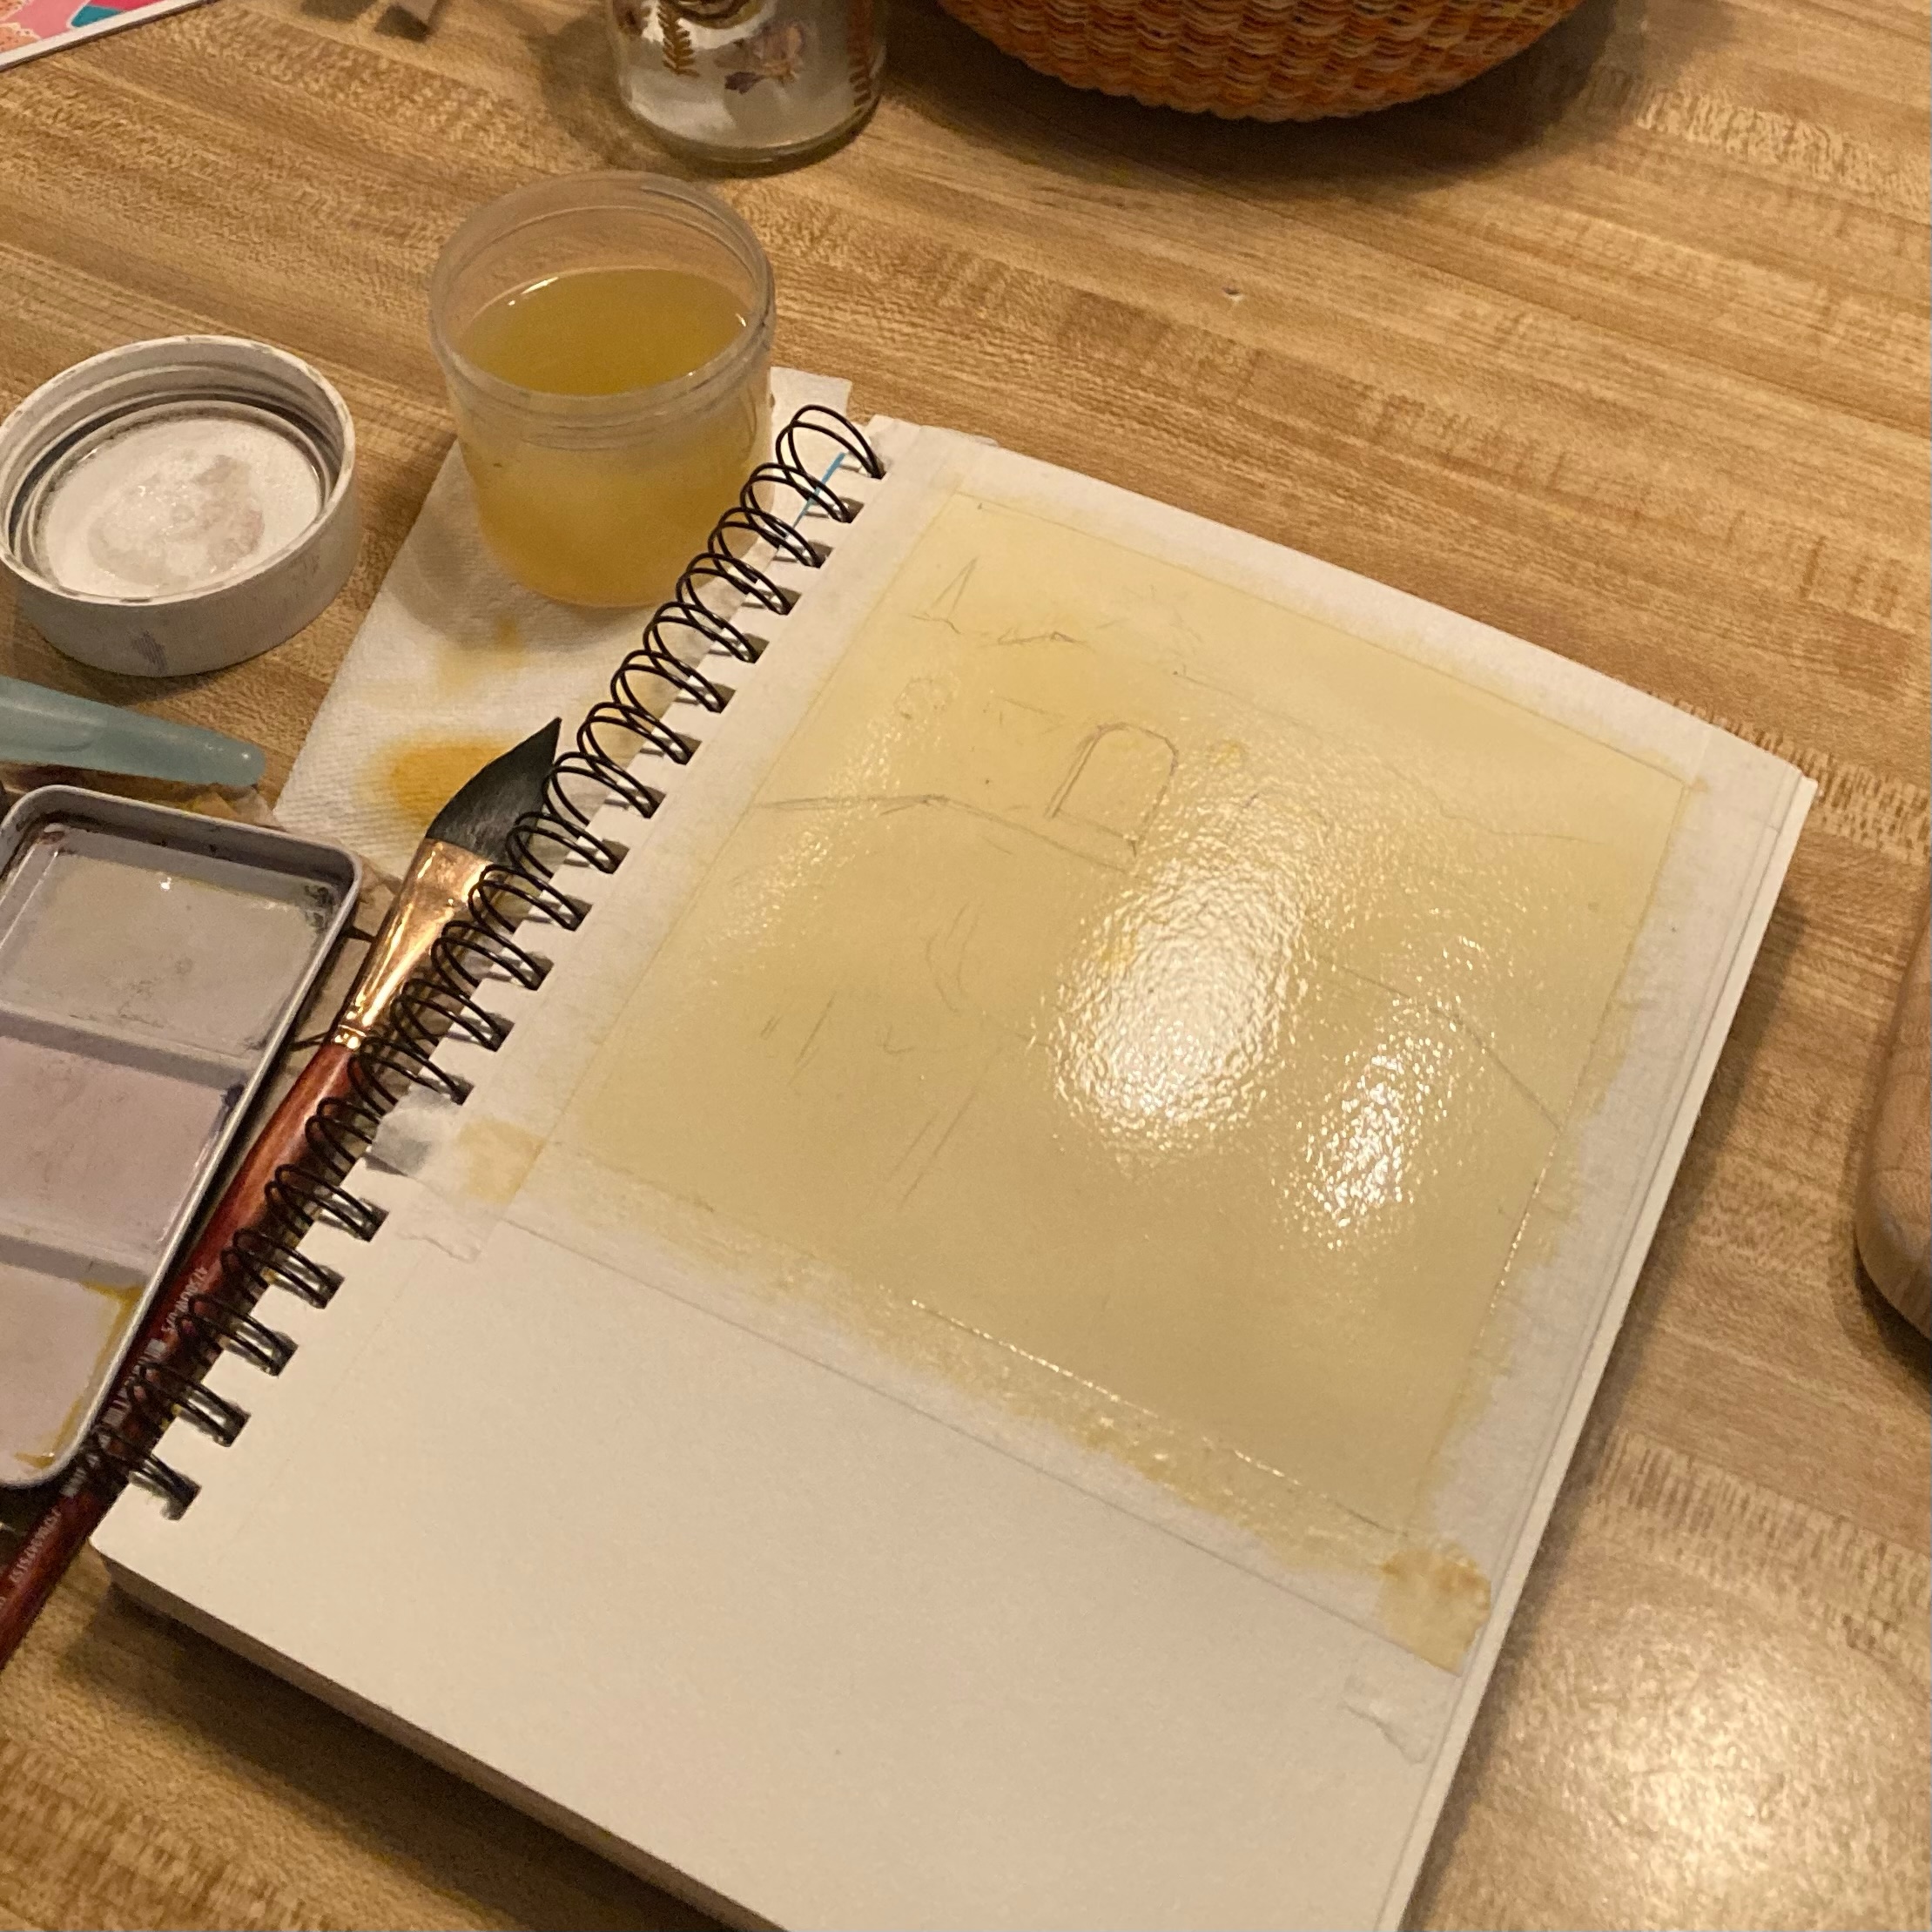
The first color wash is usually the lightest value in the painting. Here I've put in the golden light from the bottom of the sky's gradient and the light from the wall sconces and their reflections in the pool.
The second wash lays in the midtones of the sky at twilight and I create the clouds by painting around their shapes.
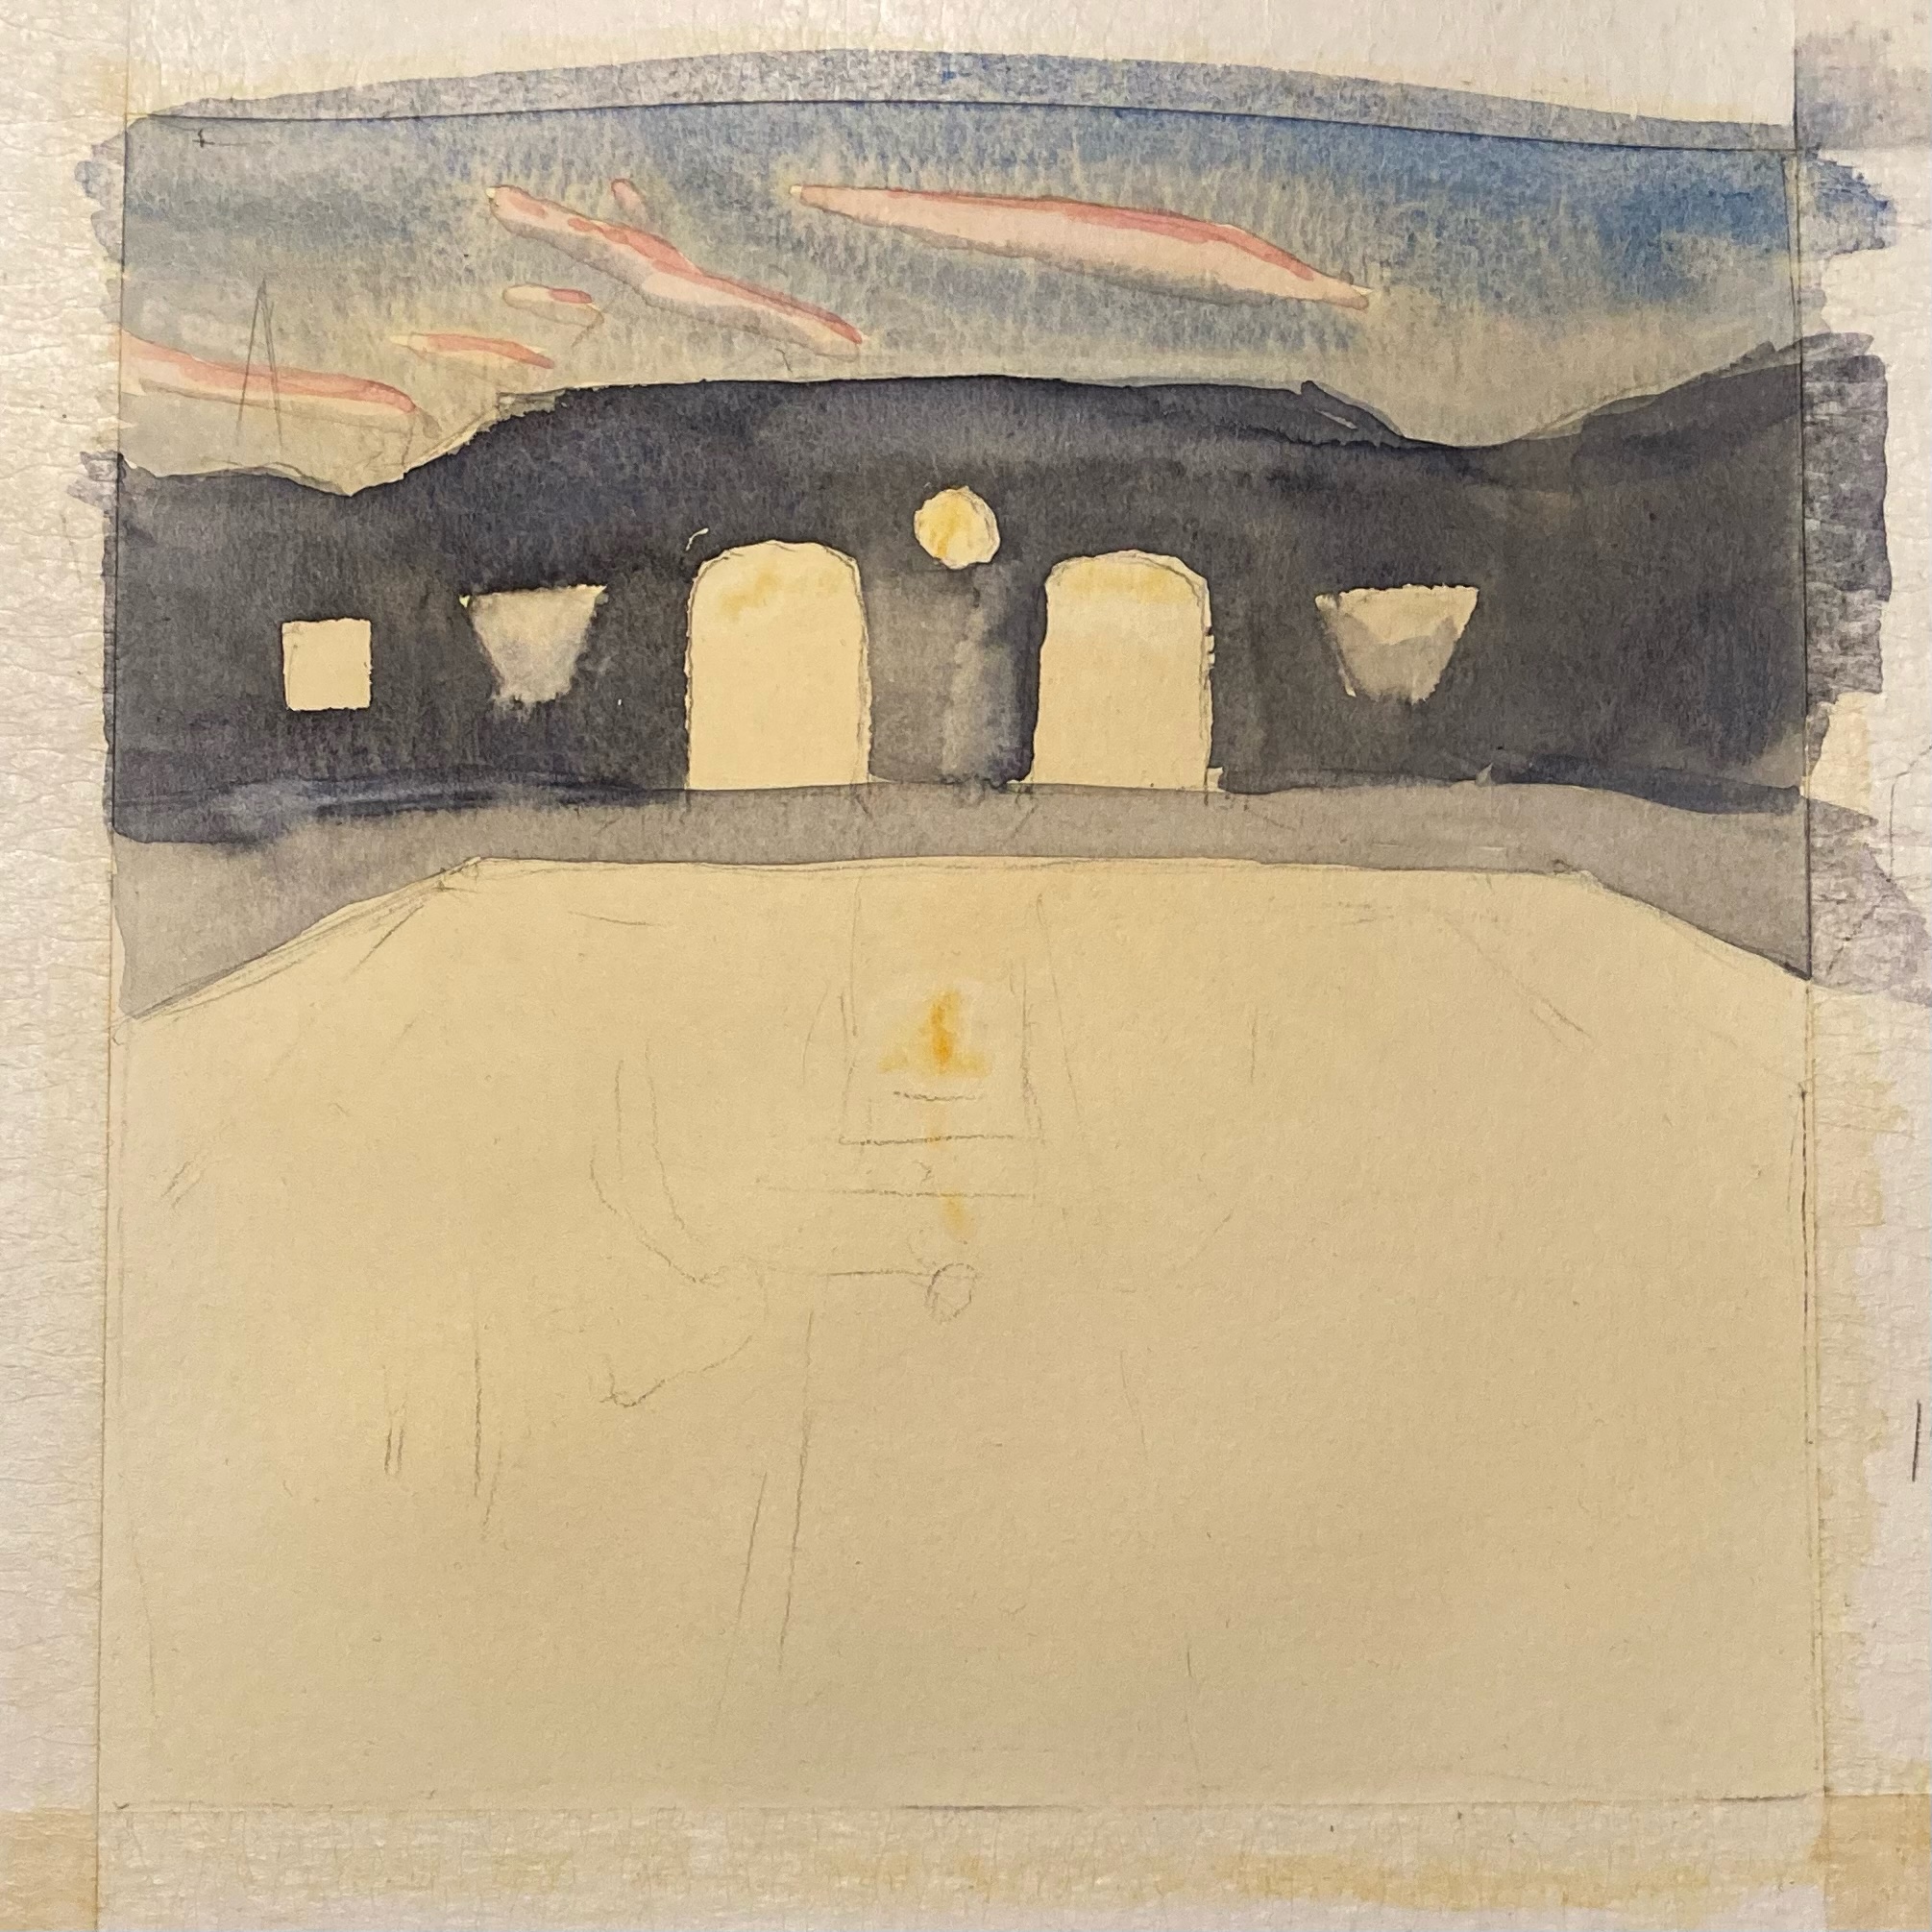
This layer I put in the pink color and shadows of the clouds, and the large base shape of the building and pool deck.
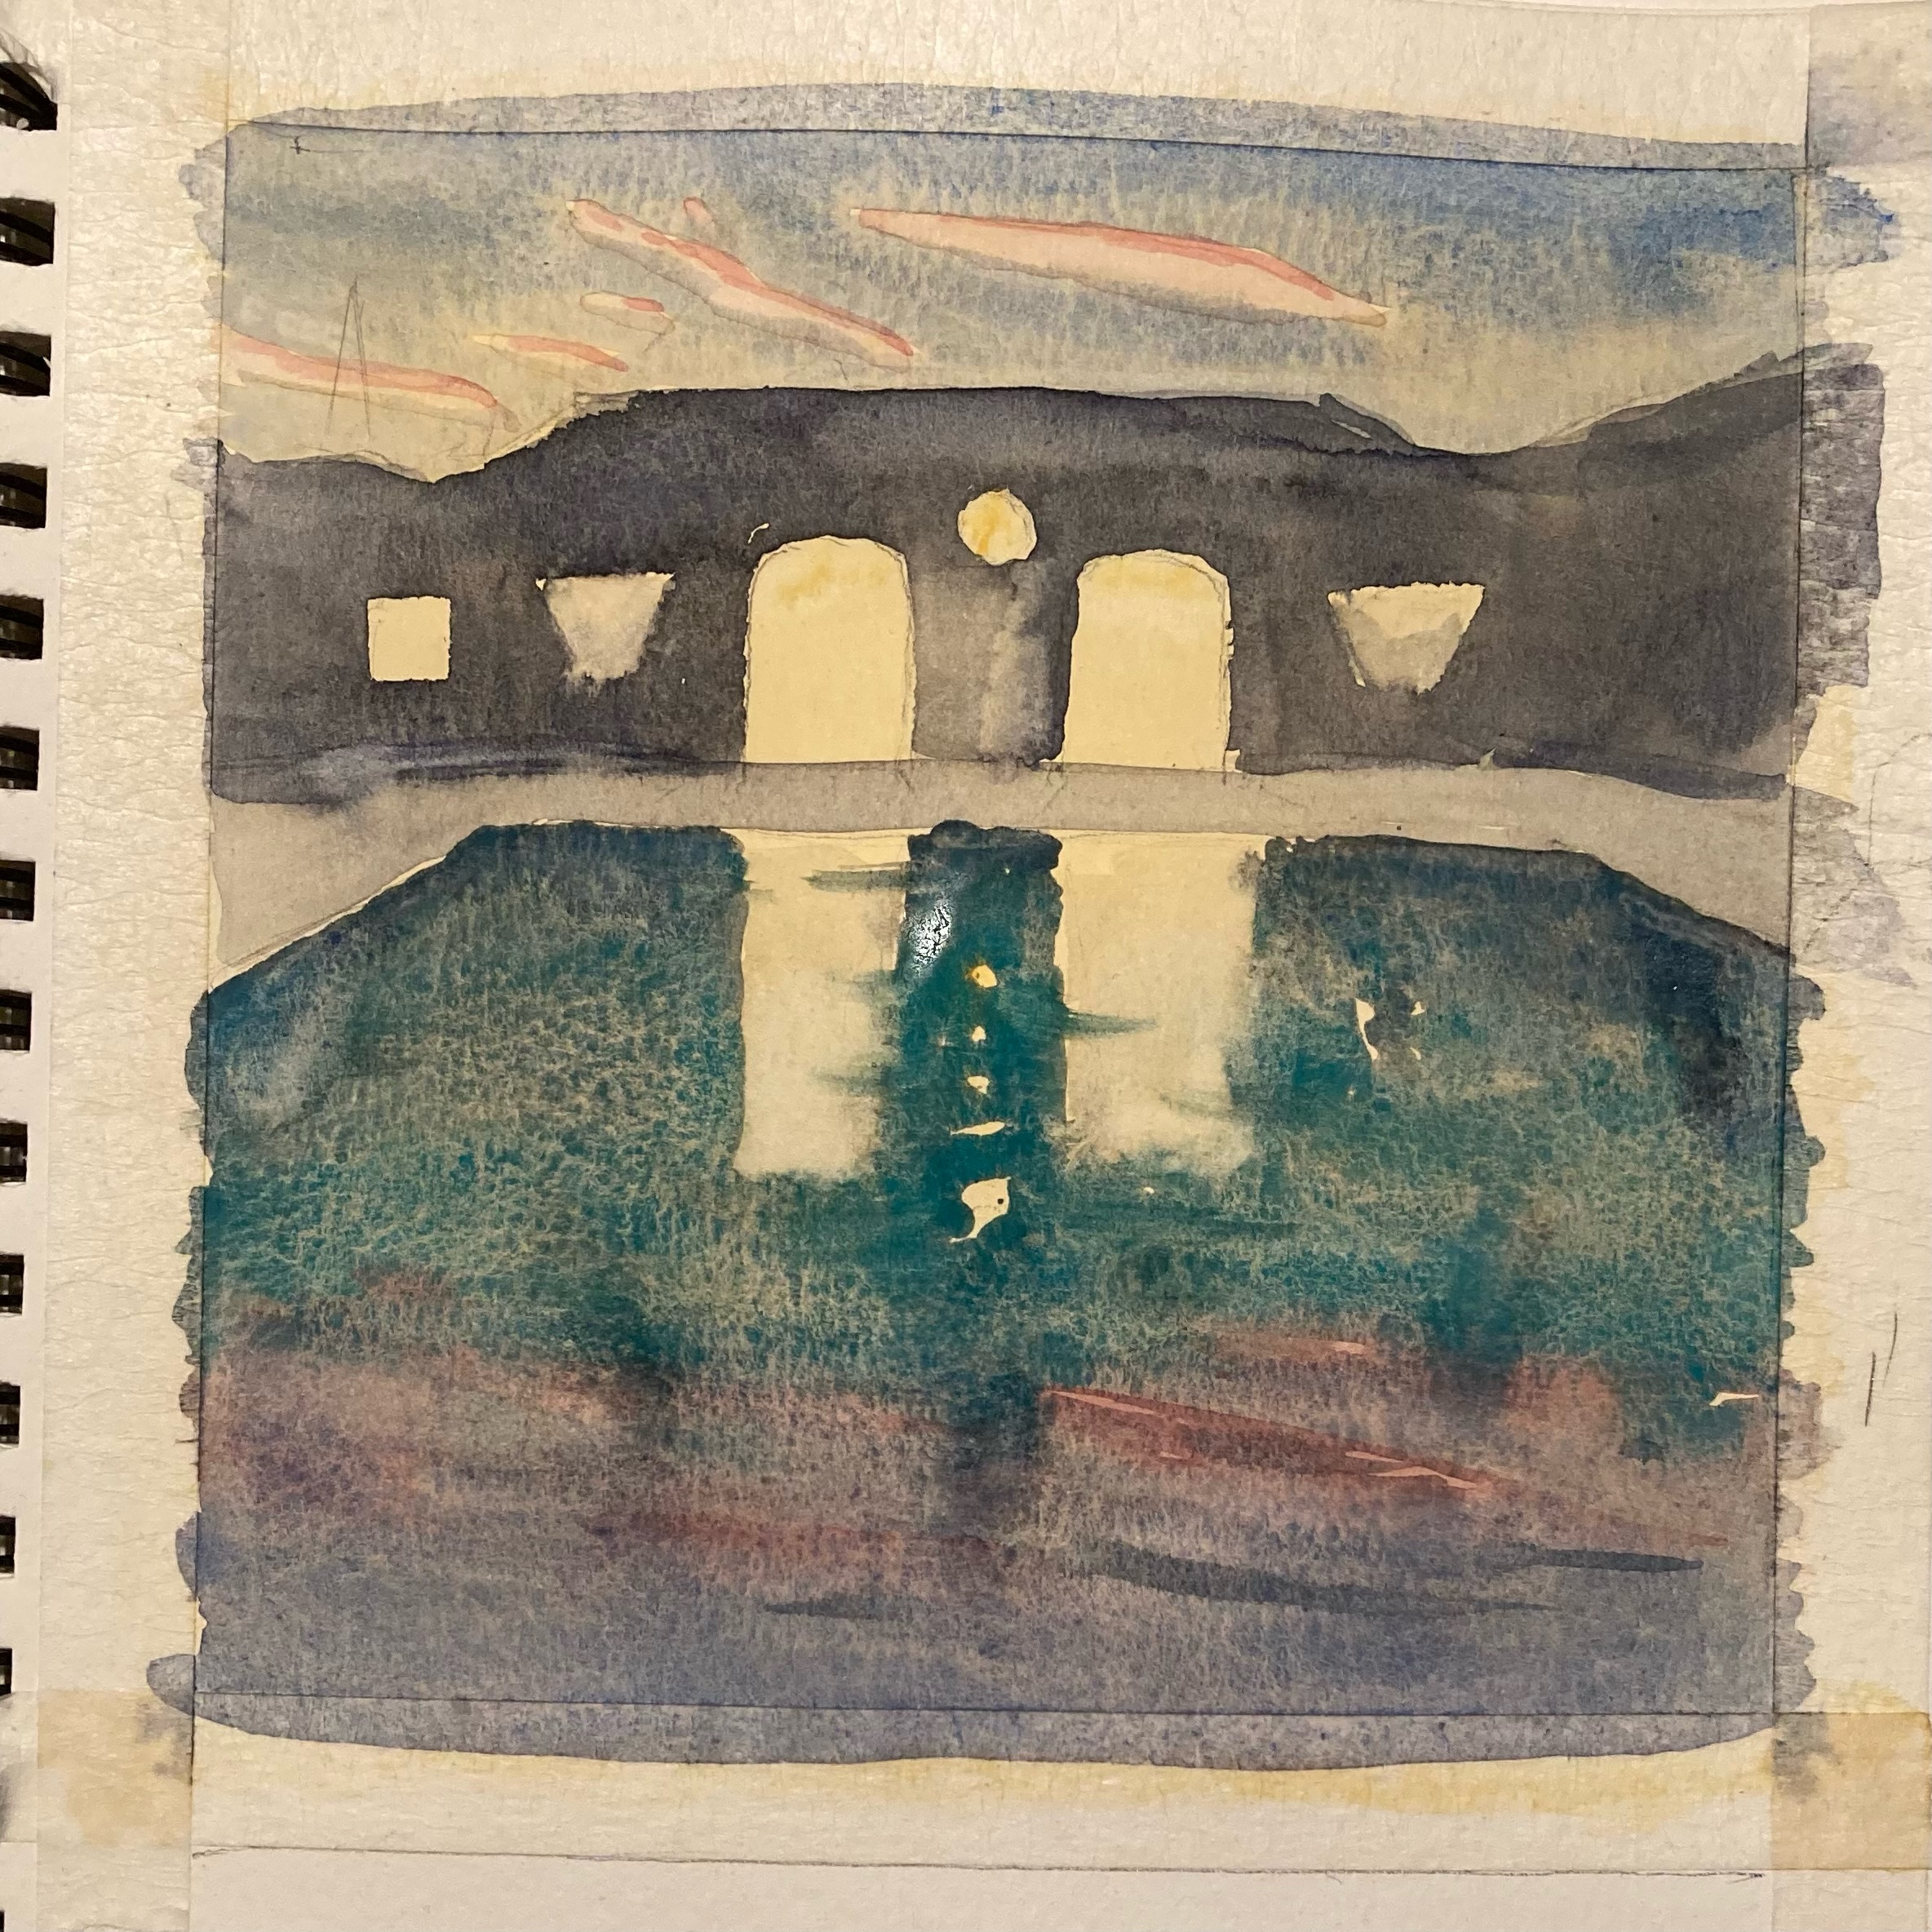
Now the colors of the sky are laid into the reflected shapes in the pool working around the shapes of the doorways and wall sconces.
This step I add more details using darker midtones like the dark lines on the bottom of the pool and shapes on the building. Also added at this stage are the trees in silhouette and the dark shape of the roof.
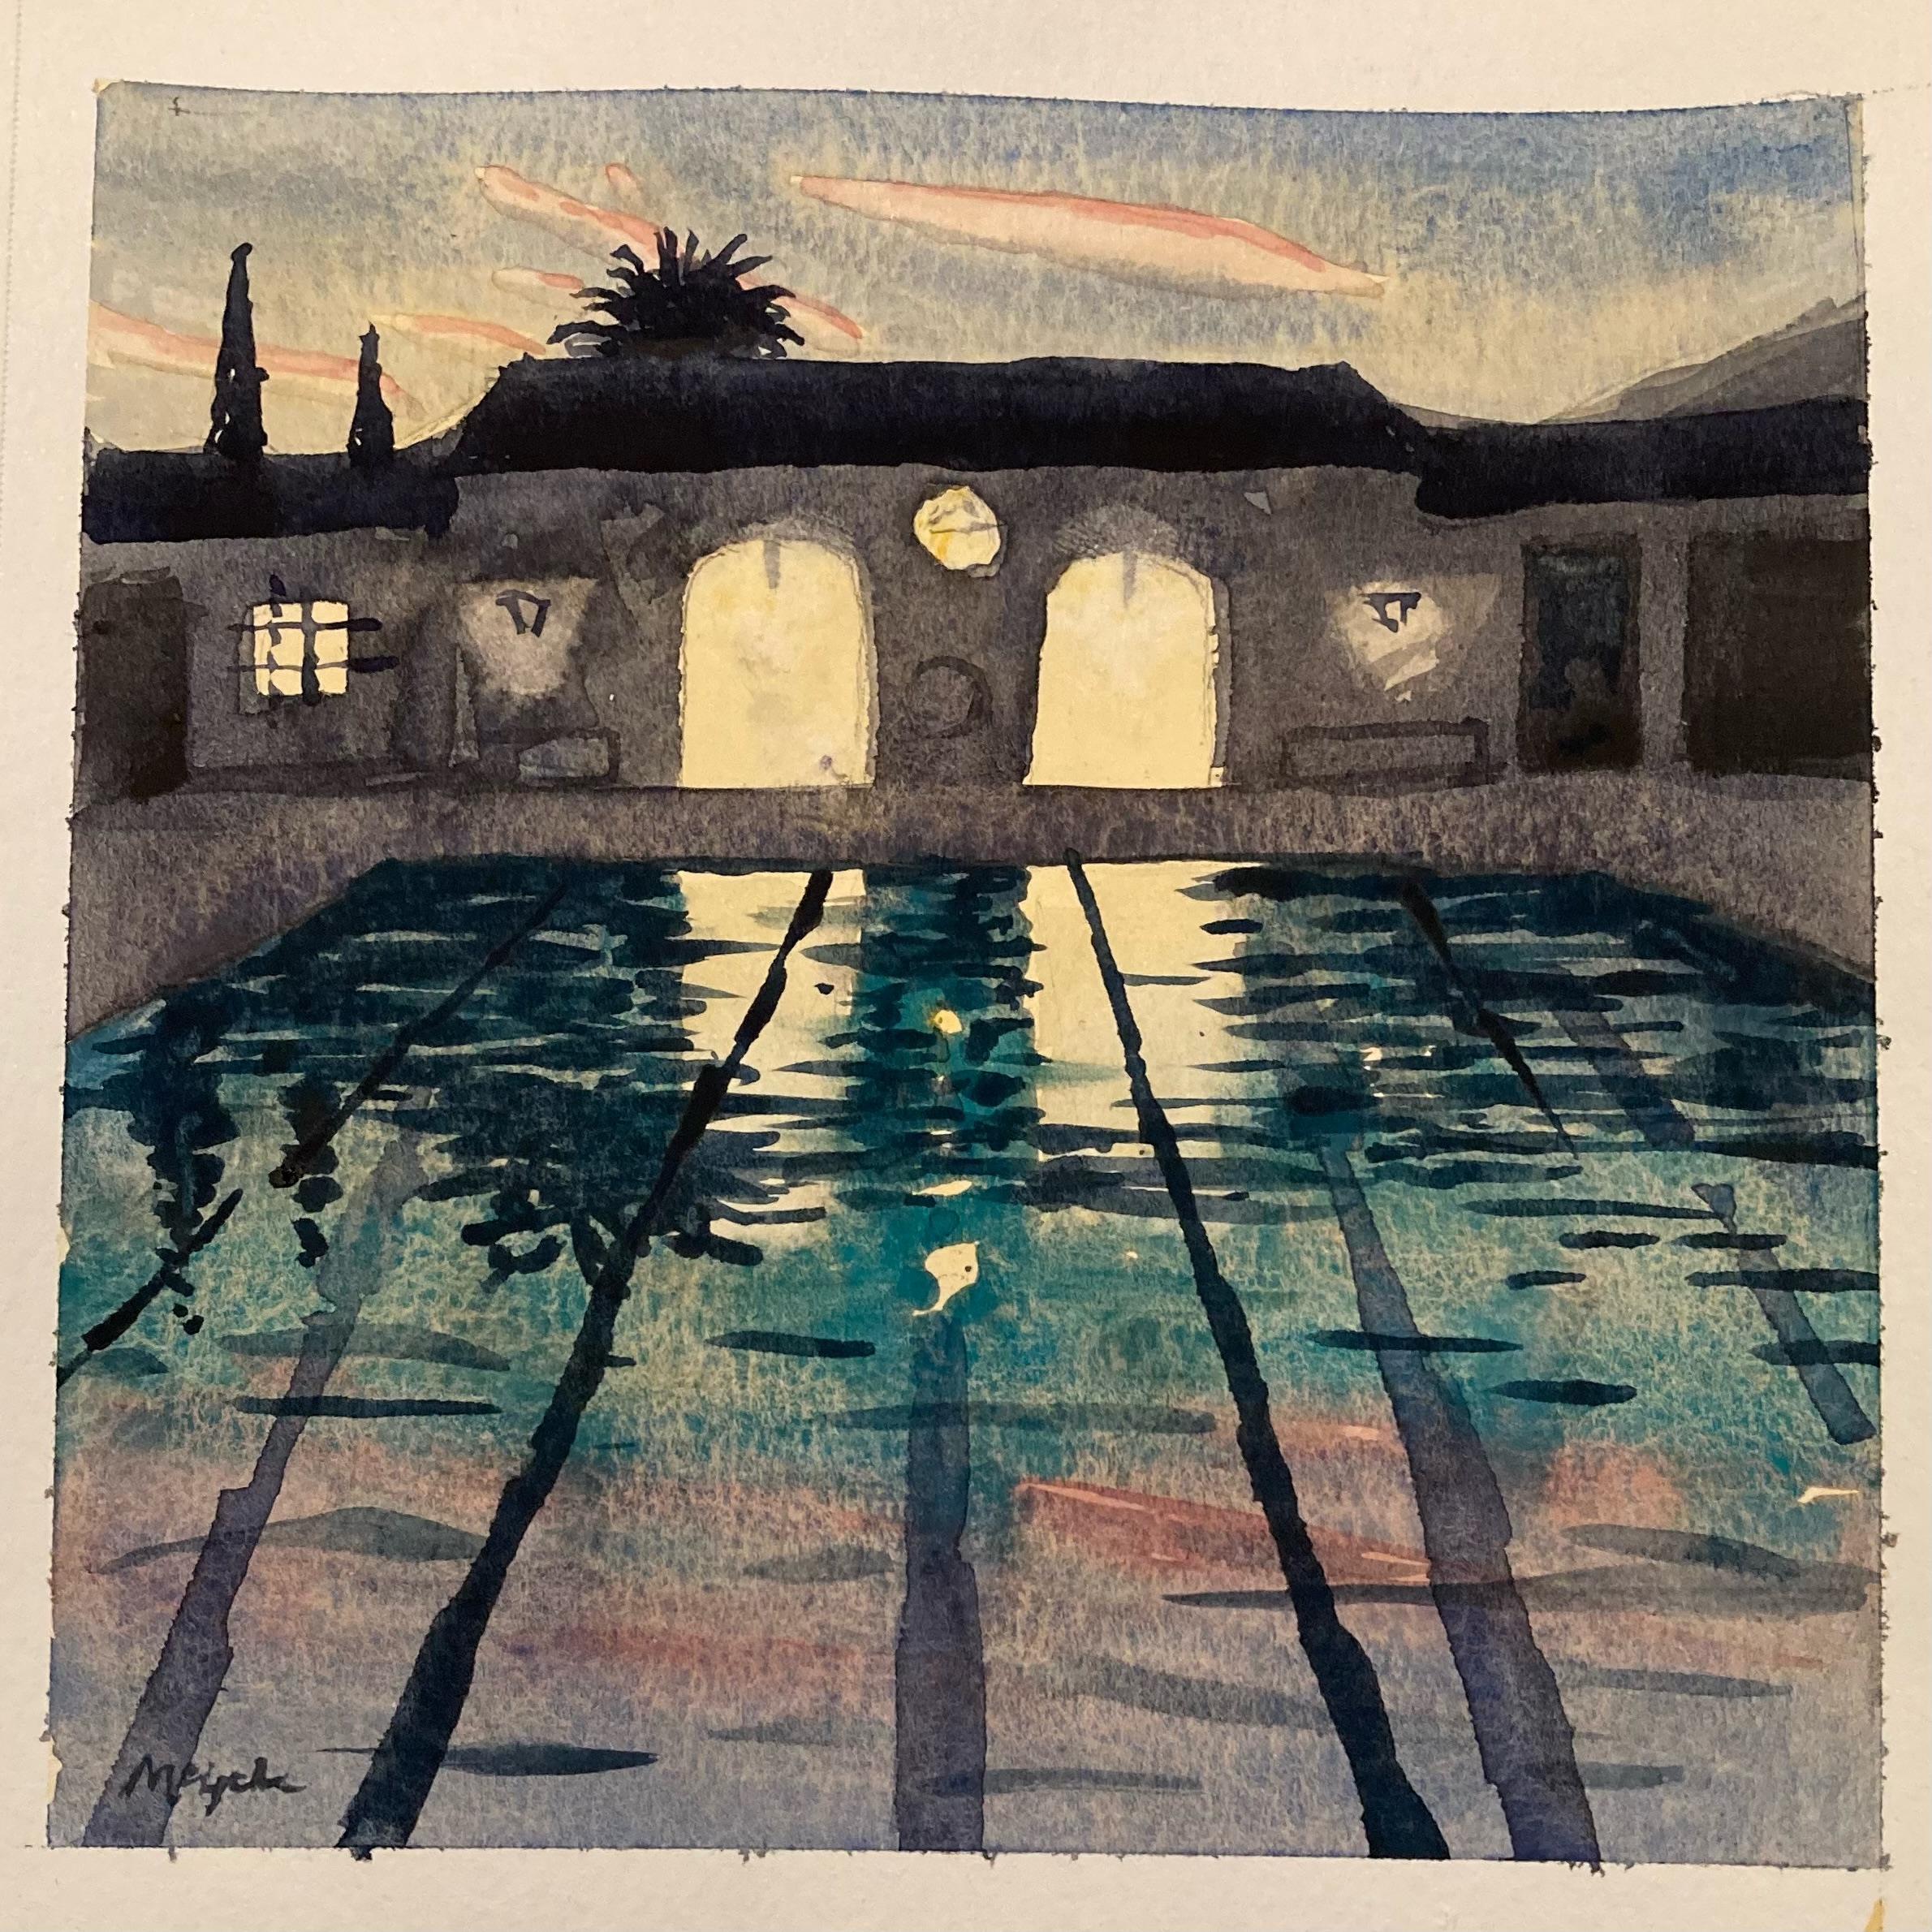
In the final step I add the darkest values which include the reflections and swimlanes on the pool's surface.
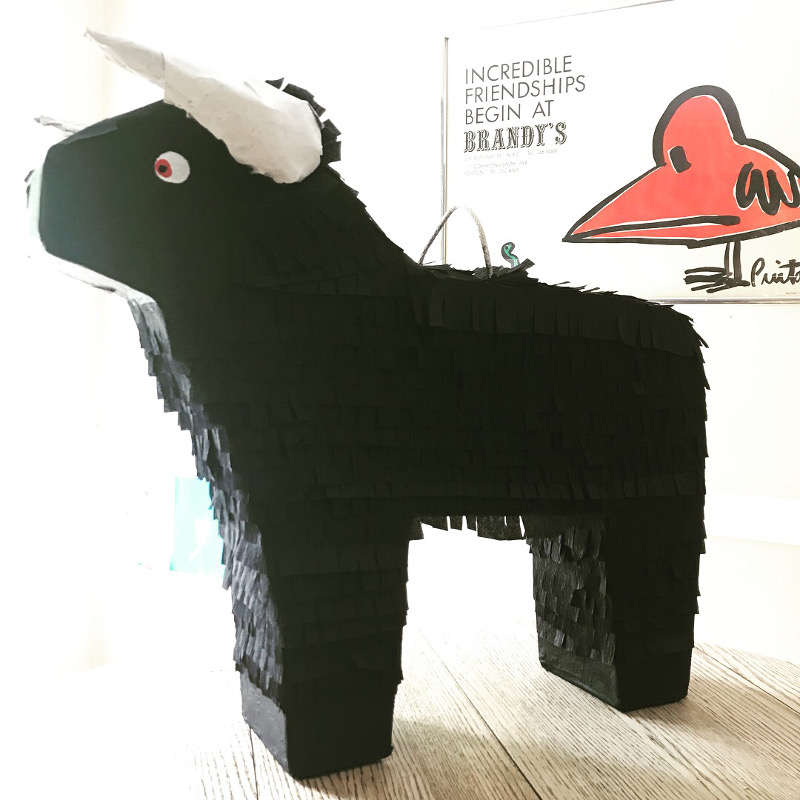
How to make a Piñata.
Here are the steps that I took to create the piñata you see here. I made it for my daughter's 10th birthday and she's a Taurus and will absolutely love destroying this to get at the candy and toys it will be stuffed with.
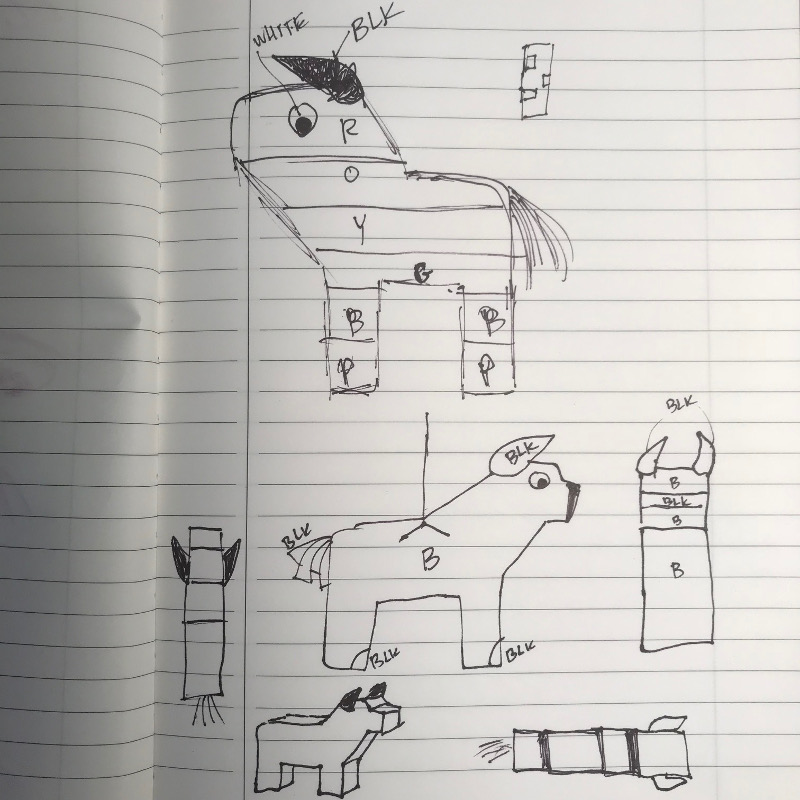
Start with a plan.
Get an idea of the scale, proportions, and any structural constraints.
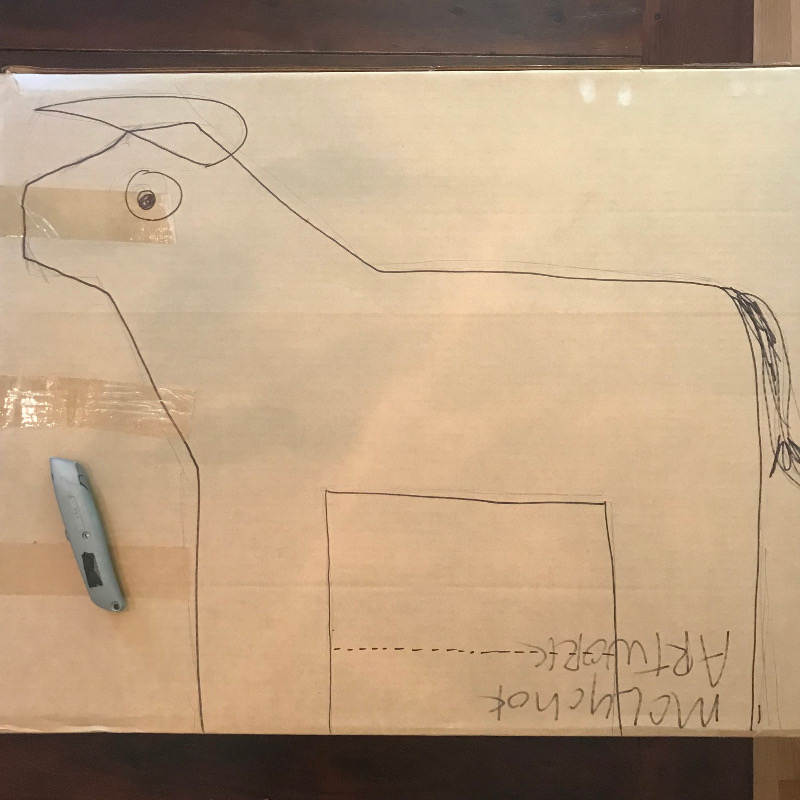
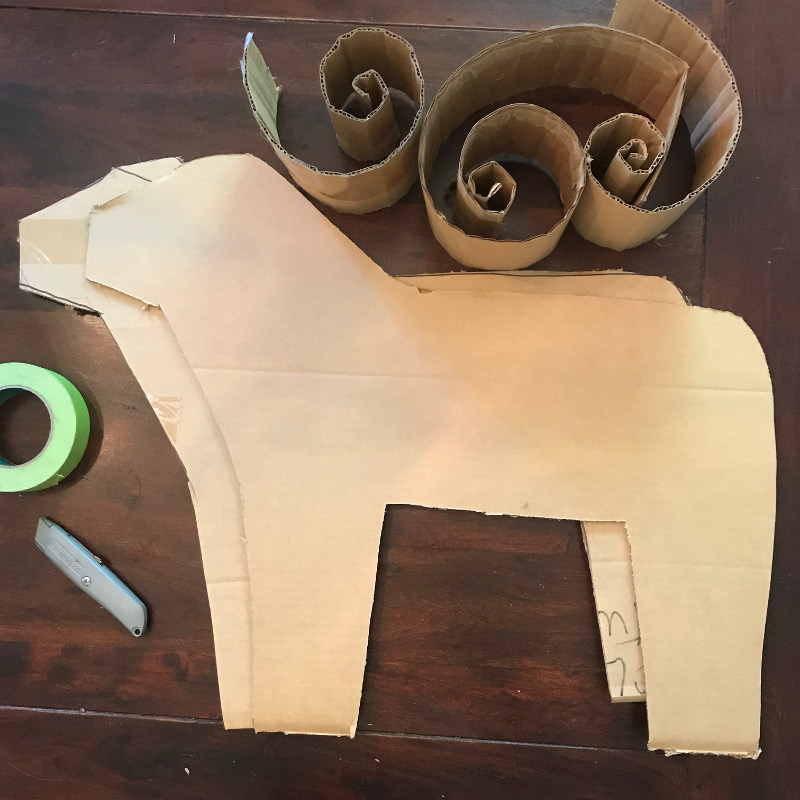
Cut it out.
Cut out the template for both sides, also cut a strip of cardboard the depth of your body and roll the it up so it's easier to follow the contour of the shape.
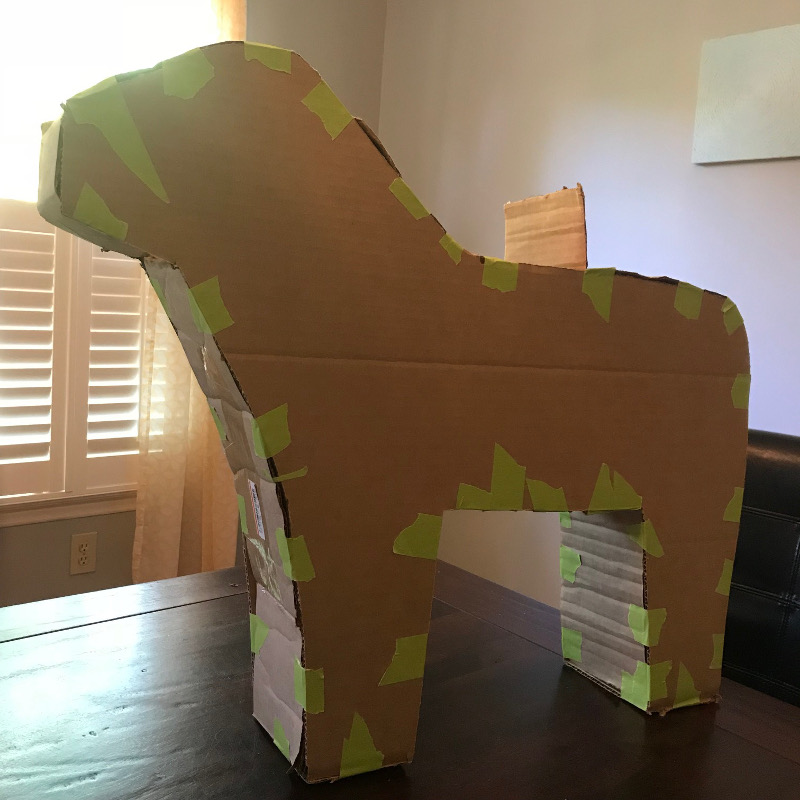
Tape it up and add handle.
Use masking tape and every 3-4 inches tape the sides and center together. Don't make it perfect as the piñata is supposed to break, eventually.
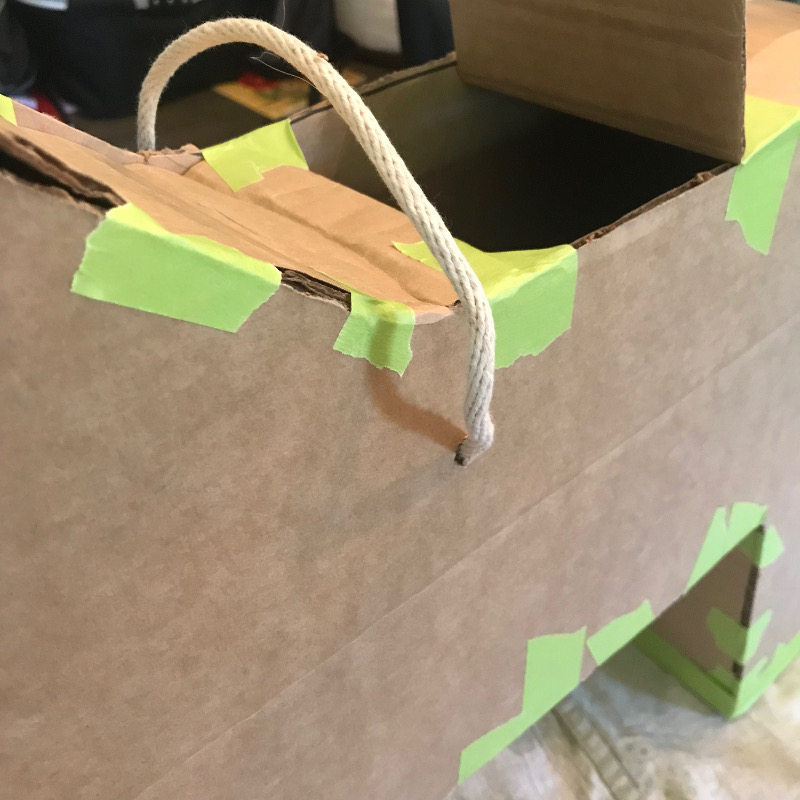
Take the opportunity to add a handle so that the paper mache will help make it stronger.
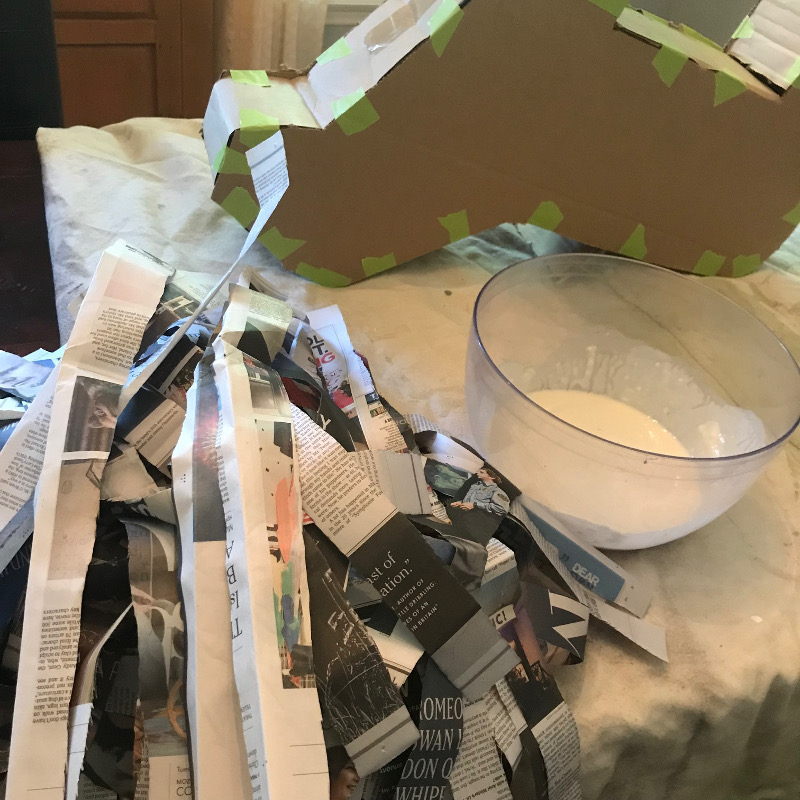
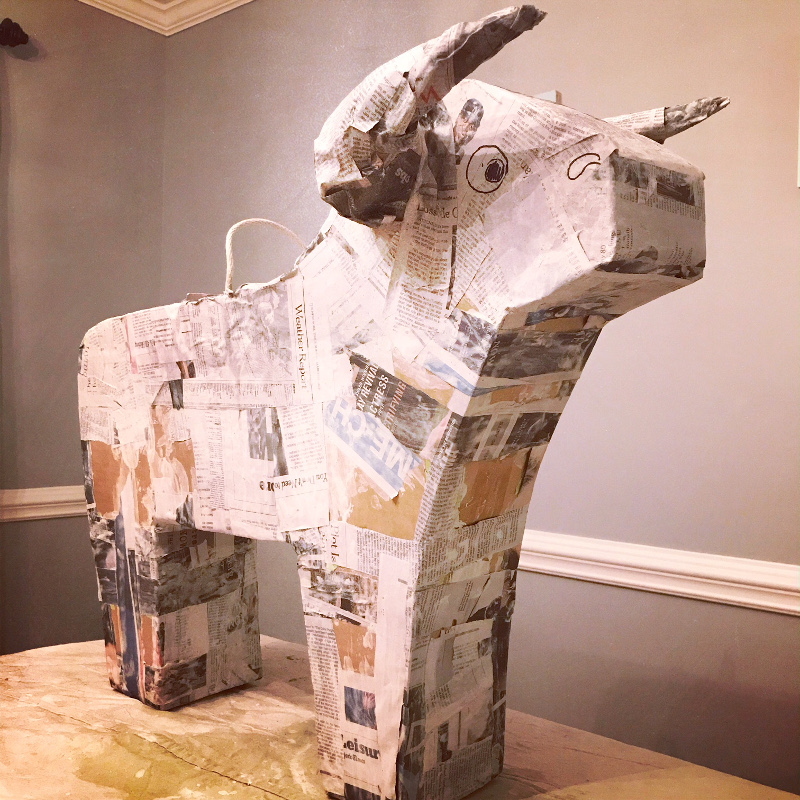
Paper mache the body.
Mix a cup of water with a cup of flour and using strips of paper cover the body of the piñata.
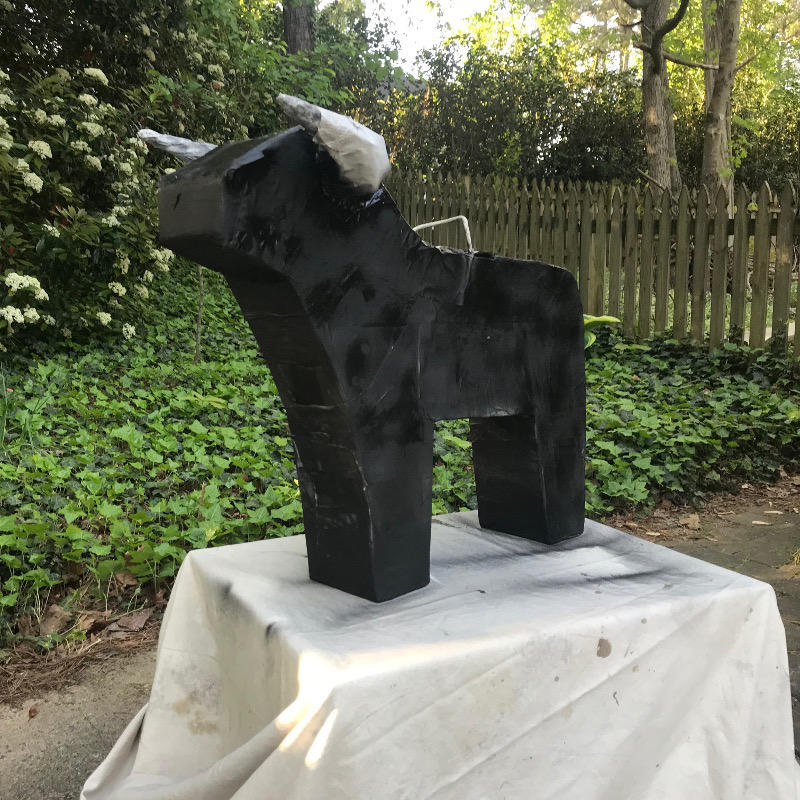
Paint the background.
This step was not necessary but for my design I was going to have the face and hooves of my bull exposed to create a different texture.
Glue crepe paper and decorate.
I used a roll of black crepe paper and cut the fringe by making cuts in the roll. Then I glued the paper on and painted the parts that needed it.
How to Make Sourdough Bread
"A gourmet who thinks of calories is like a tart who looks at her watch."James Beard
- Ingredients
- Levain:
- Rounded 1/2 cup of whole wheat flour
- Starter culture
- 1/2 cup lukewarm water
- Bread:
- 2 cups of wheat flour
- 2 cups of all purpose flour
- 1 teaspoon of salt
- 1 1/2 cup of lukewarm water
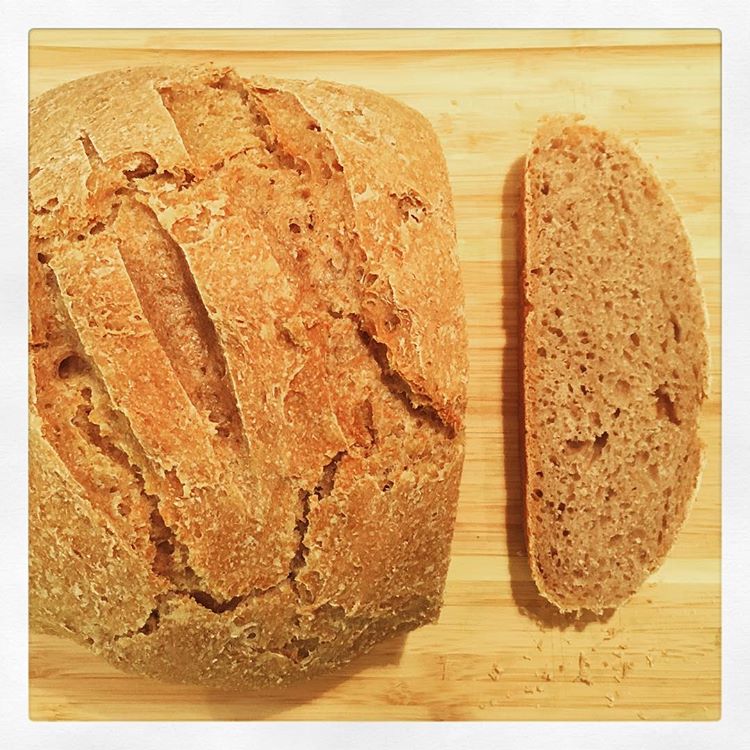
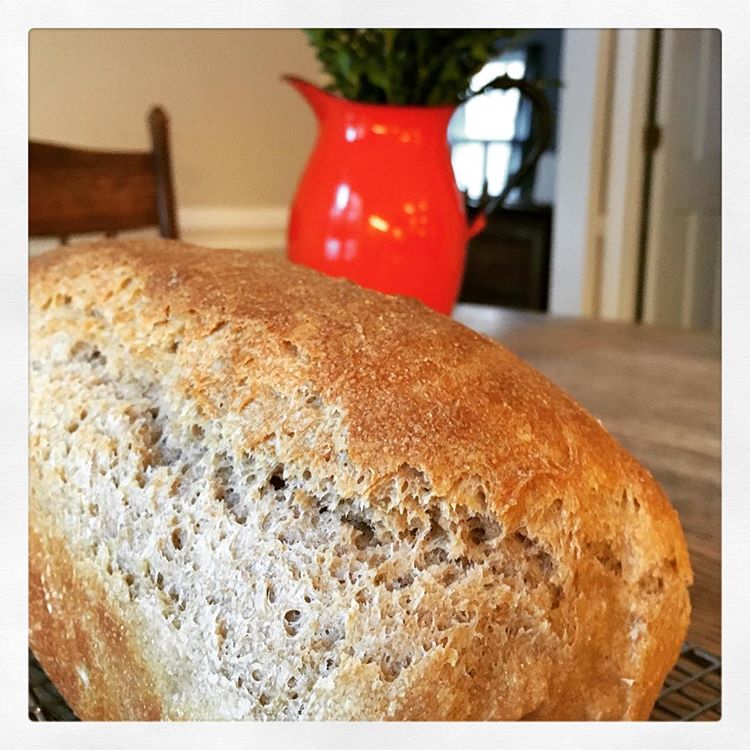
My desert island food would be bread, specifically sourdough. I would find some way to grind coconuts down into flour and cultivate a wild yeast by letting the wet dough sit exposed under a palm tree until it started to bubble. The rest is easy, well kind of.
I have been baking bread since an early age. The smell of fresh bread is intoxicating and makes you want to have it everyday. Over the years I have learned different methods from my mother/grandma/aunts/teachers. I once even worked in a bakery in Tahoe California and learned from a master baker how to bake everything from croissants to bagettes but it's hard to recreate those techniques as we cooked large recipes measuring by weight and mixing in a gigantic mixer. Thanks to all of these people in my life, including my wife and children, I feel more connected with bread and savour every bite of a handmade loaf.
For the last couple years my wife and I have been baking a loaf of sourdough every week. We send our daughter to school with a sandwich made from it and savour it with soups or as toast. Even the ends, or heals, are turned into croutons for salads, very rarely does it get a chance to grow mold. We were given a 'starter' from a Waldorf teacher in Santa Barbara who received it from someone in San Francisco more that 10 years ago. When we moved to North Carolina, Jeanine froze the starter and brought it on the plane with her across the country. Besides the weird looks from TSA agents, it arrived as perky as ever. The process we use, adapted from Taproot Magazine issue 12, takes about a day to make a loaf, which sounds long, but as you'll come to find out it's worth the effort and patience. We used to make round loaves but now use a rectangular loaf pan that makes for better sandwich shapes. Listed below are the stepps involved and the timeline from levain to loaf.
To start your own sourdough you'll need to get a starter from someone or buy a 'make your own starter' using dry ingredients. Check with bakers at your local farmers market if they sell starter.
From there we suggest the 'no knead' method or proofing the dough.
Steps for No-Knead Sourdough
Step 1 - Remove starter from refrigerator, we keep ours in a small glass jar.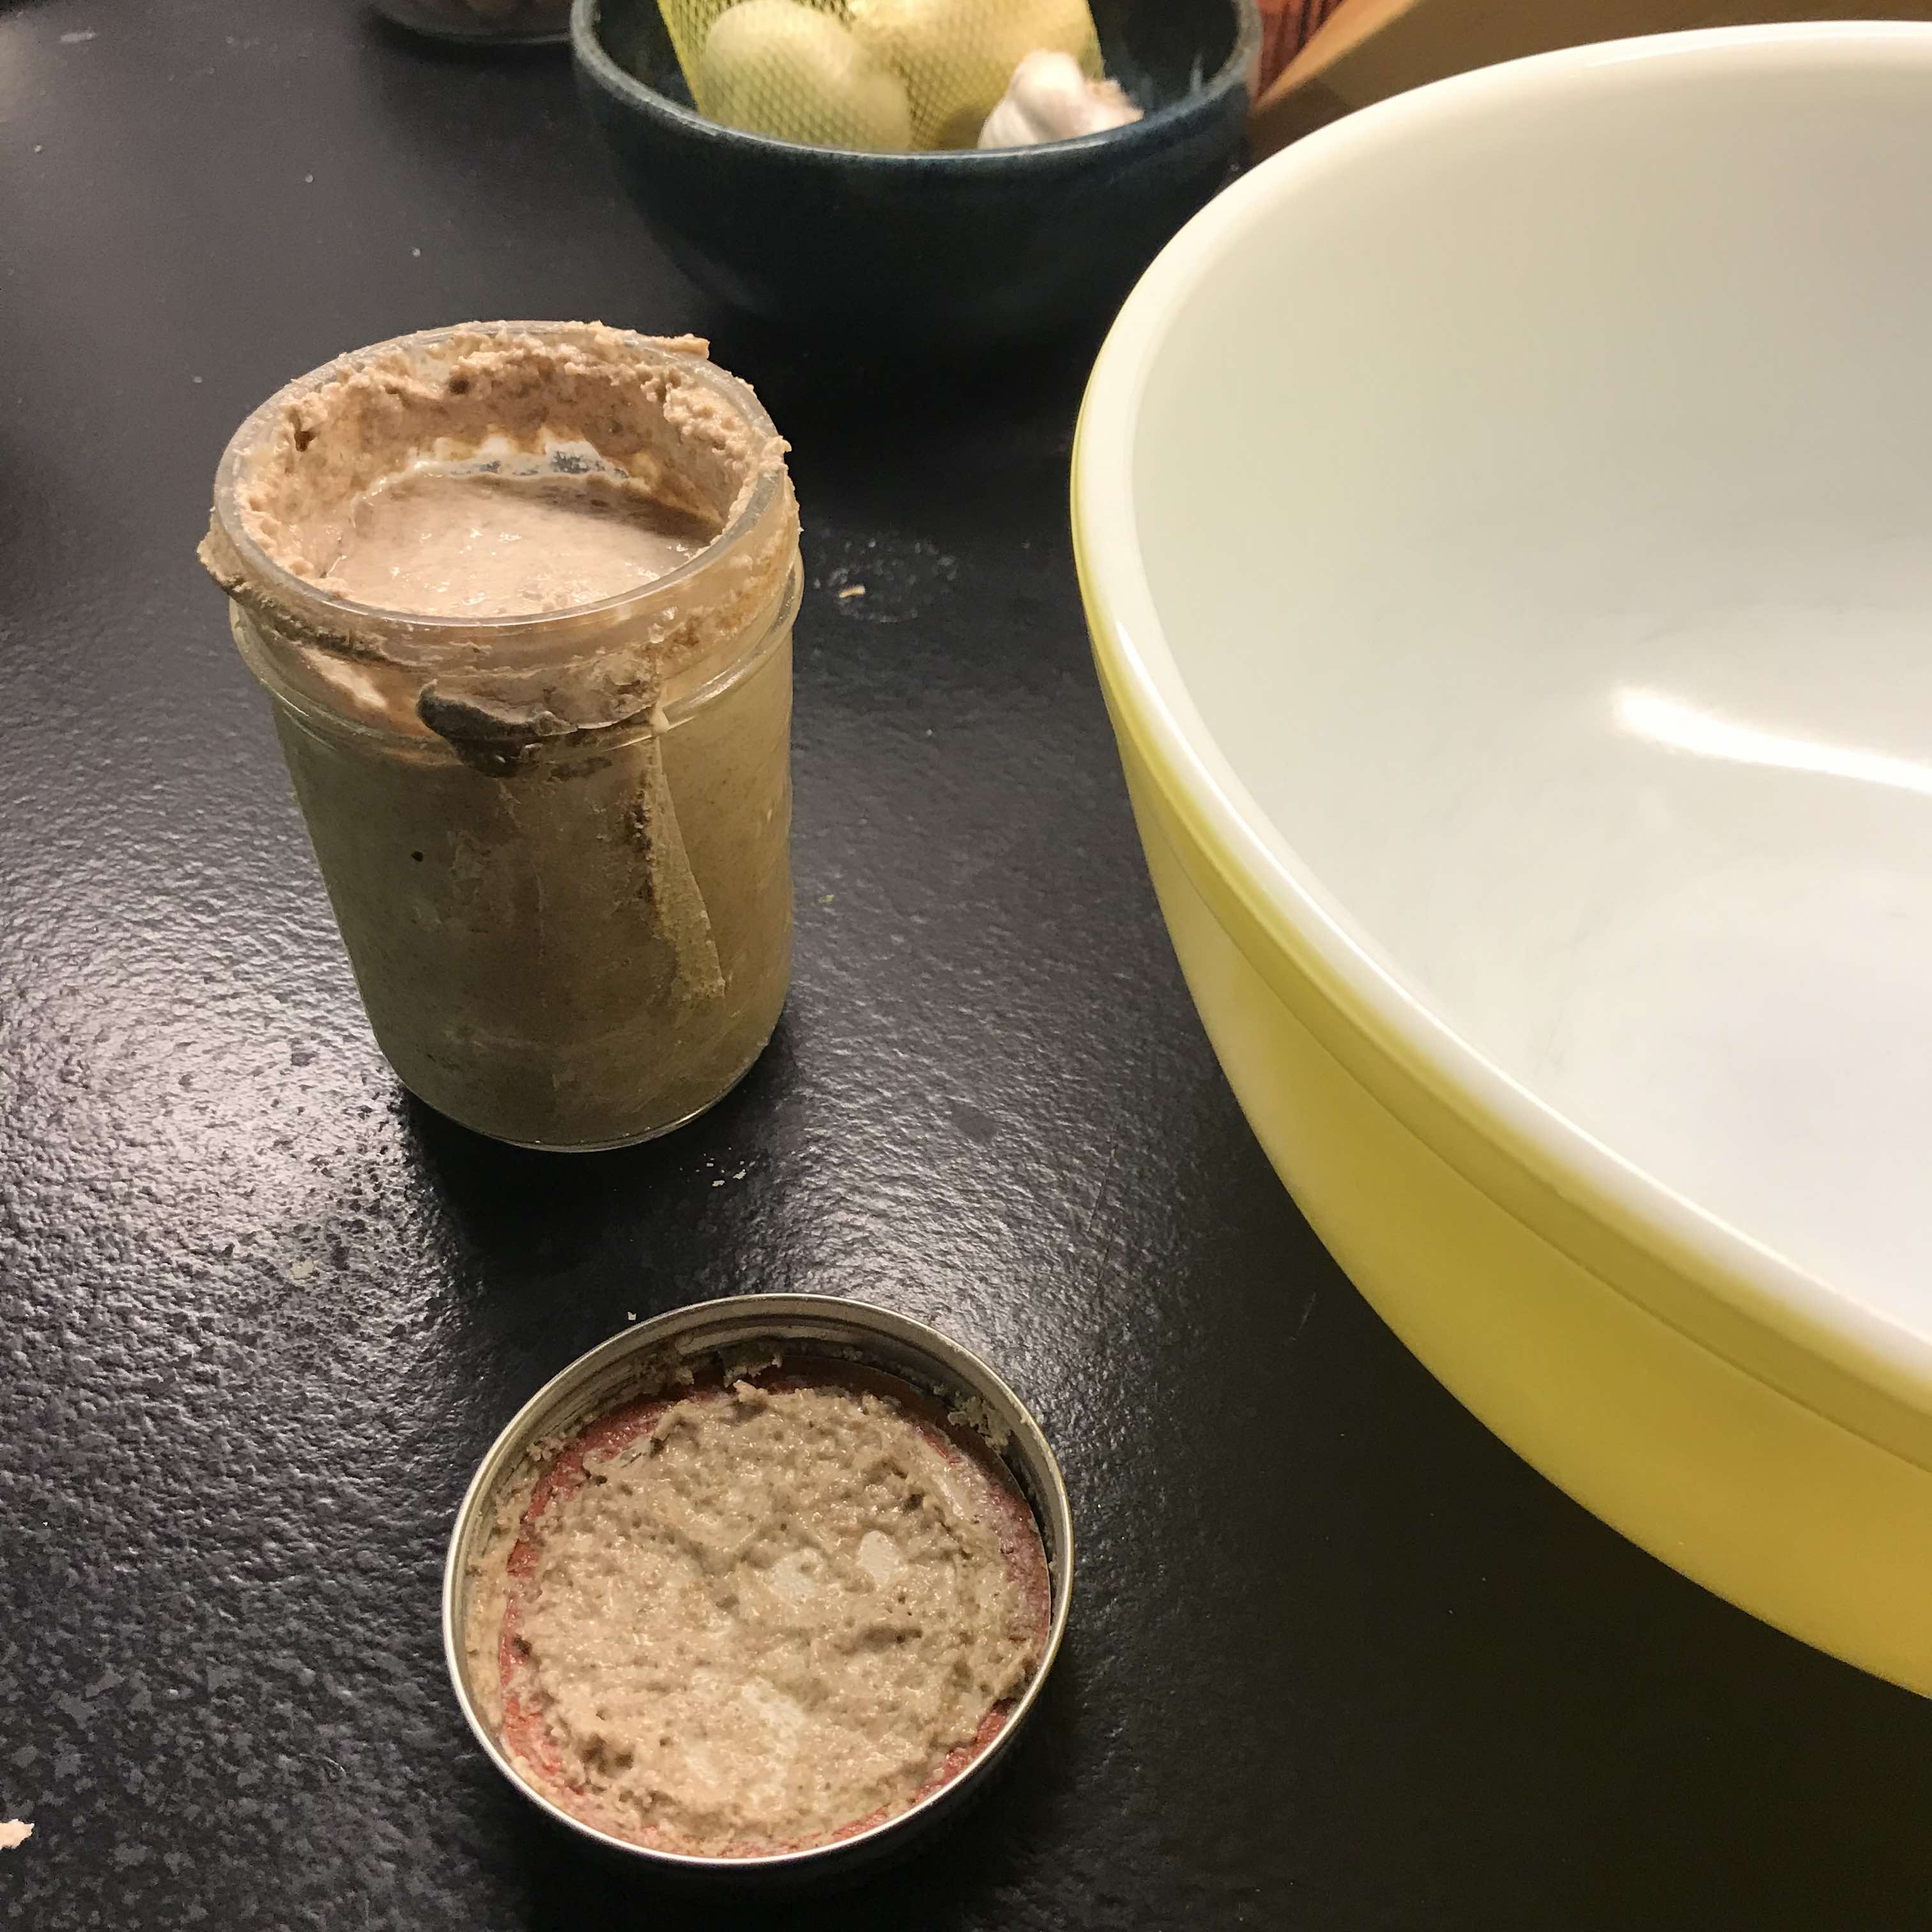
Step 2 - Spoon out starter into large mixing bowl.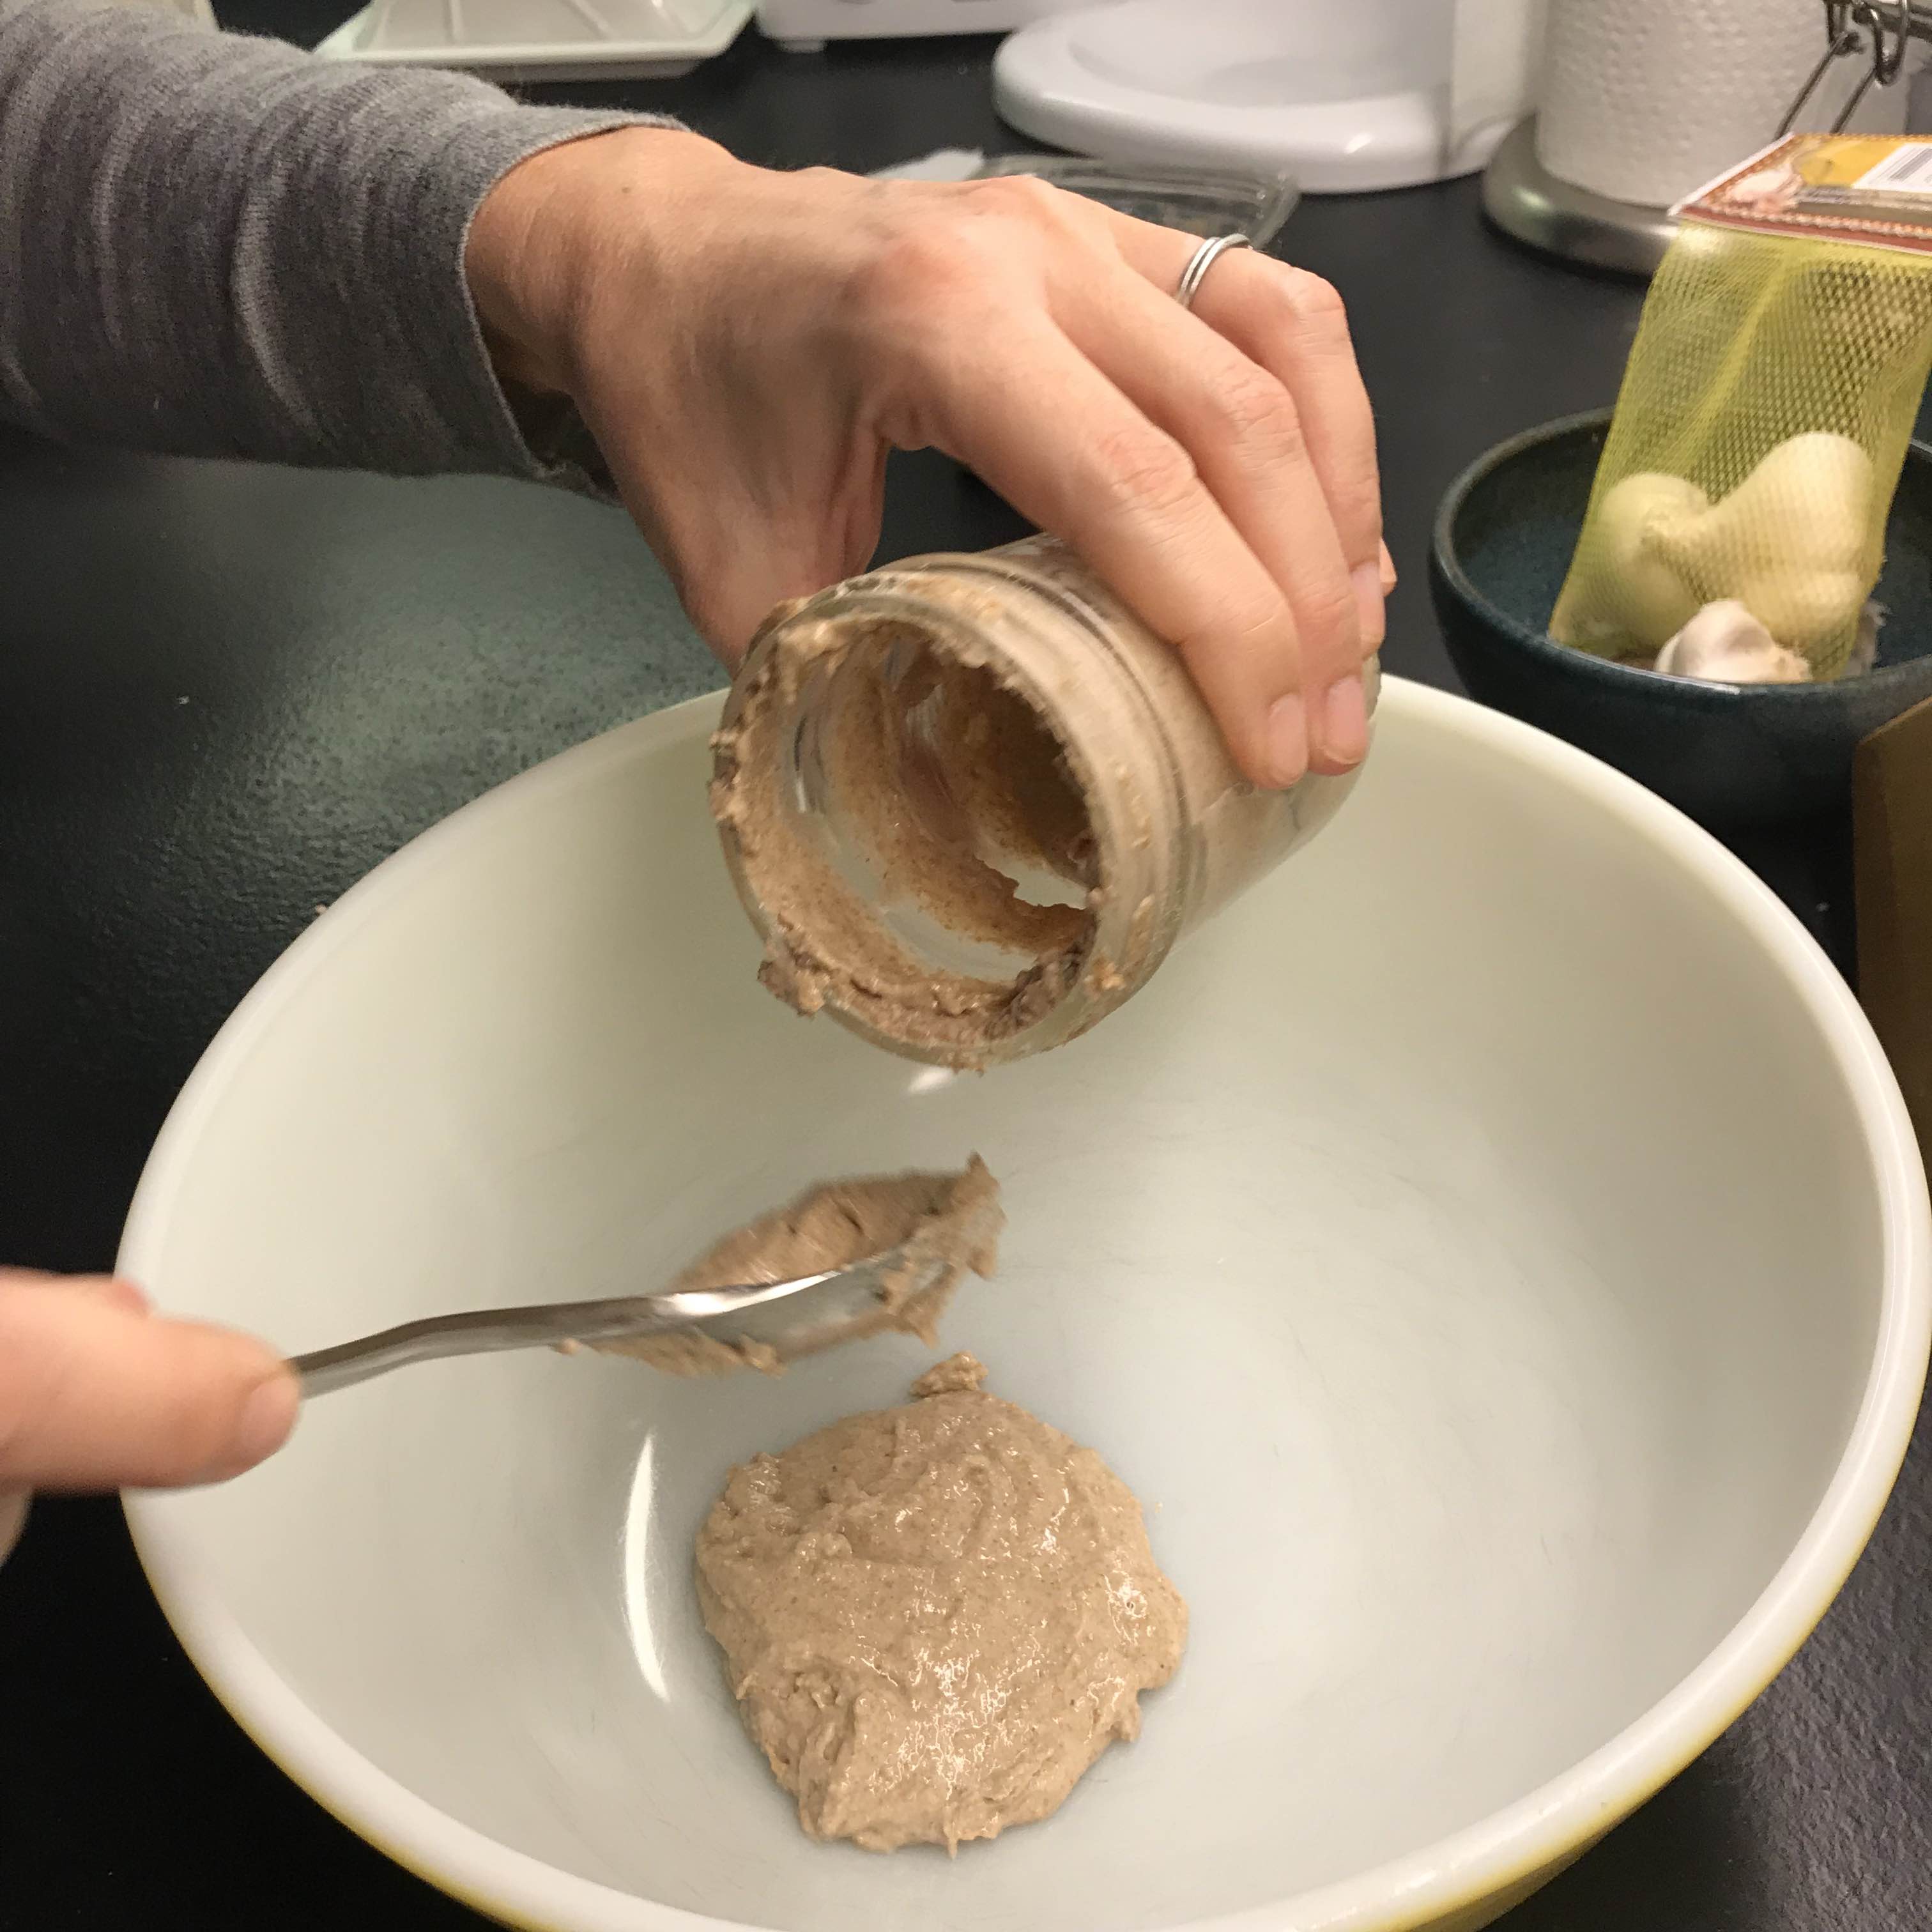
Step 3 - Add rounded 1/2 cup of wheat flour.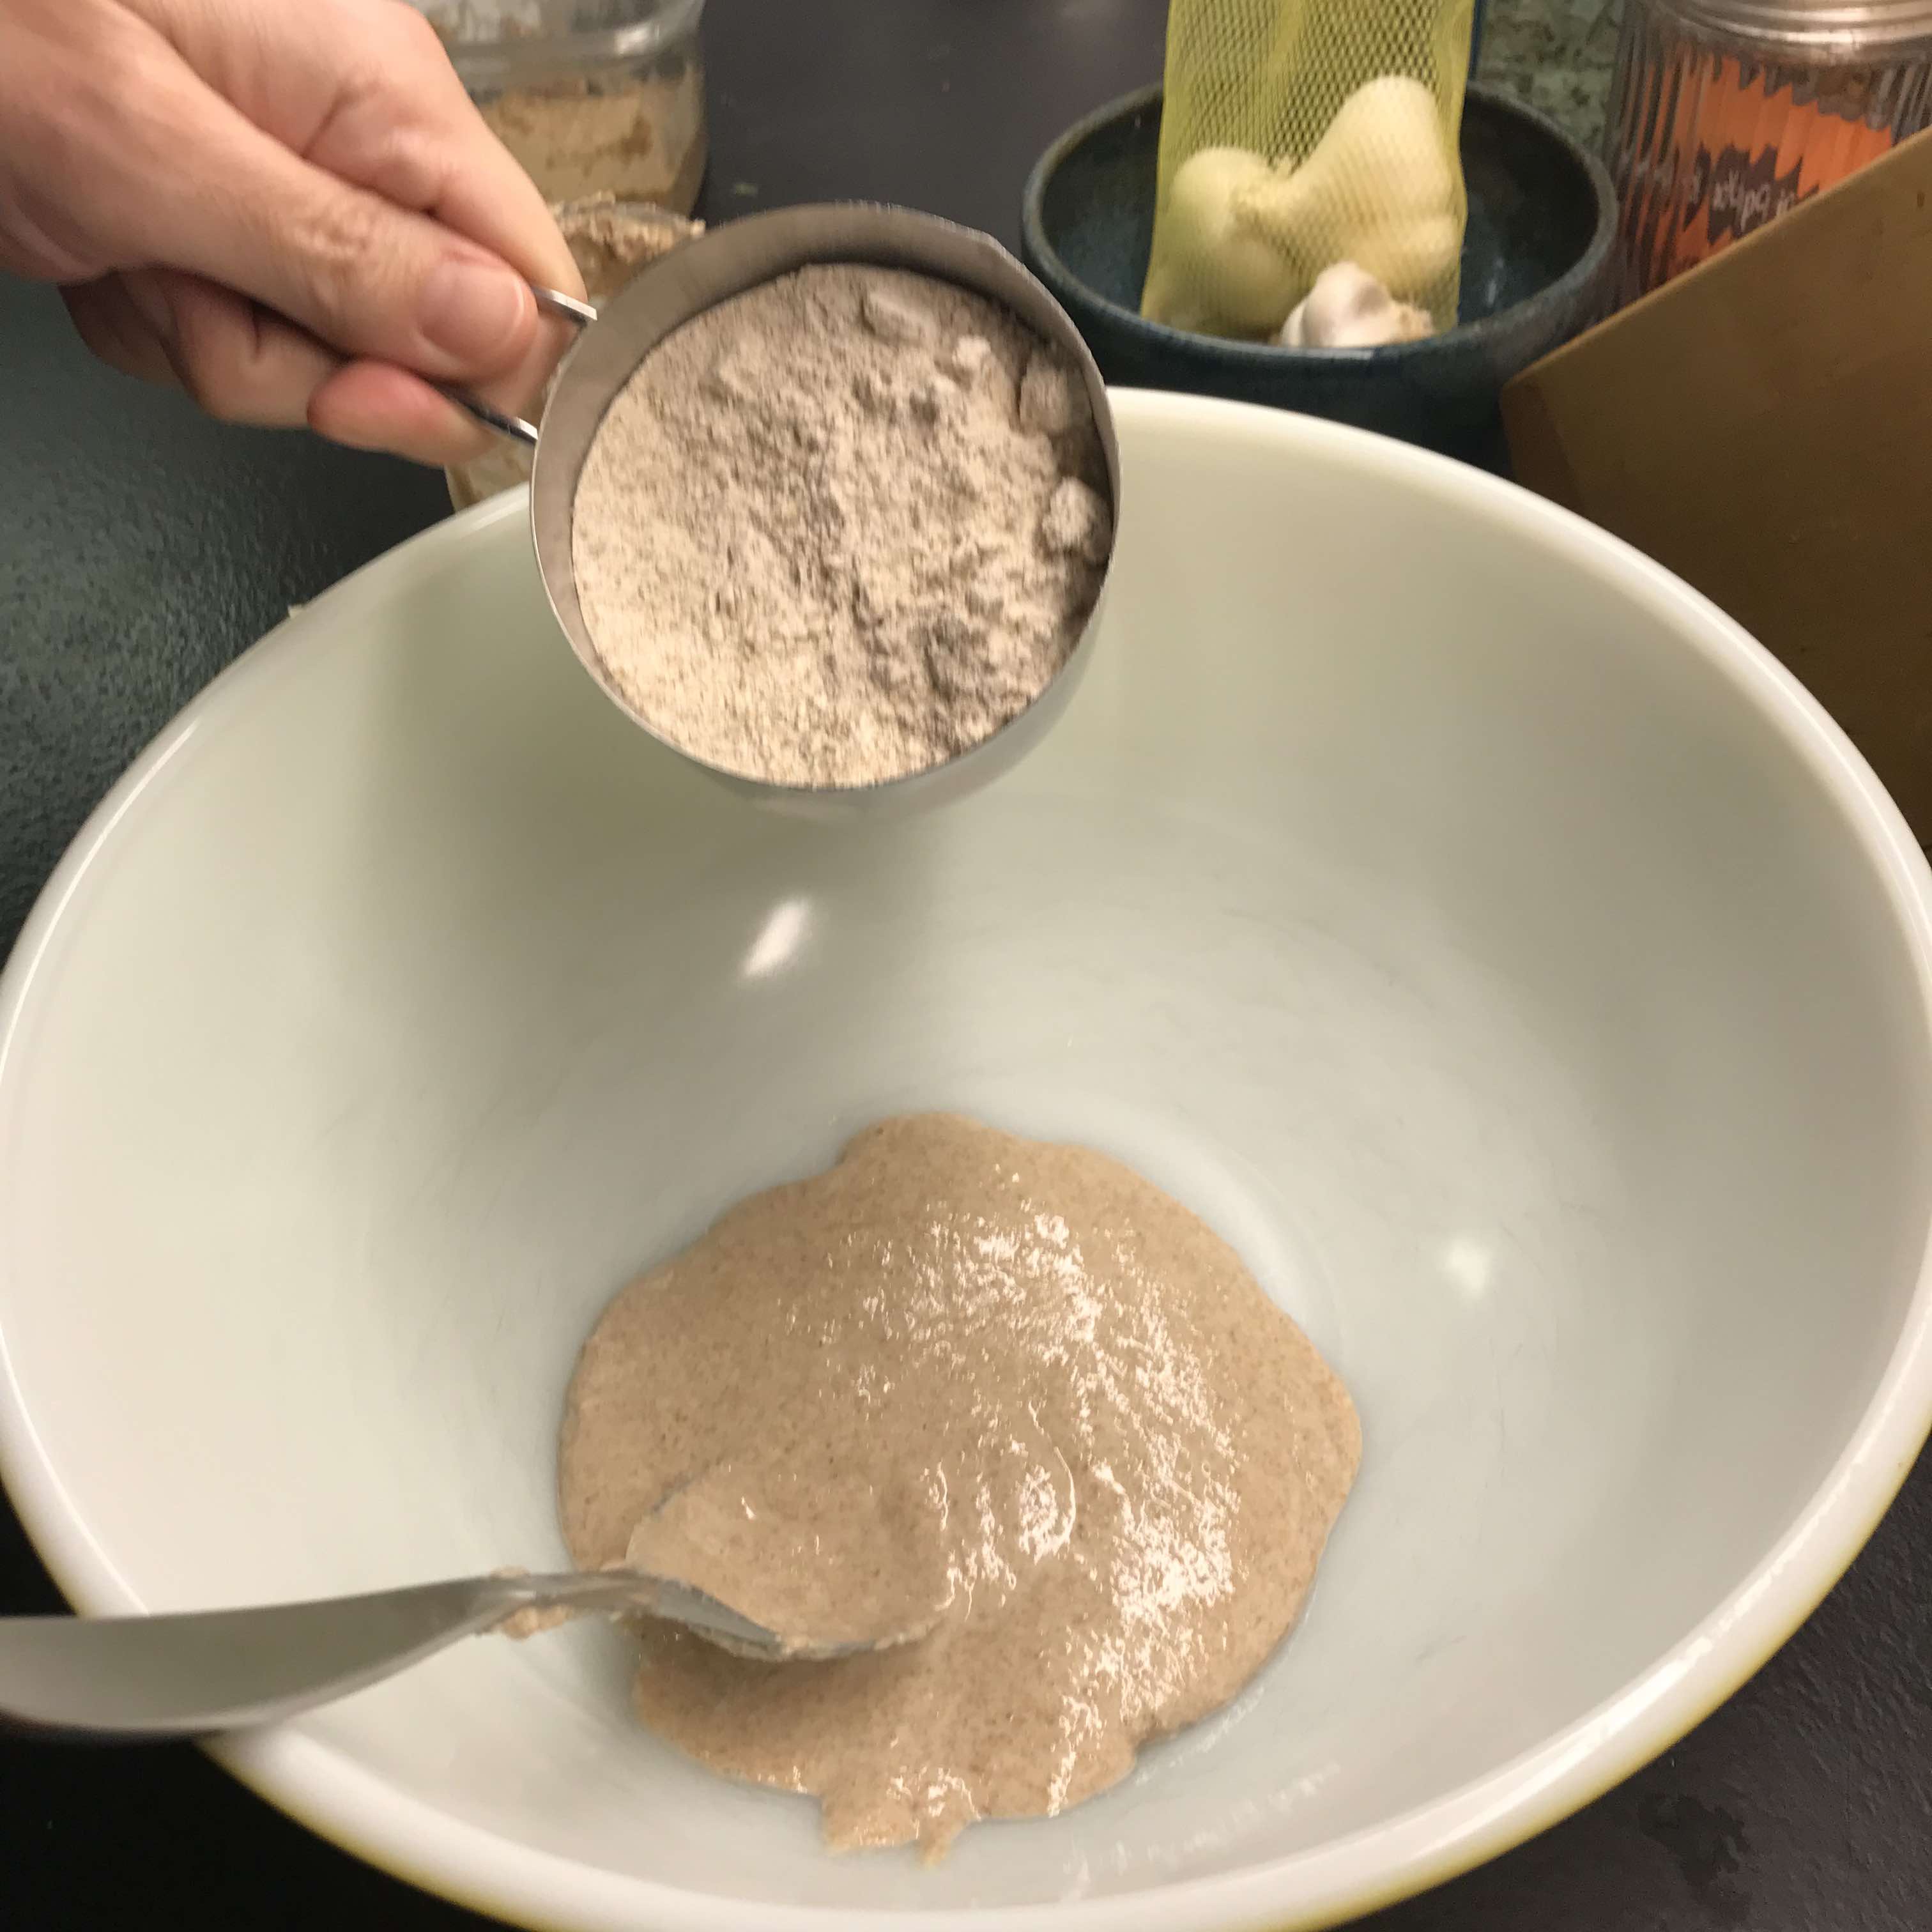
Step 4 - Add 1/2 cup of warm water.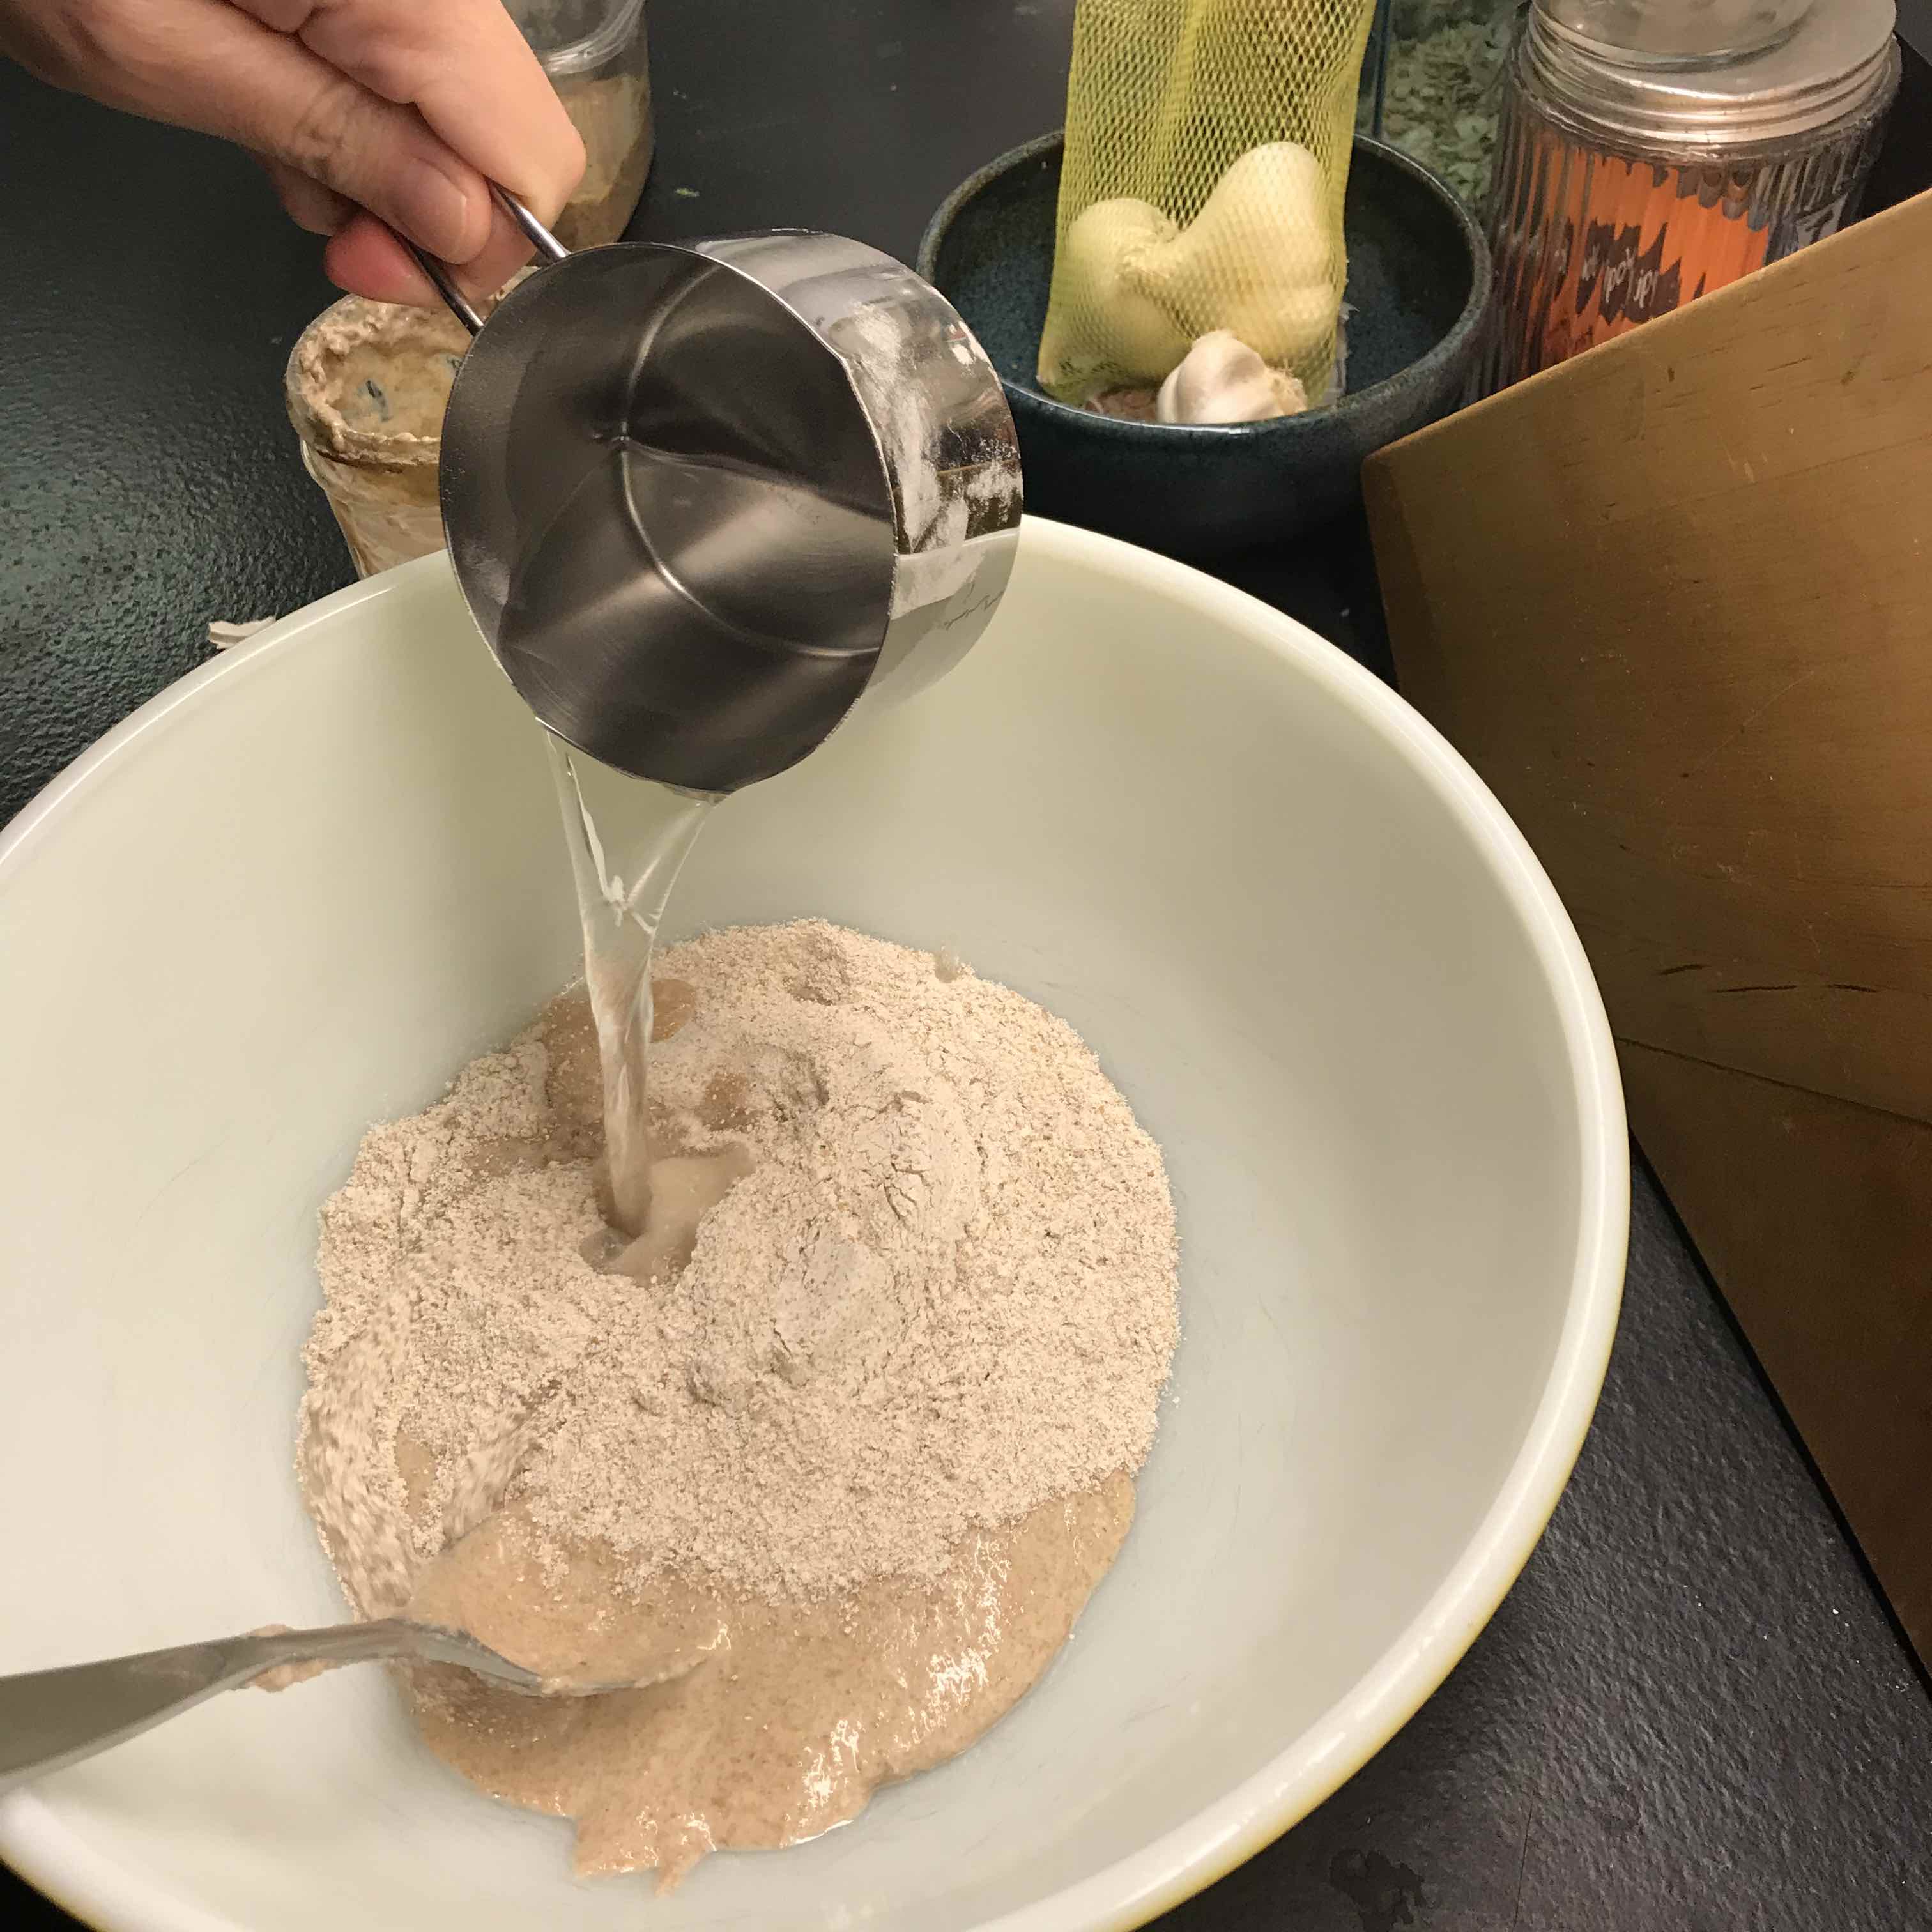
Step 5 - Mix starter, flour, and water together.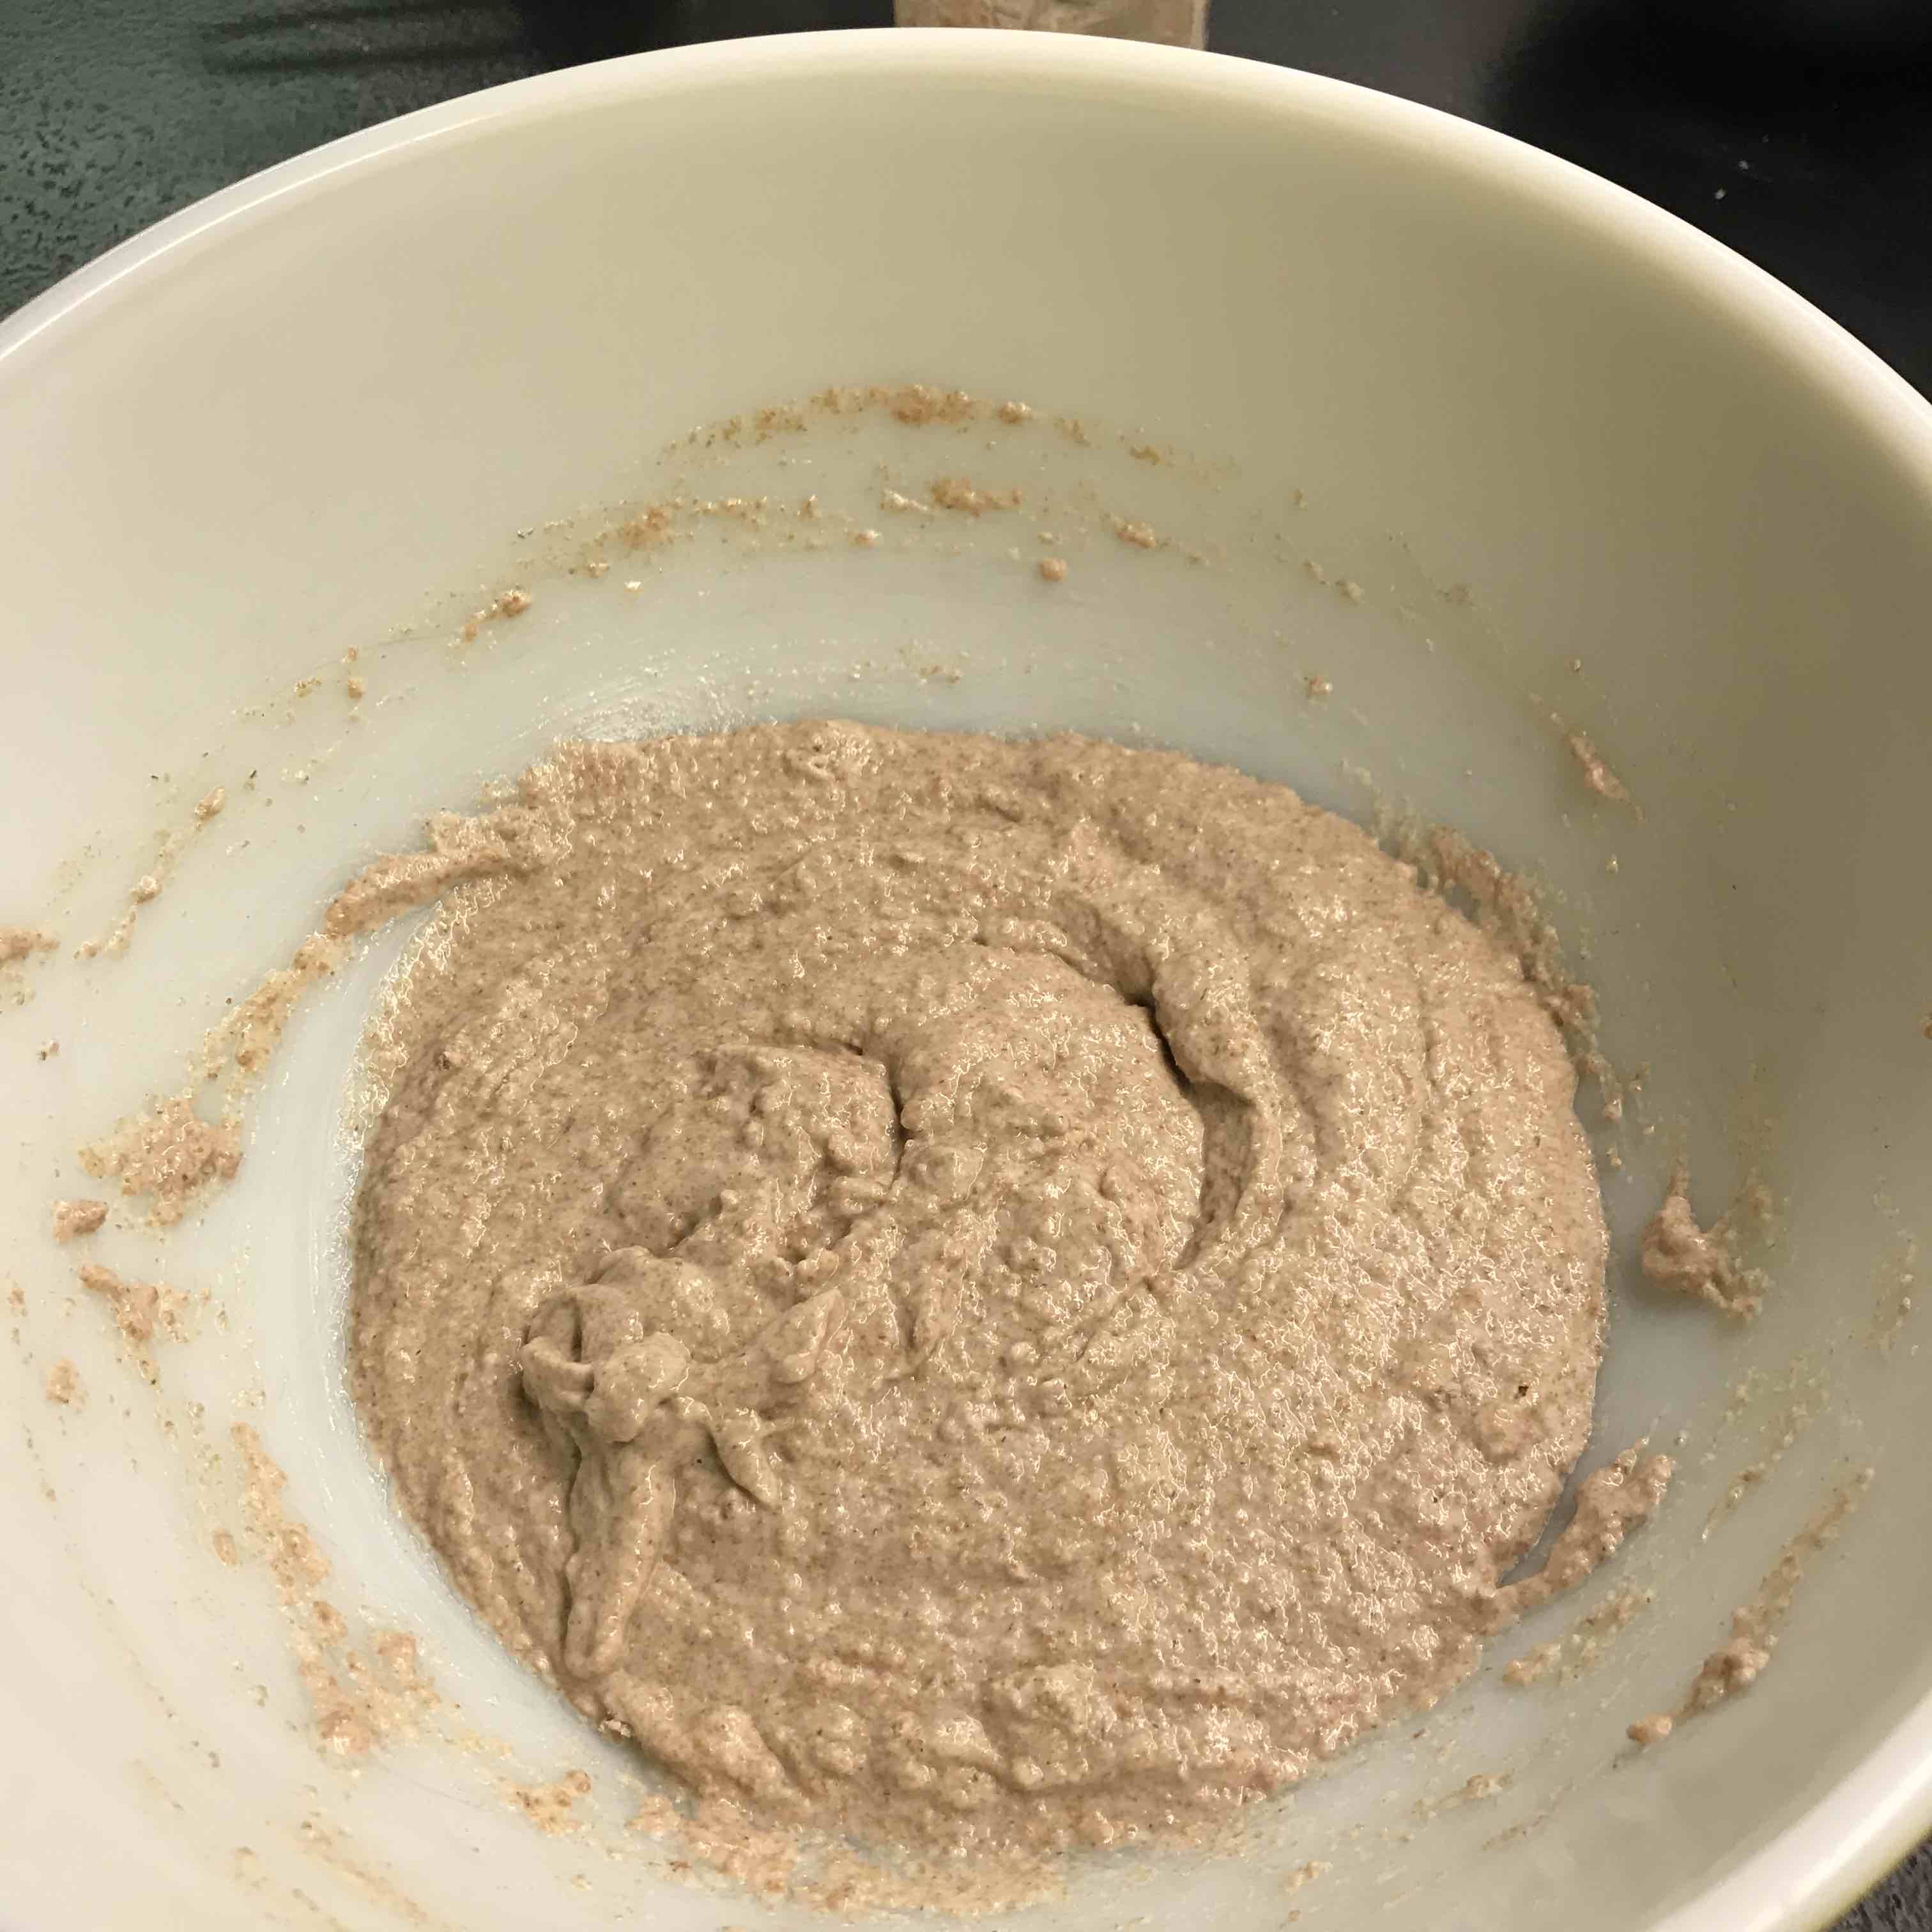
Step 6 - Cover and let rest overnight, or 6-12 hours, unrefrigerated. We like to do this step the night before.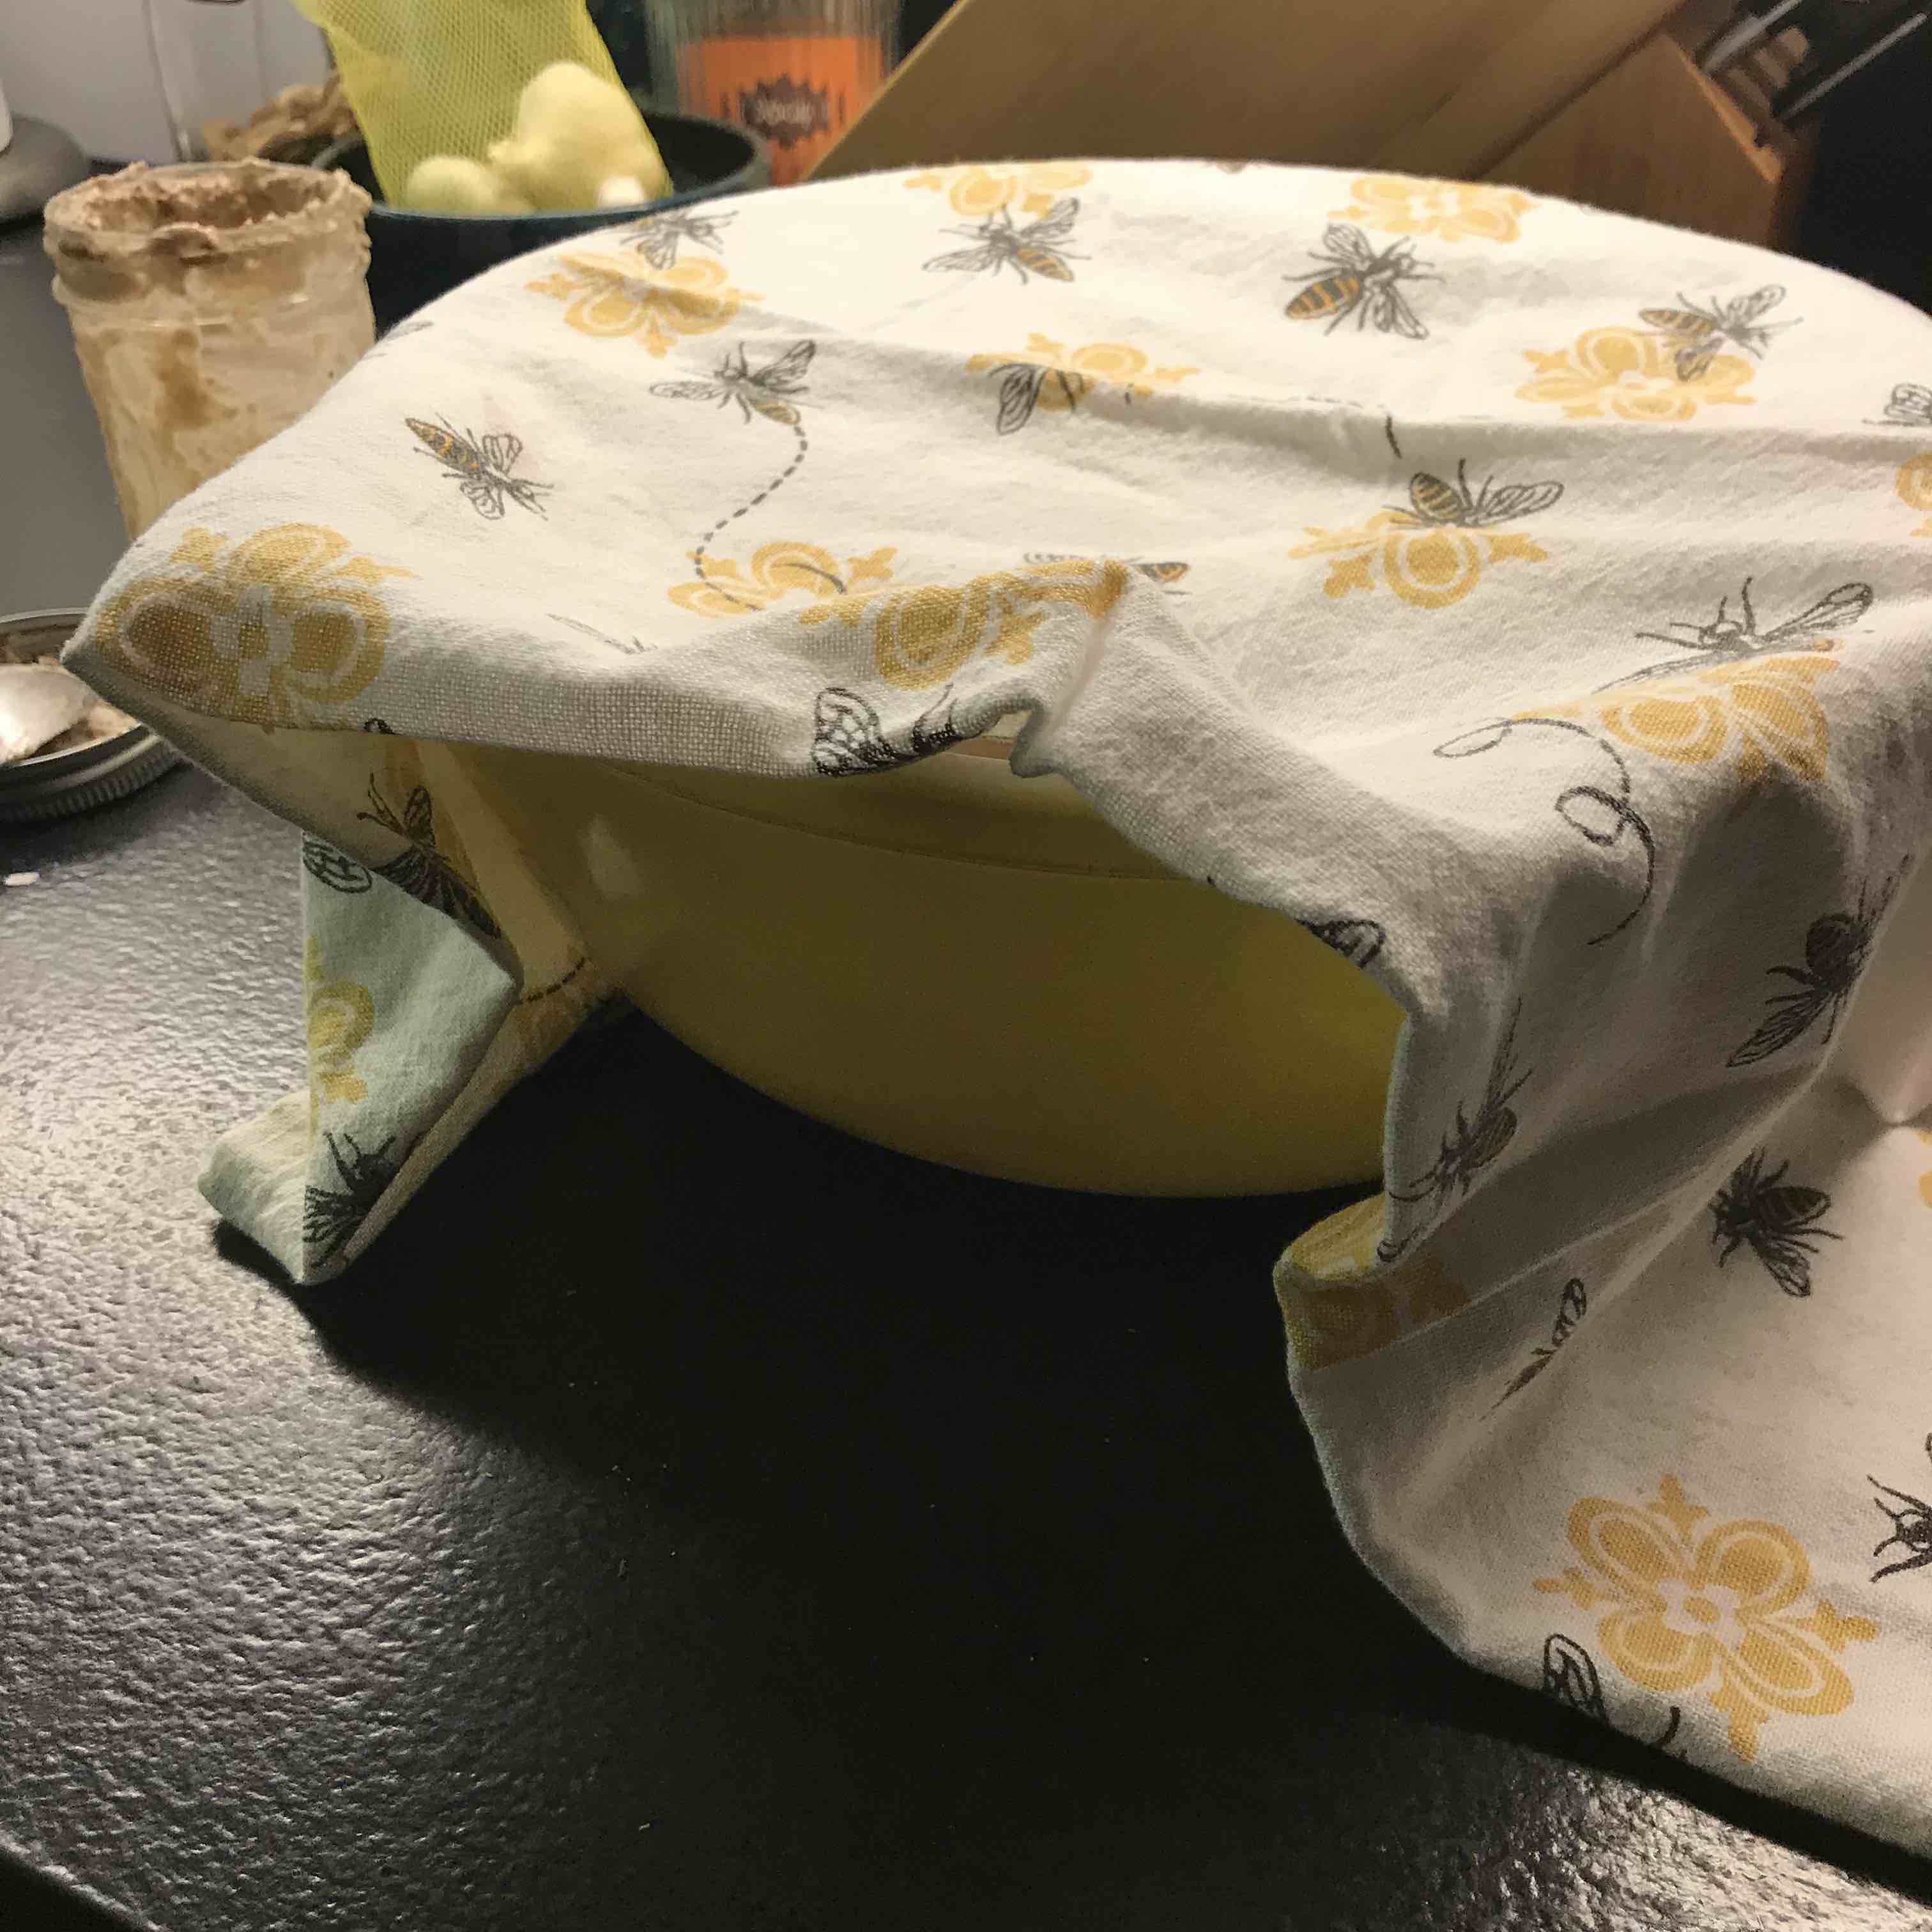
Step 7 - Remove some starter to a jar, seal and refrigerate, don't fill to the rim as it needs room to grow.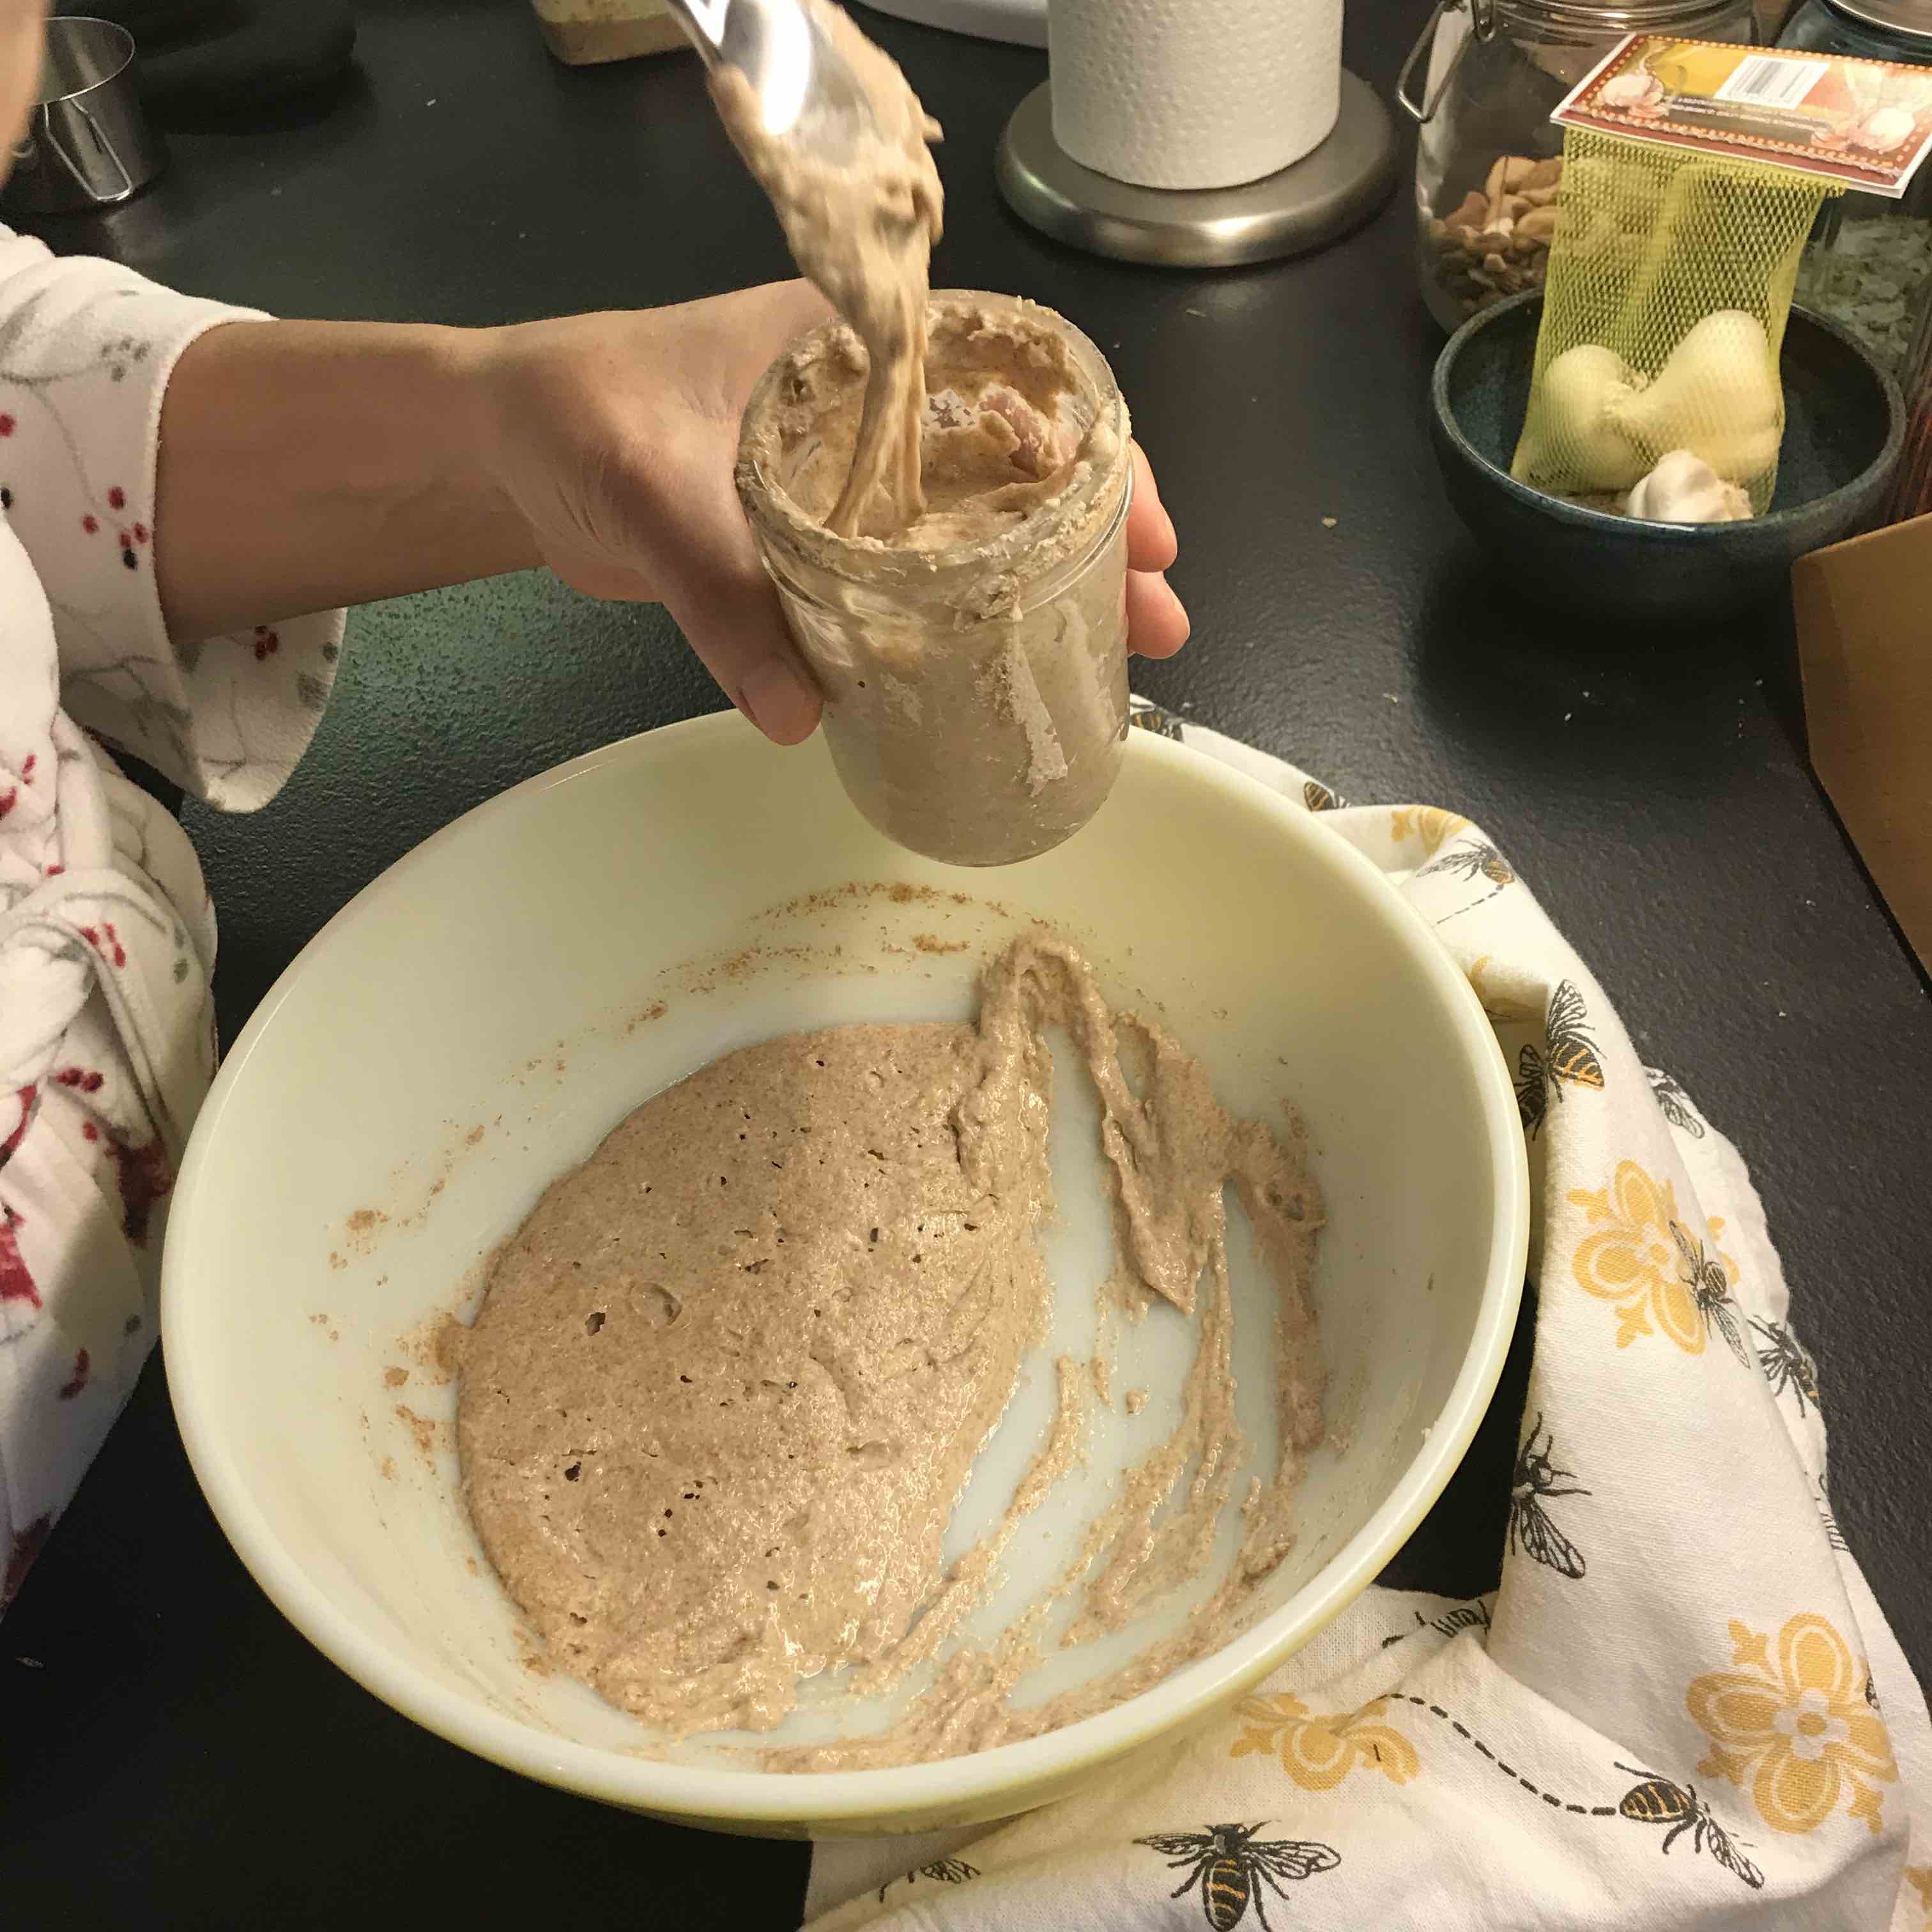
Step 8 - Add 2 cups all-purpose flour and 2 cups whole wheat flour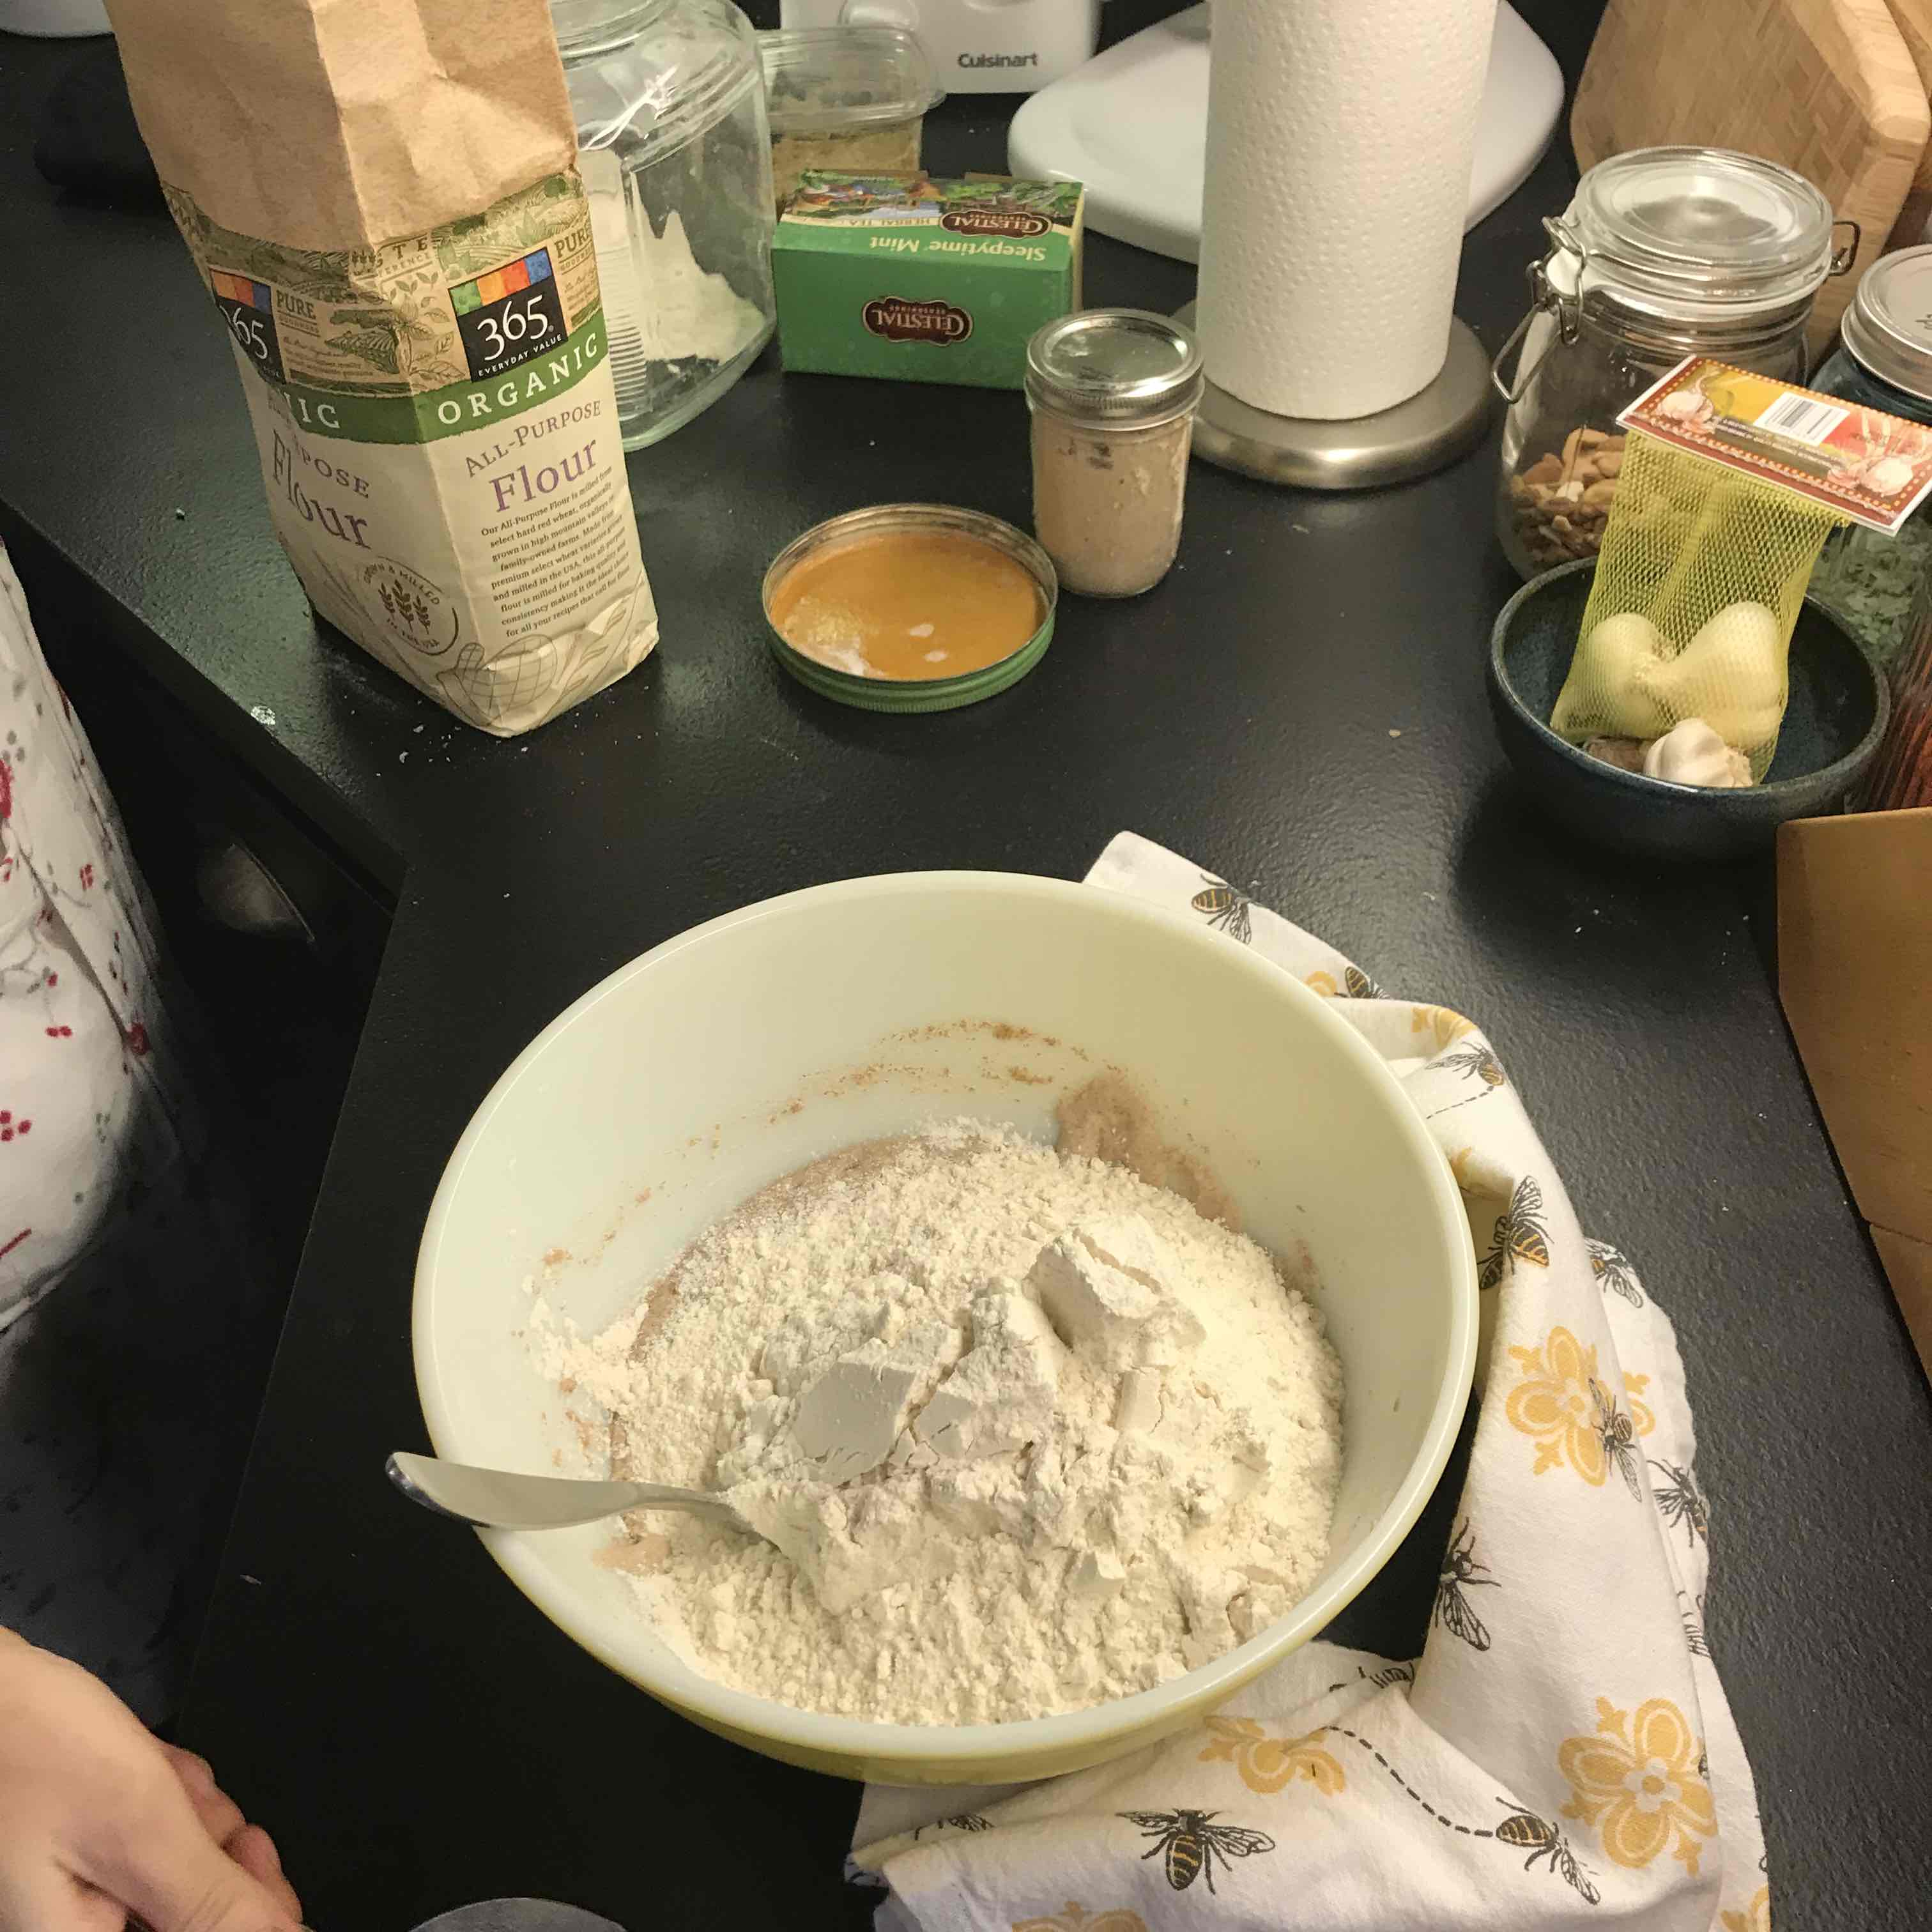
Step 9 - Add 1 teaspoon of salt.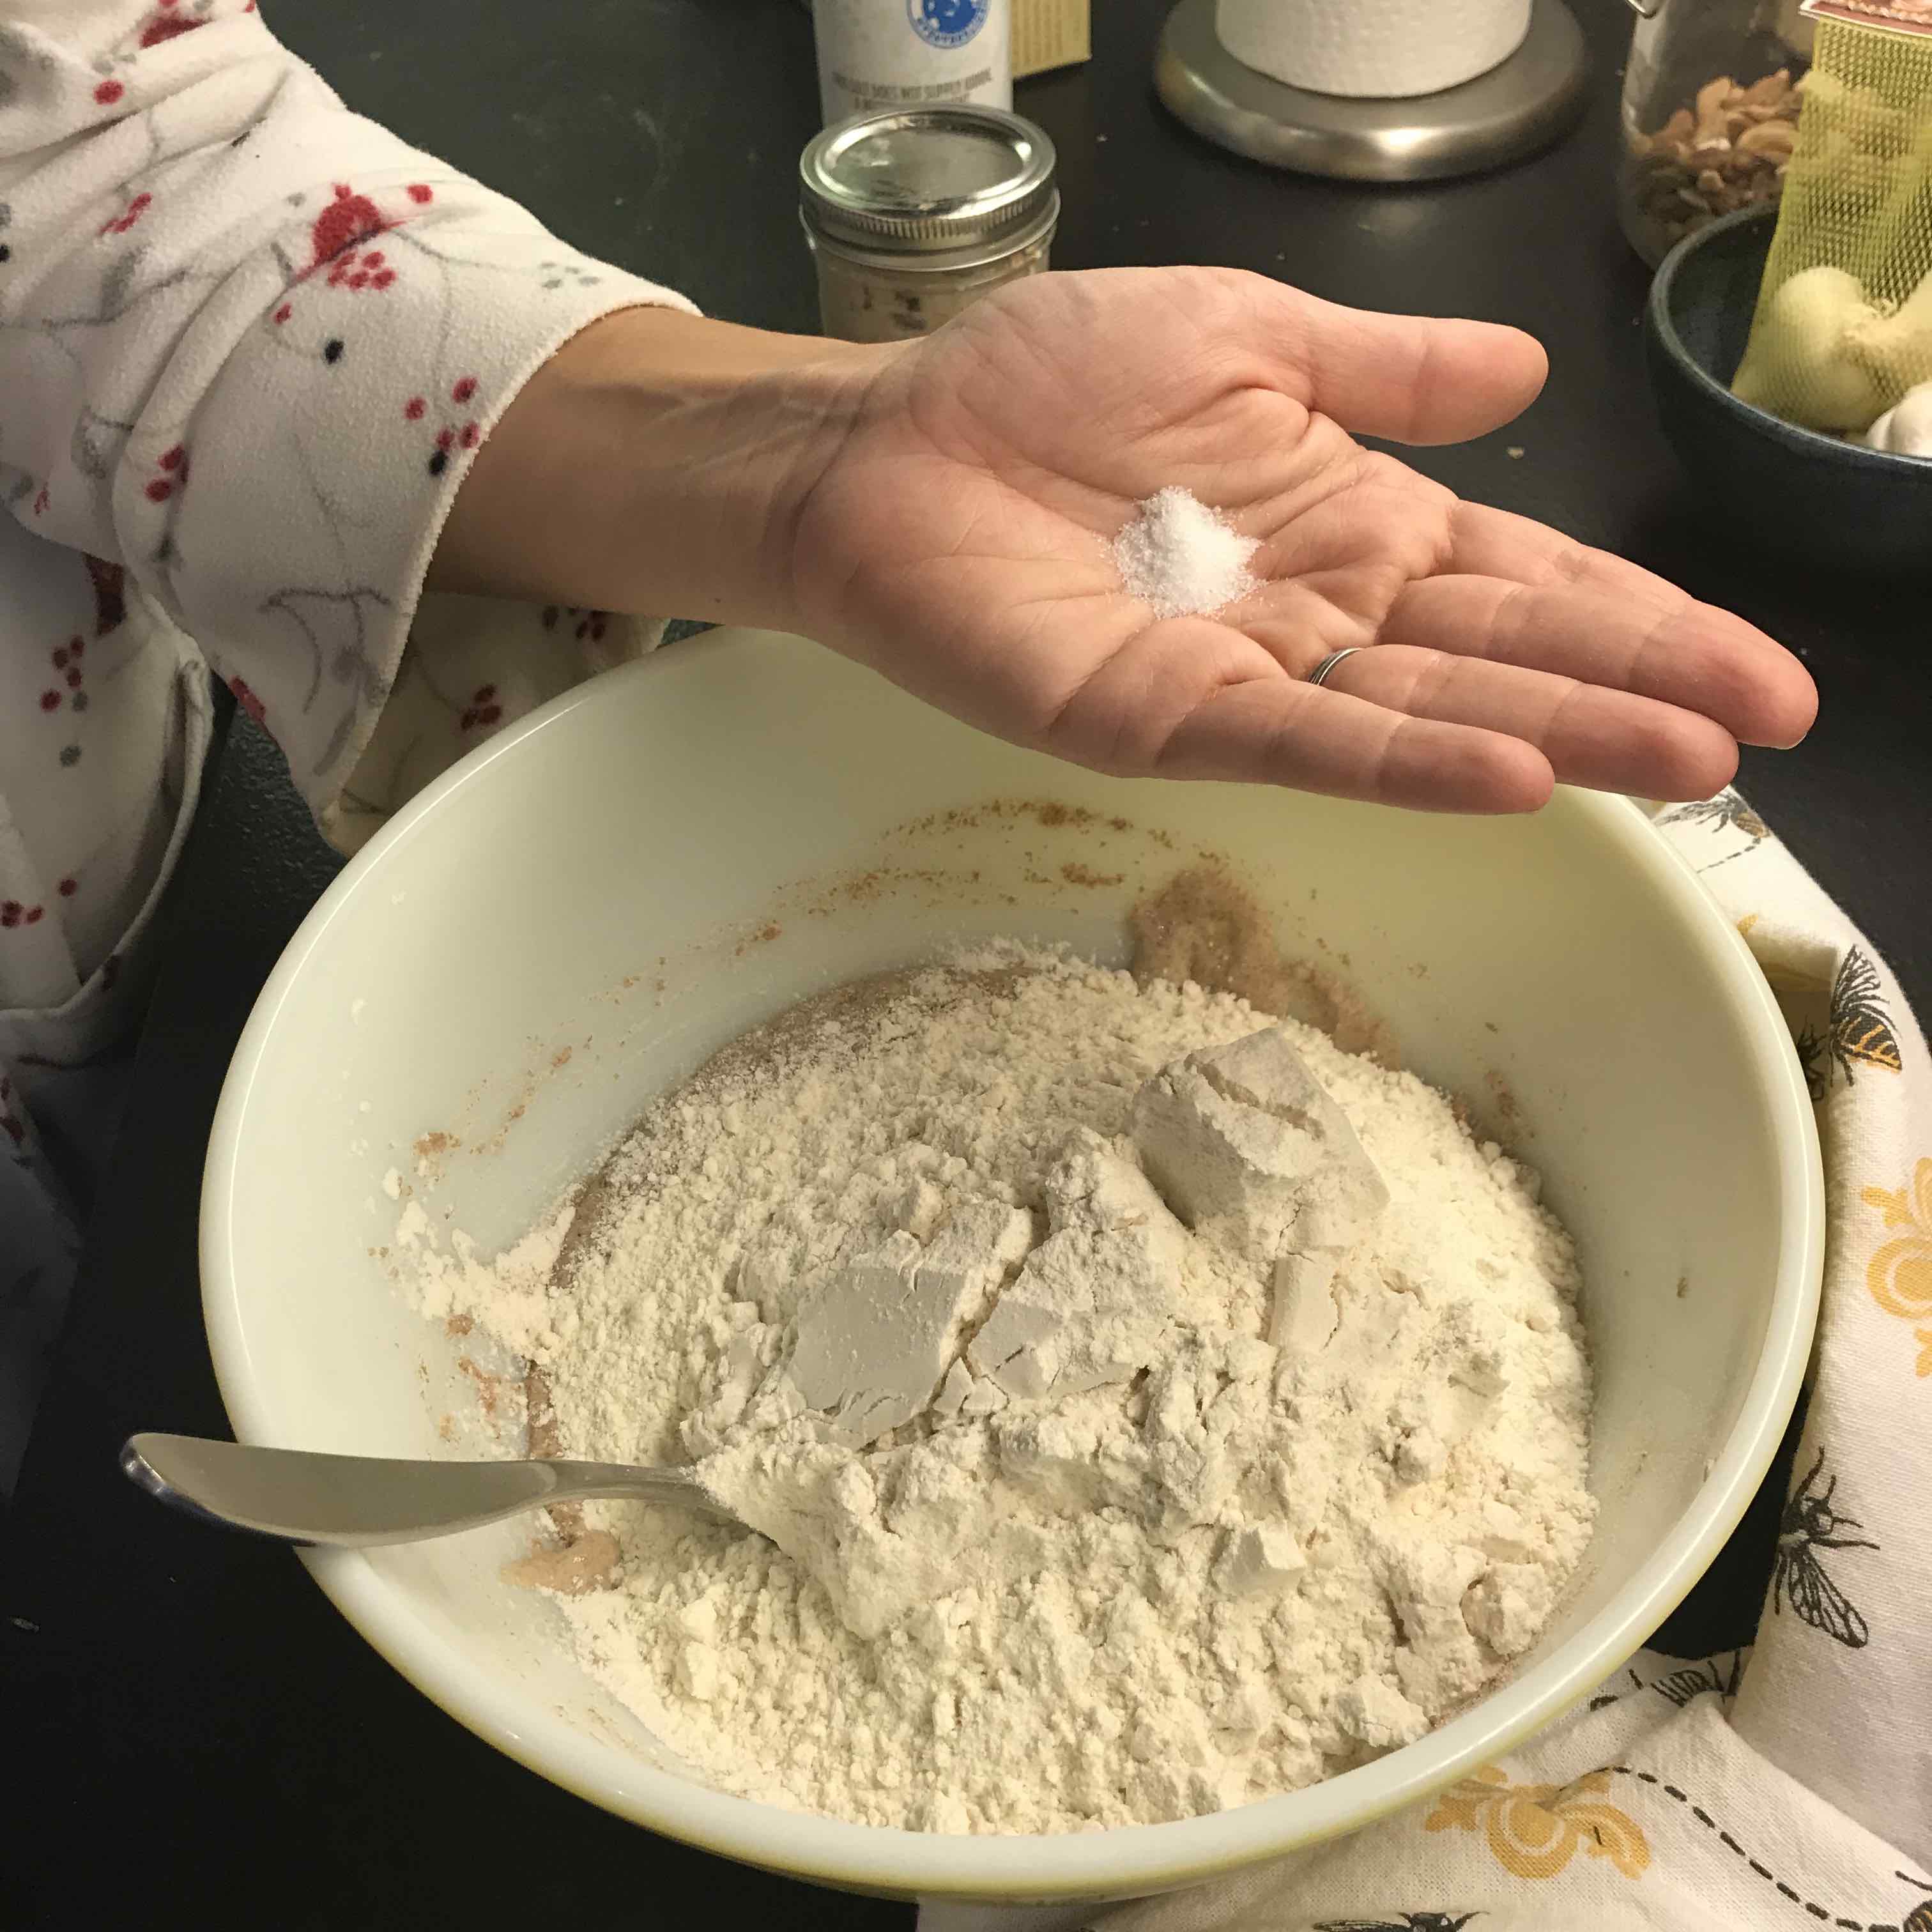
Step 10 - Add 1 1/2 cups lukewarm water.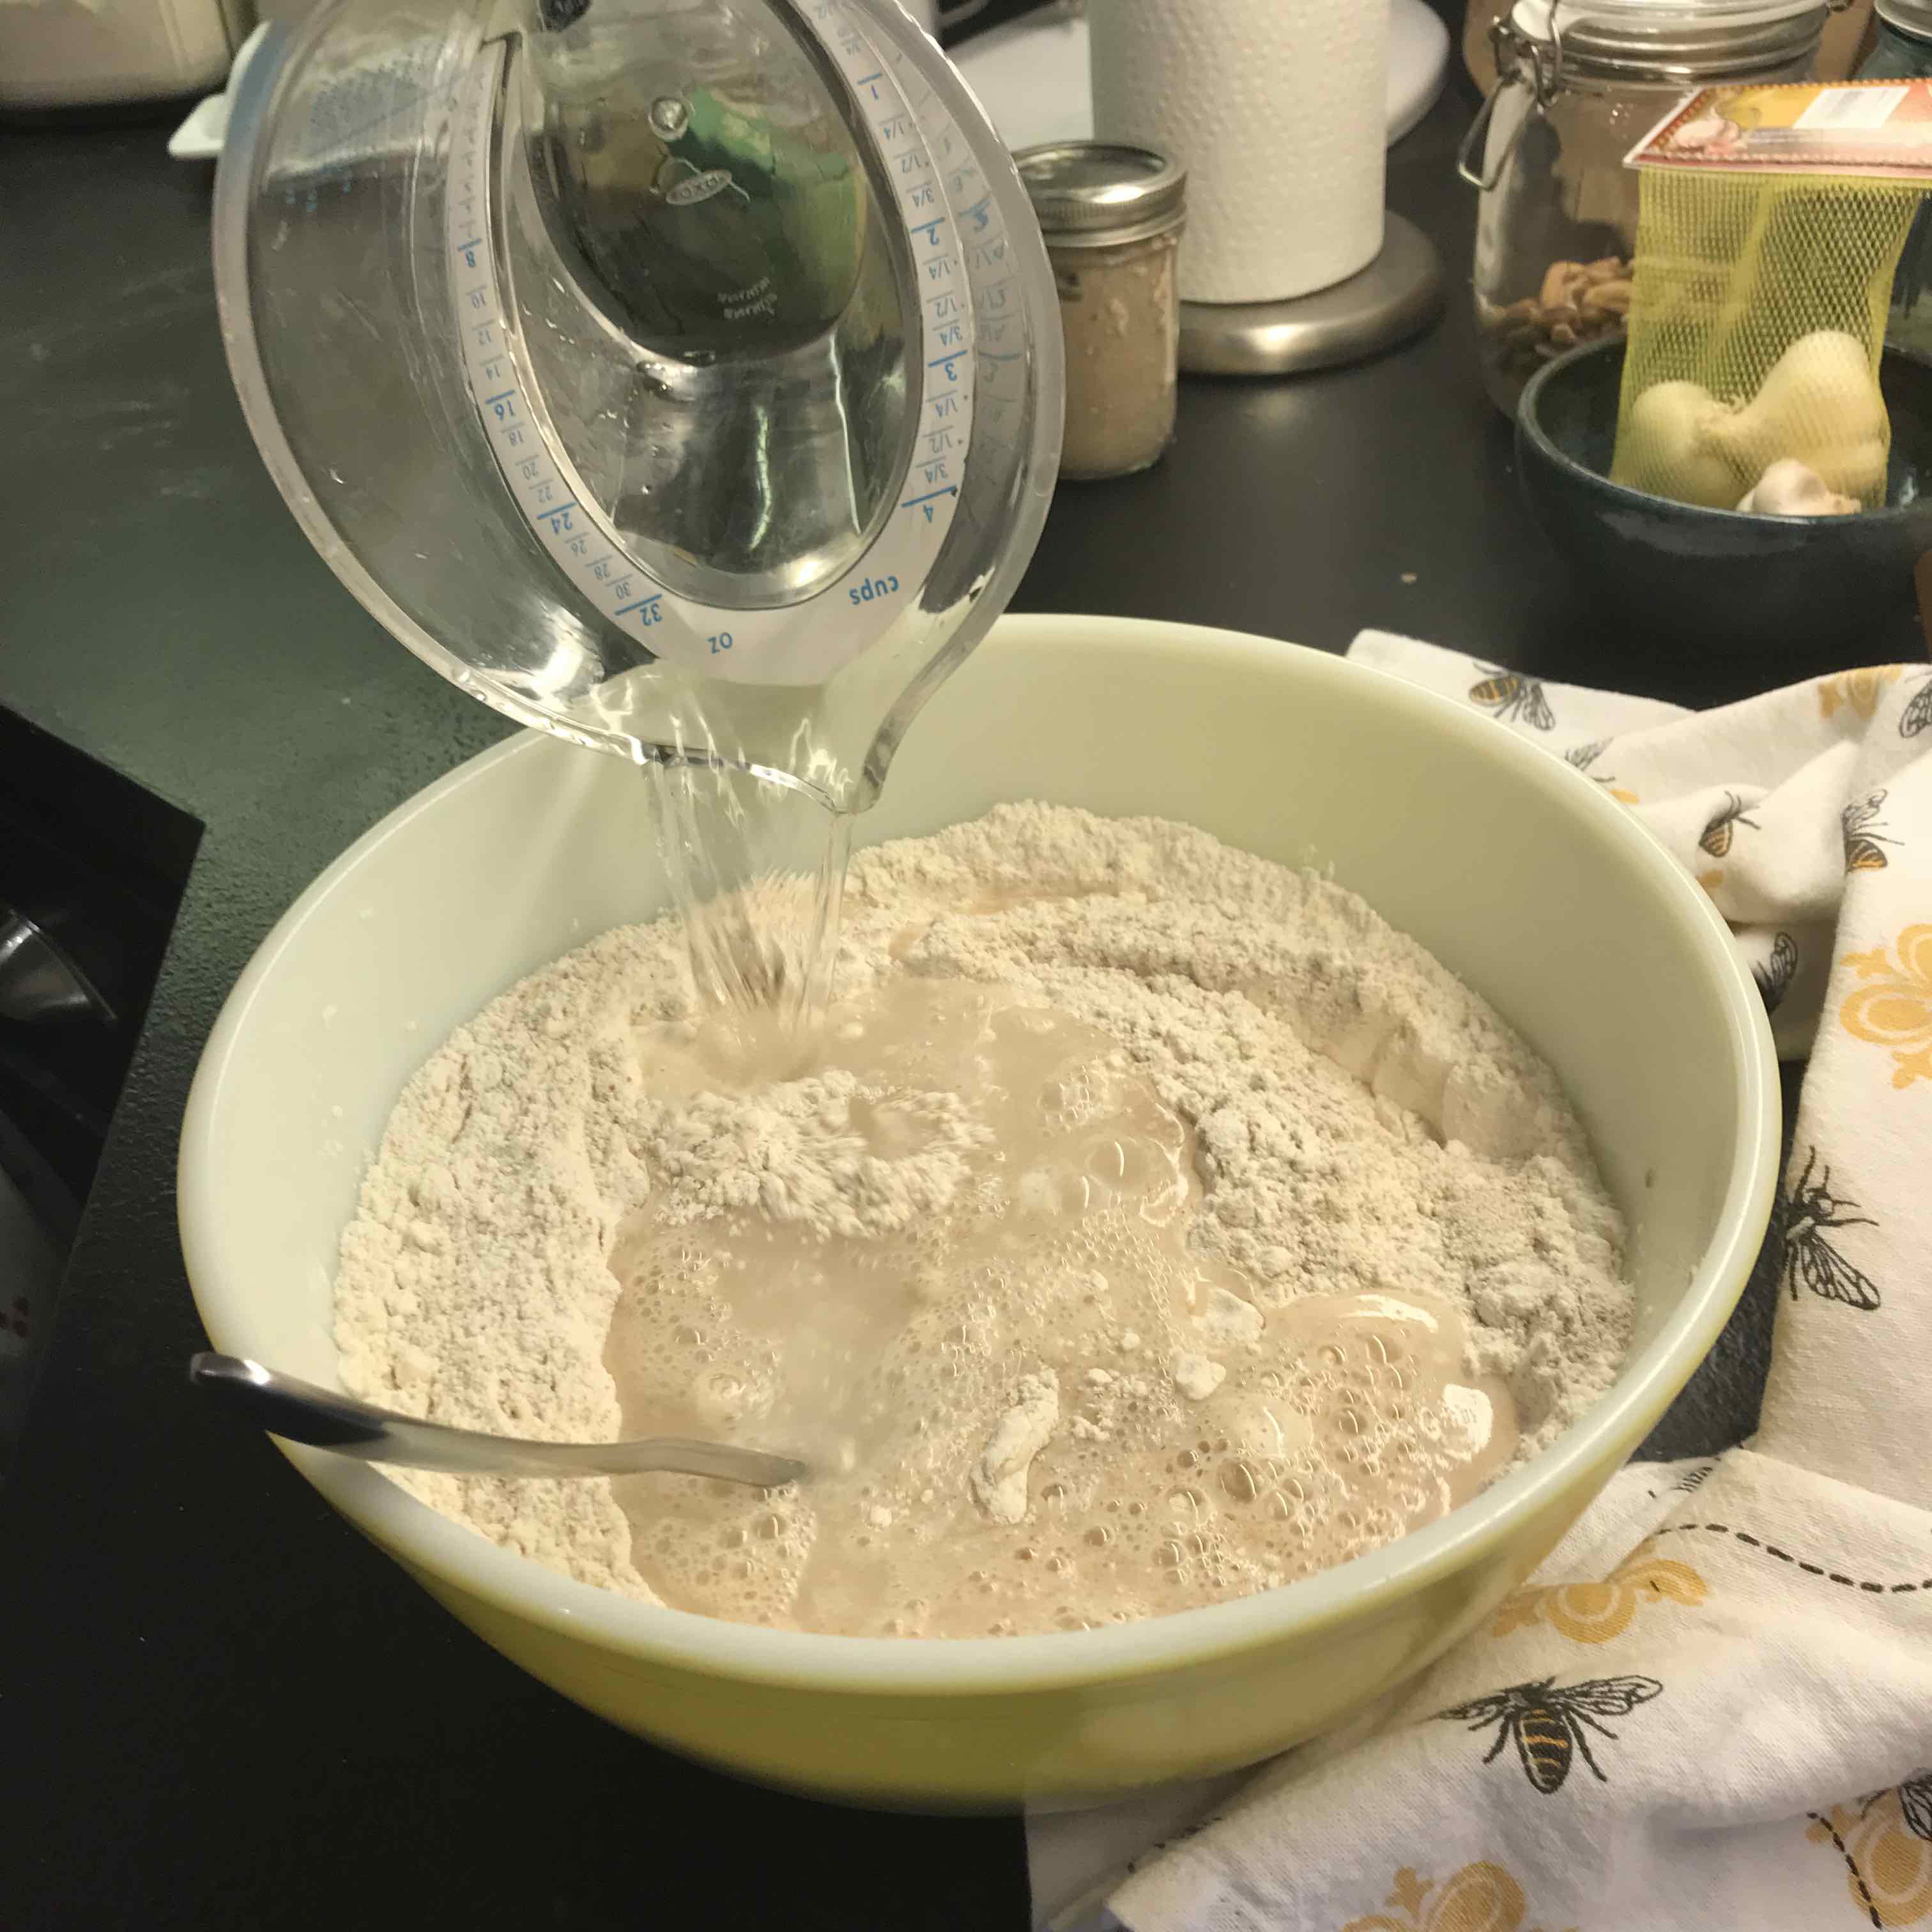
Step 11 - Combine until dough comes away from the side of the bowl and forms a ball.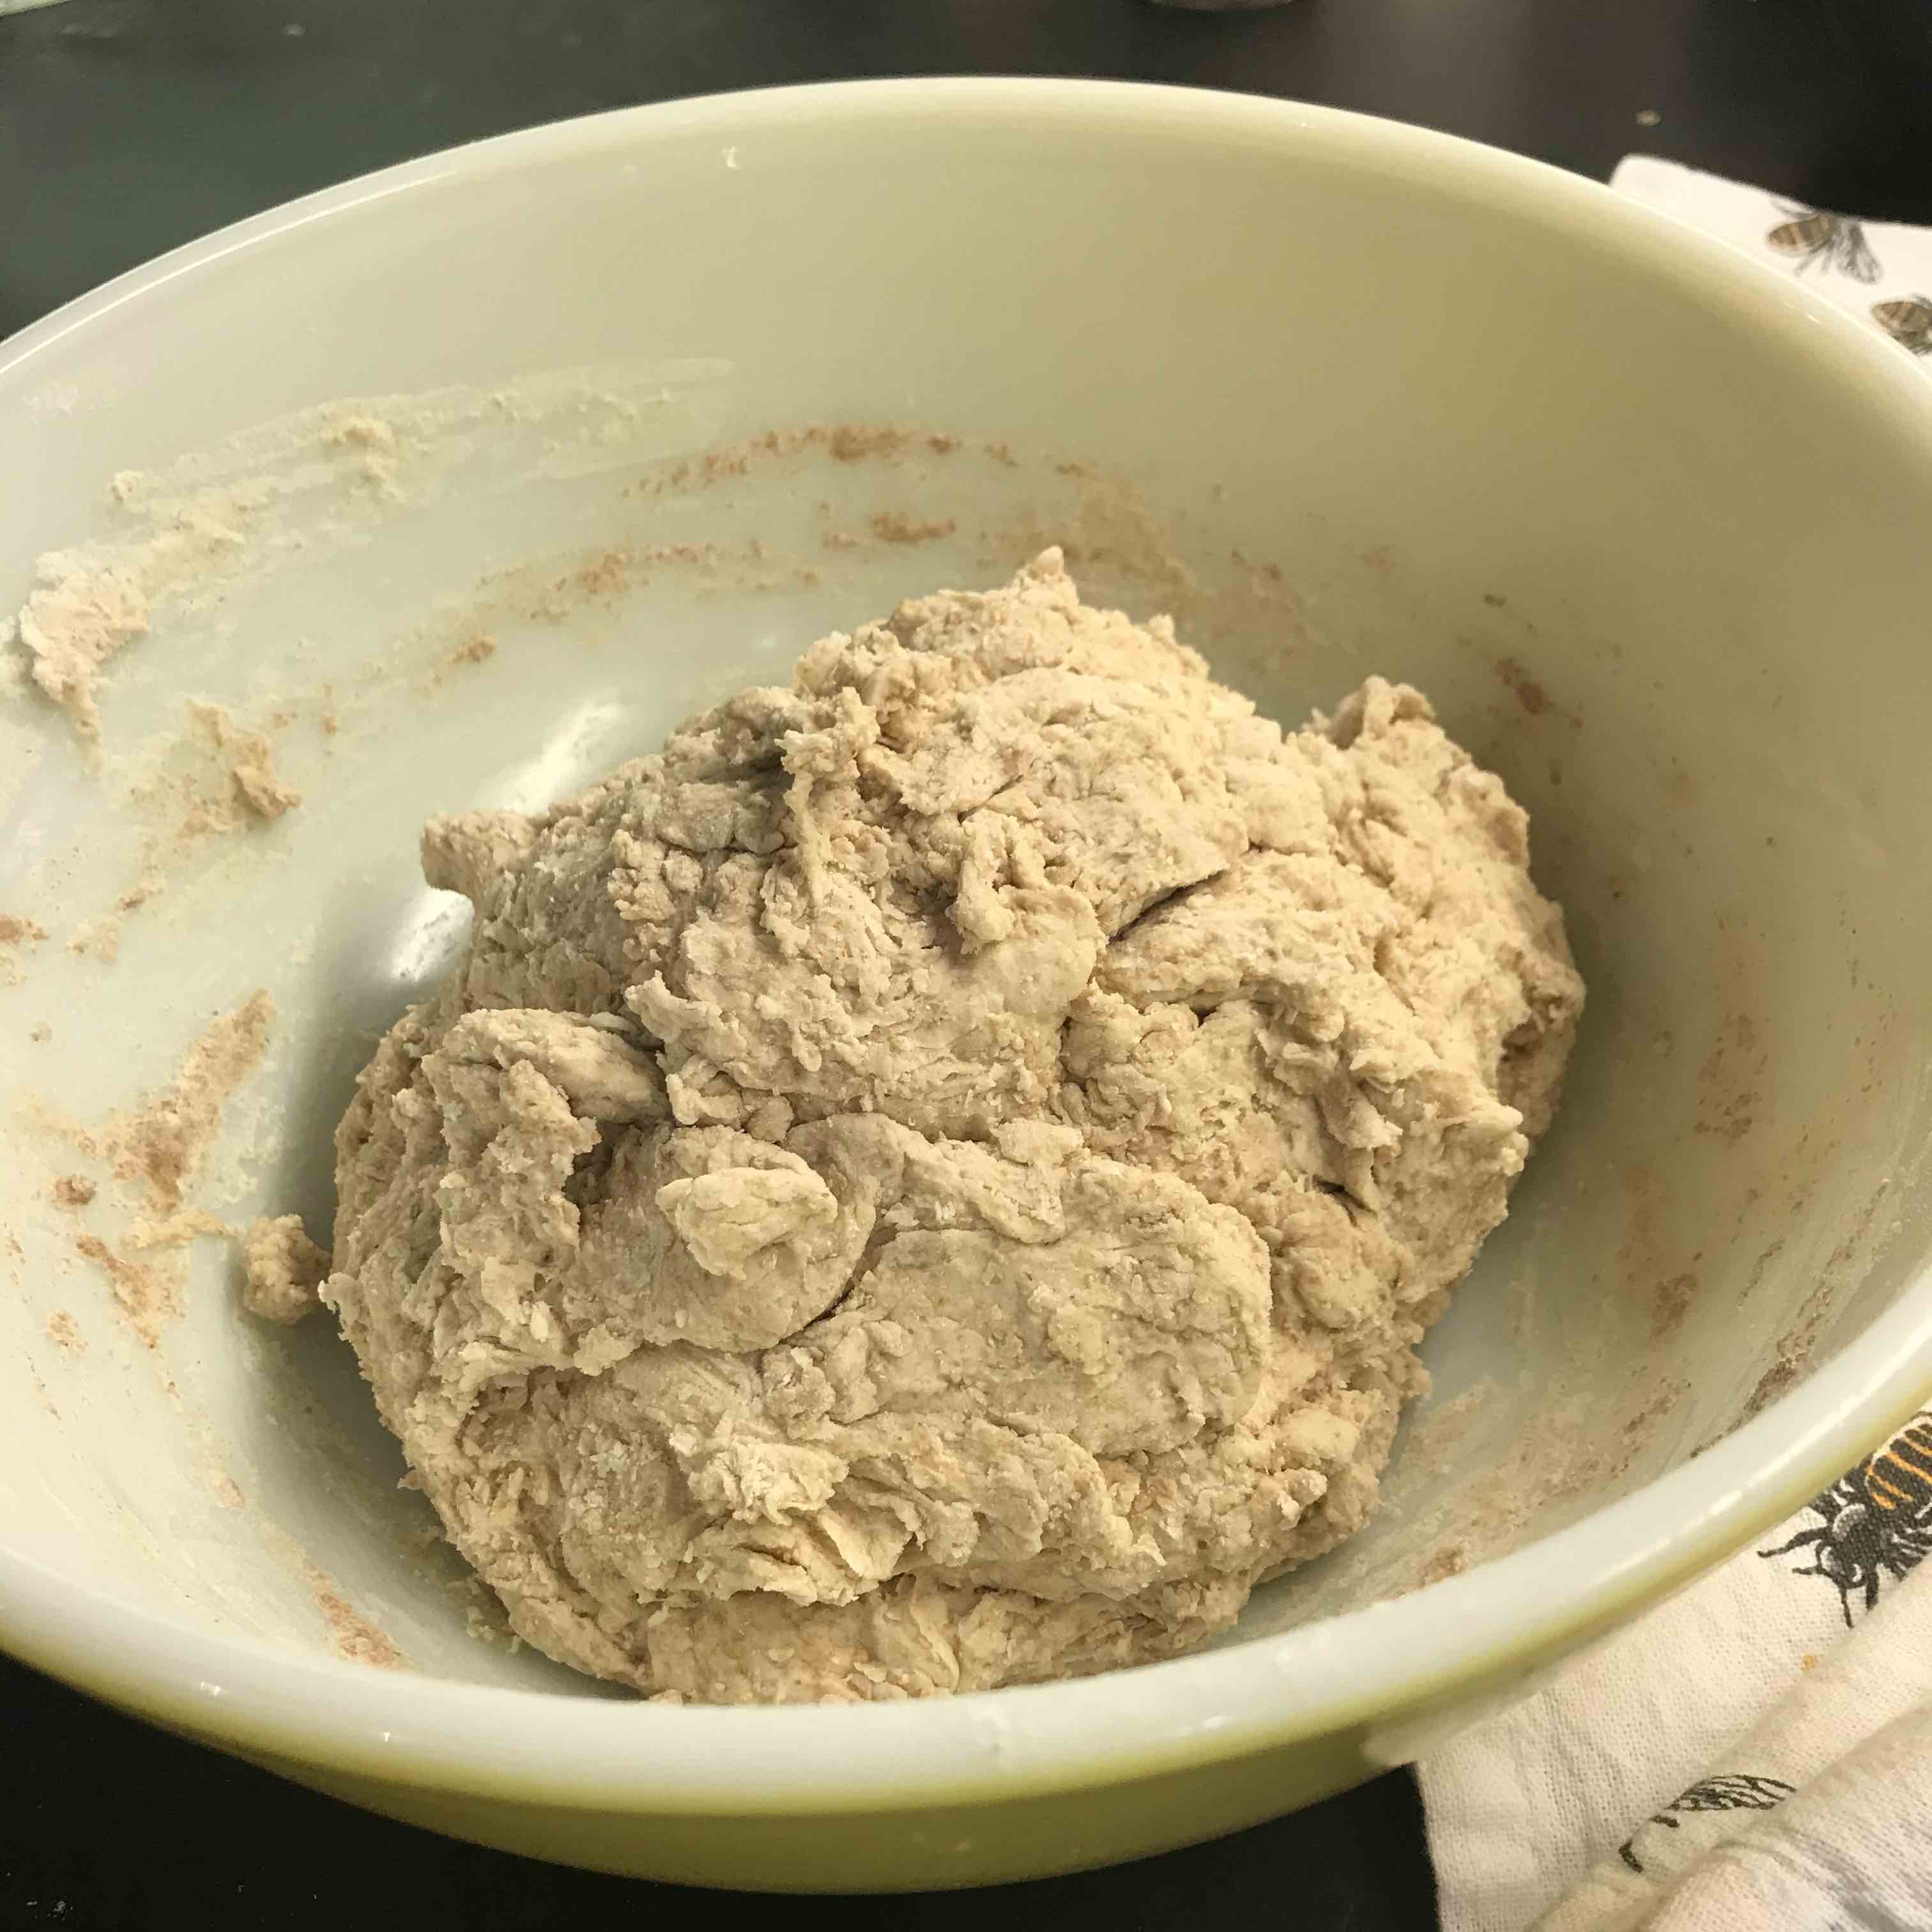
Step 12 - Cover and let rise 2 hours unrefrigerated.
Steps 13-16 - Every subsequent half hour fold the dough and let rest, on the fourth and final fold, see next step.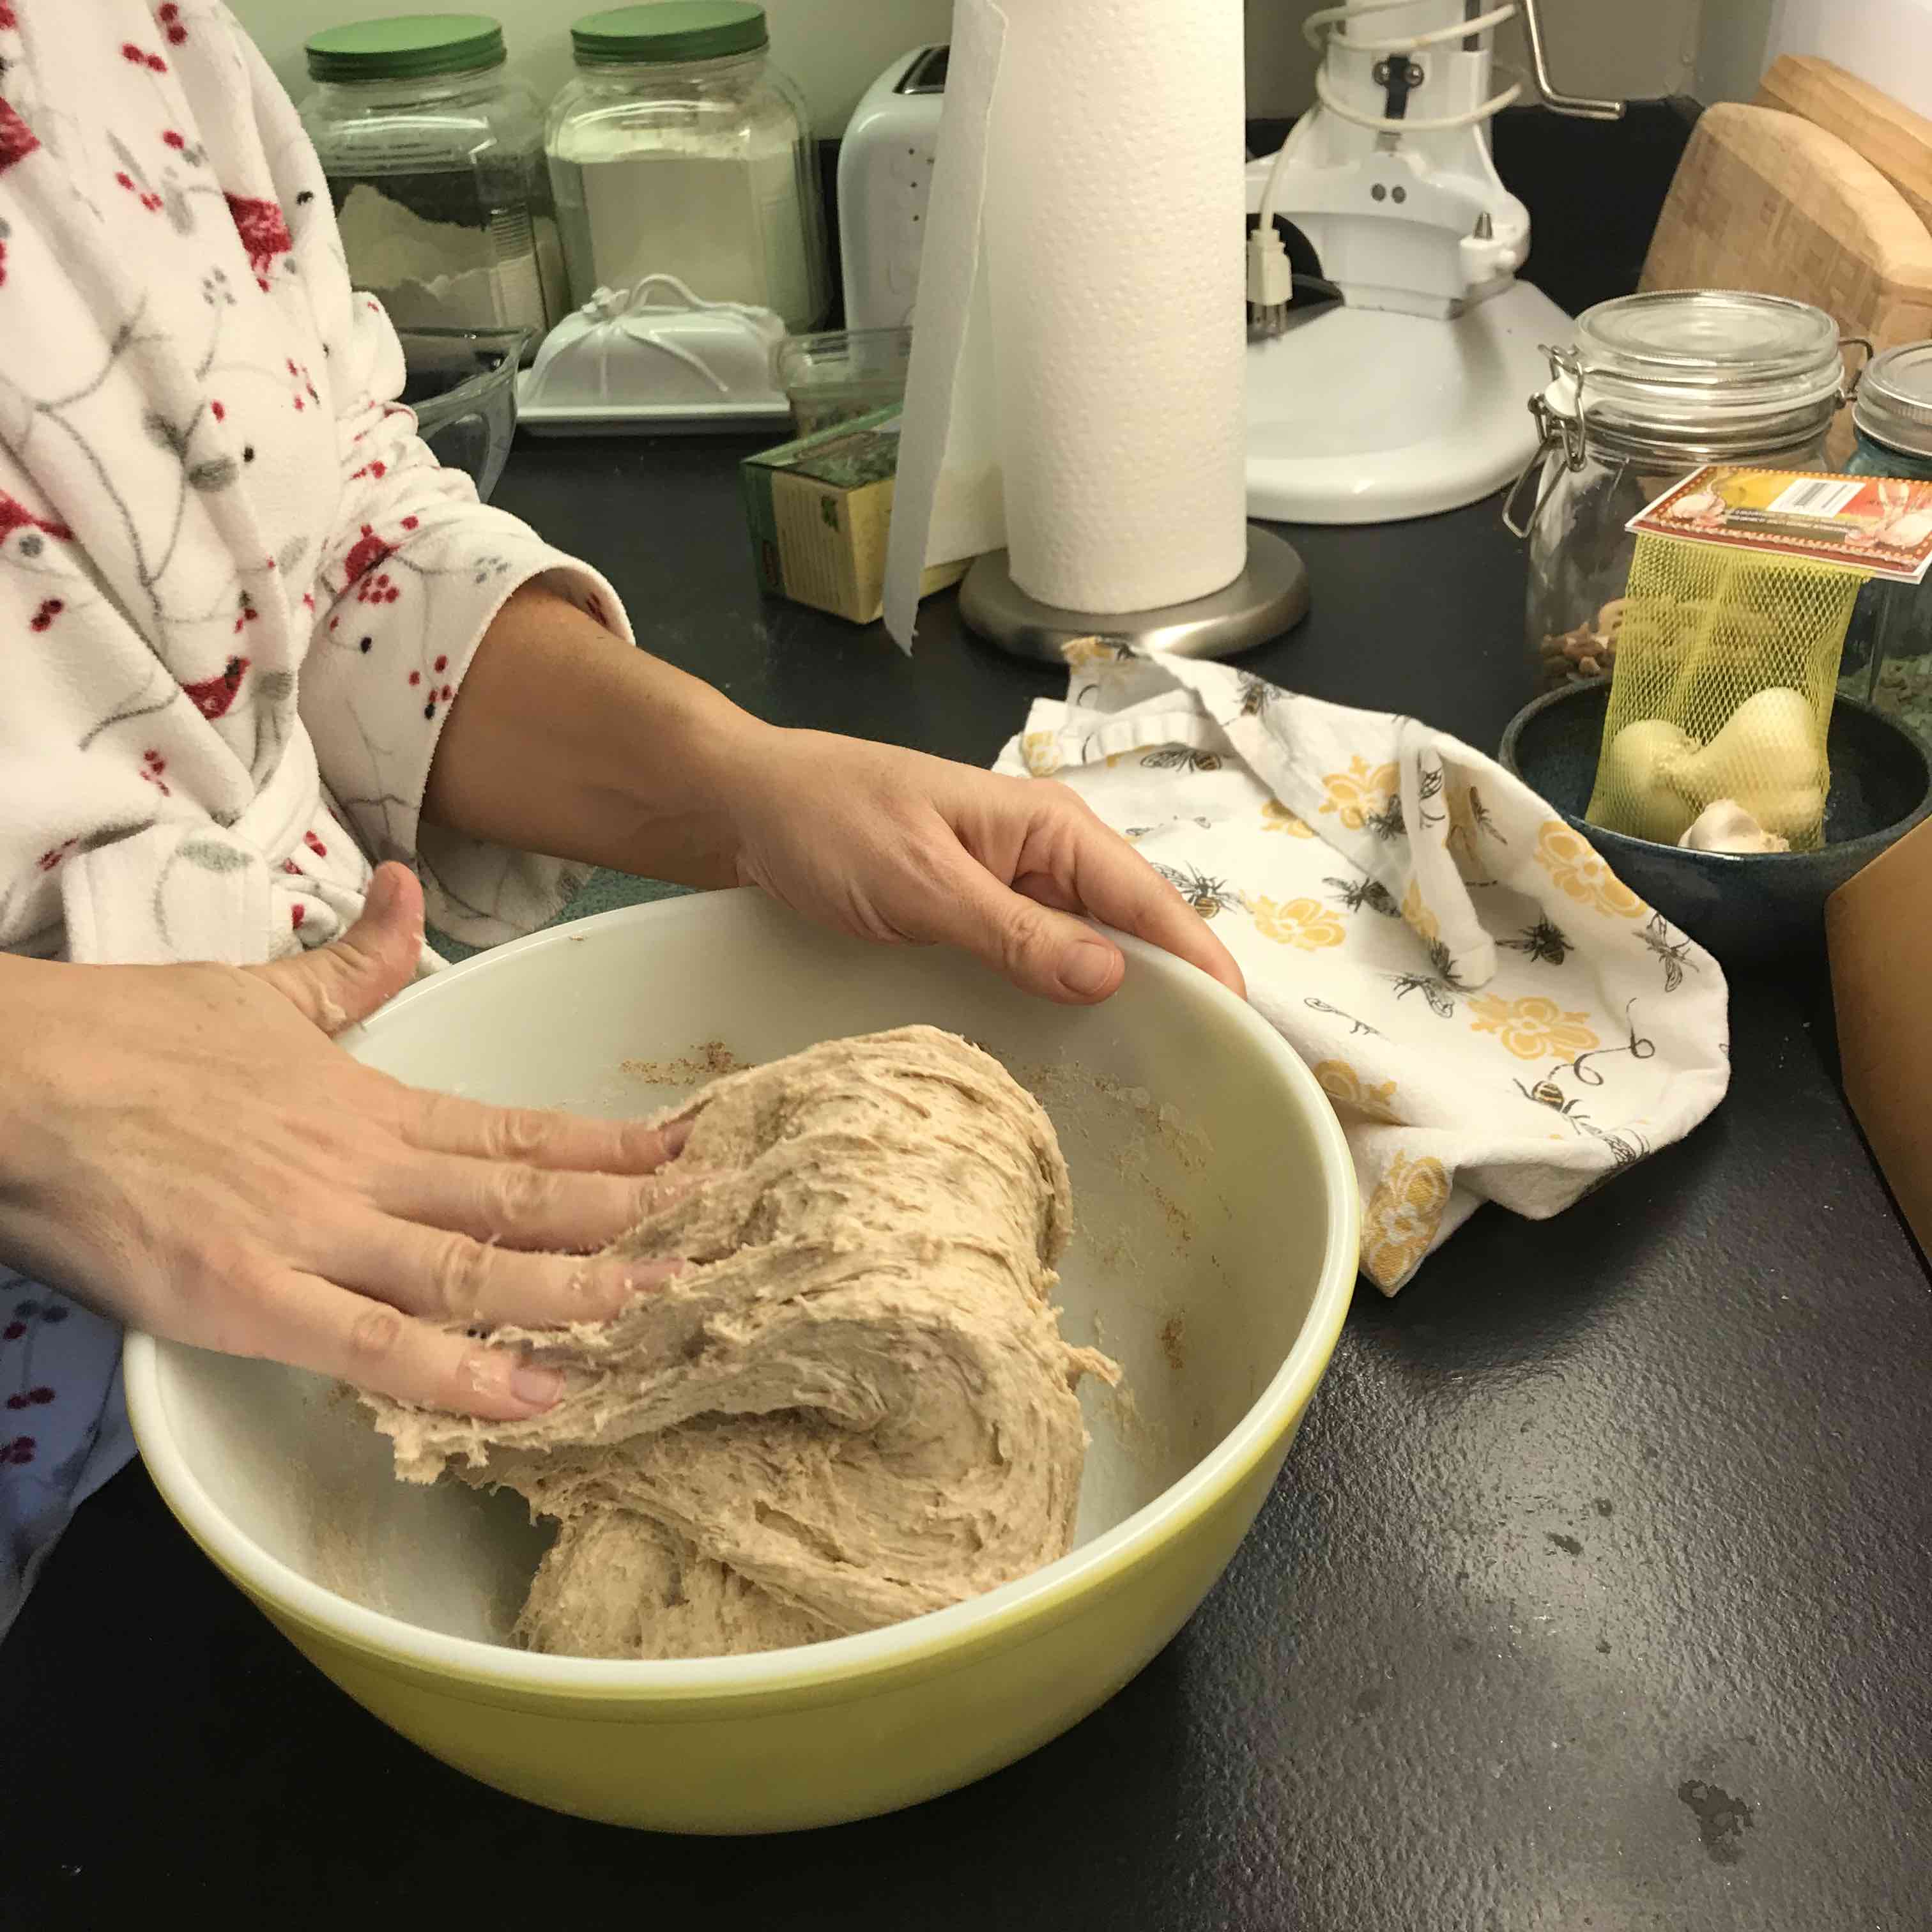
Step 17 - On the last fold remove dough from bowl and place in parchment lined loaf pan and let rise, covered, for 2 hours.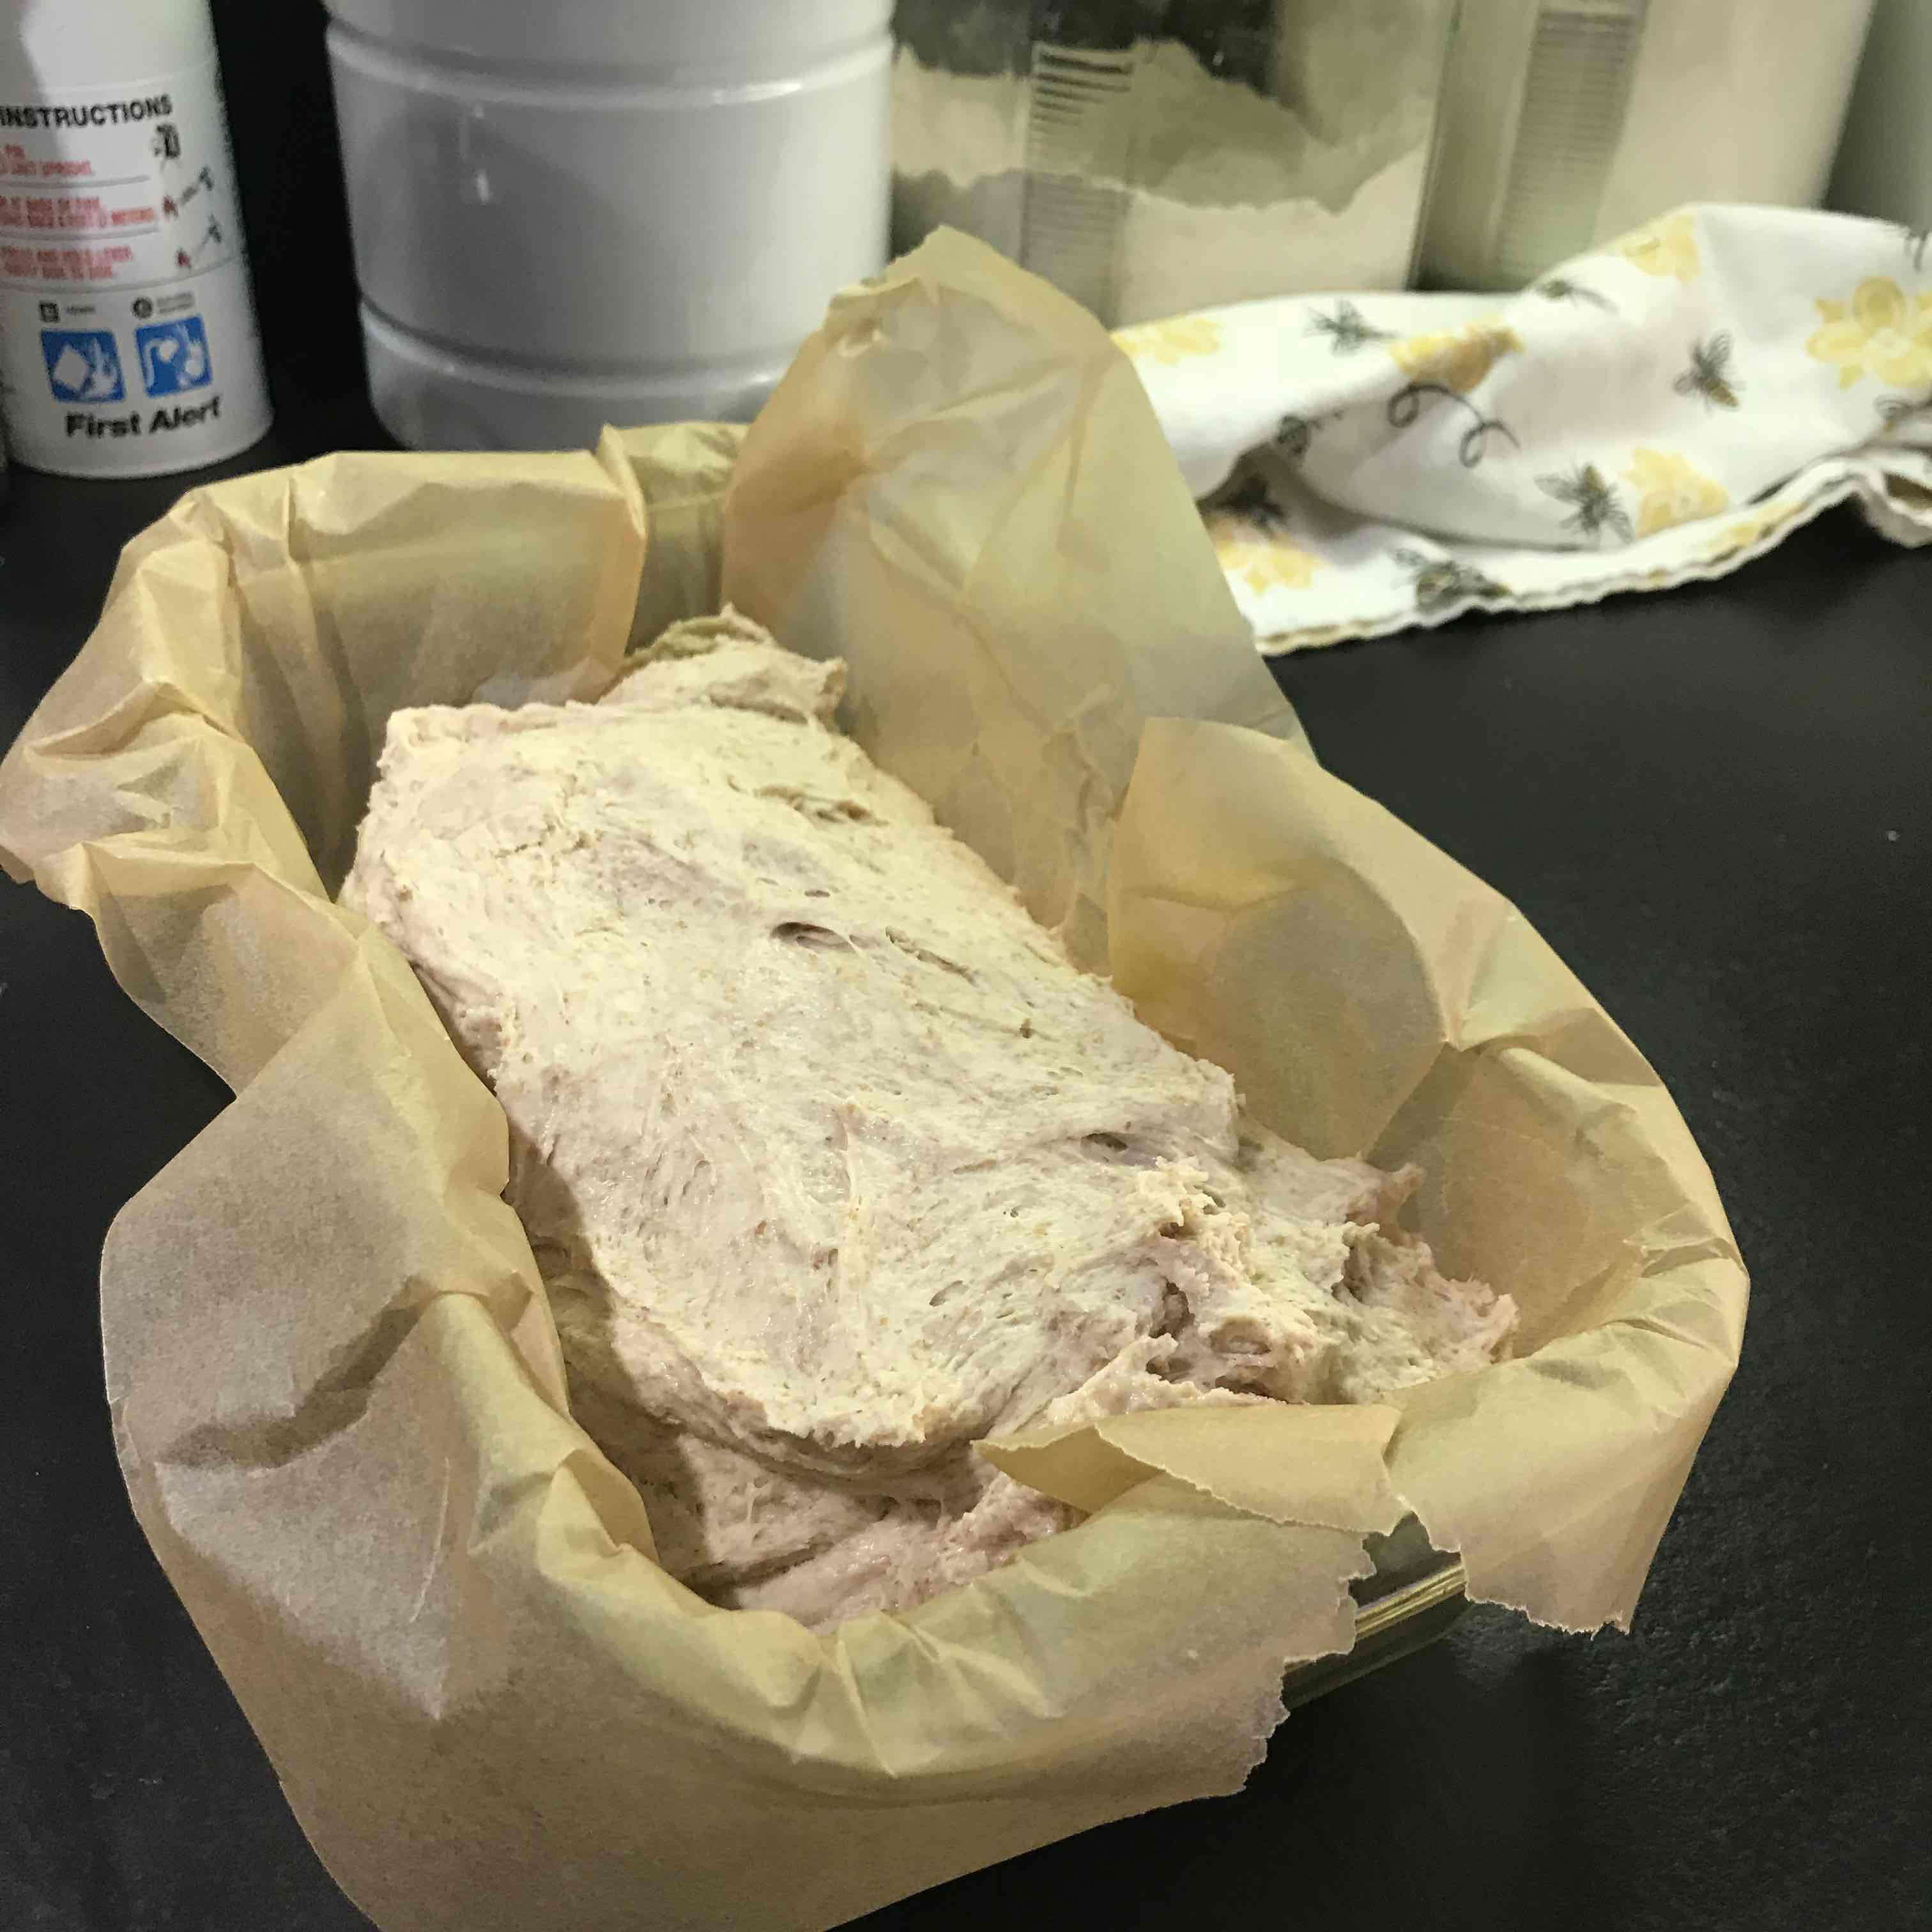
Step 18 - Cut slit along top using a serrated knife. Preheat oven to 420 degrees.
Step 19 - When the oven is at temperature place on middle rack and bake for 40 minutes.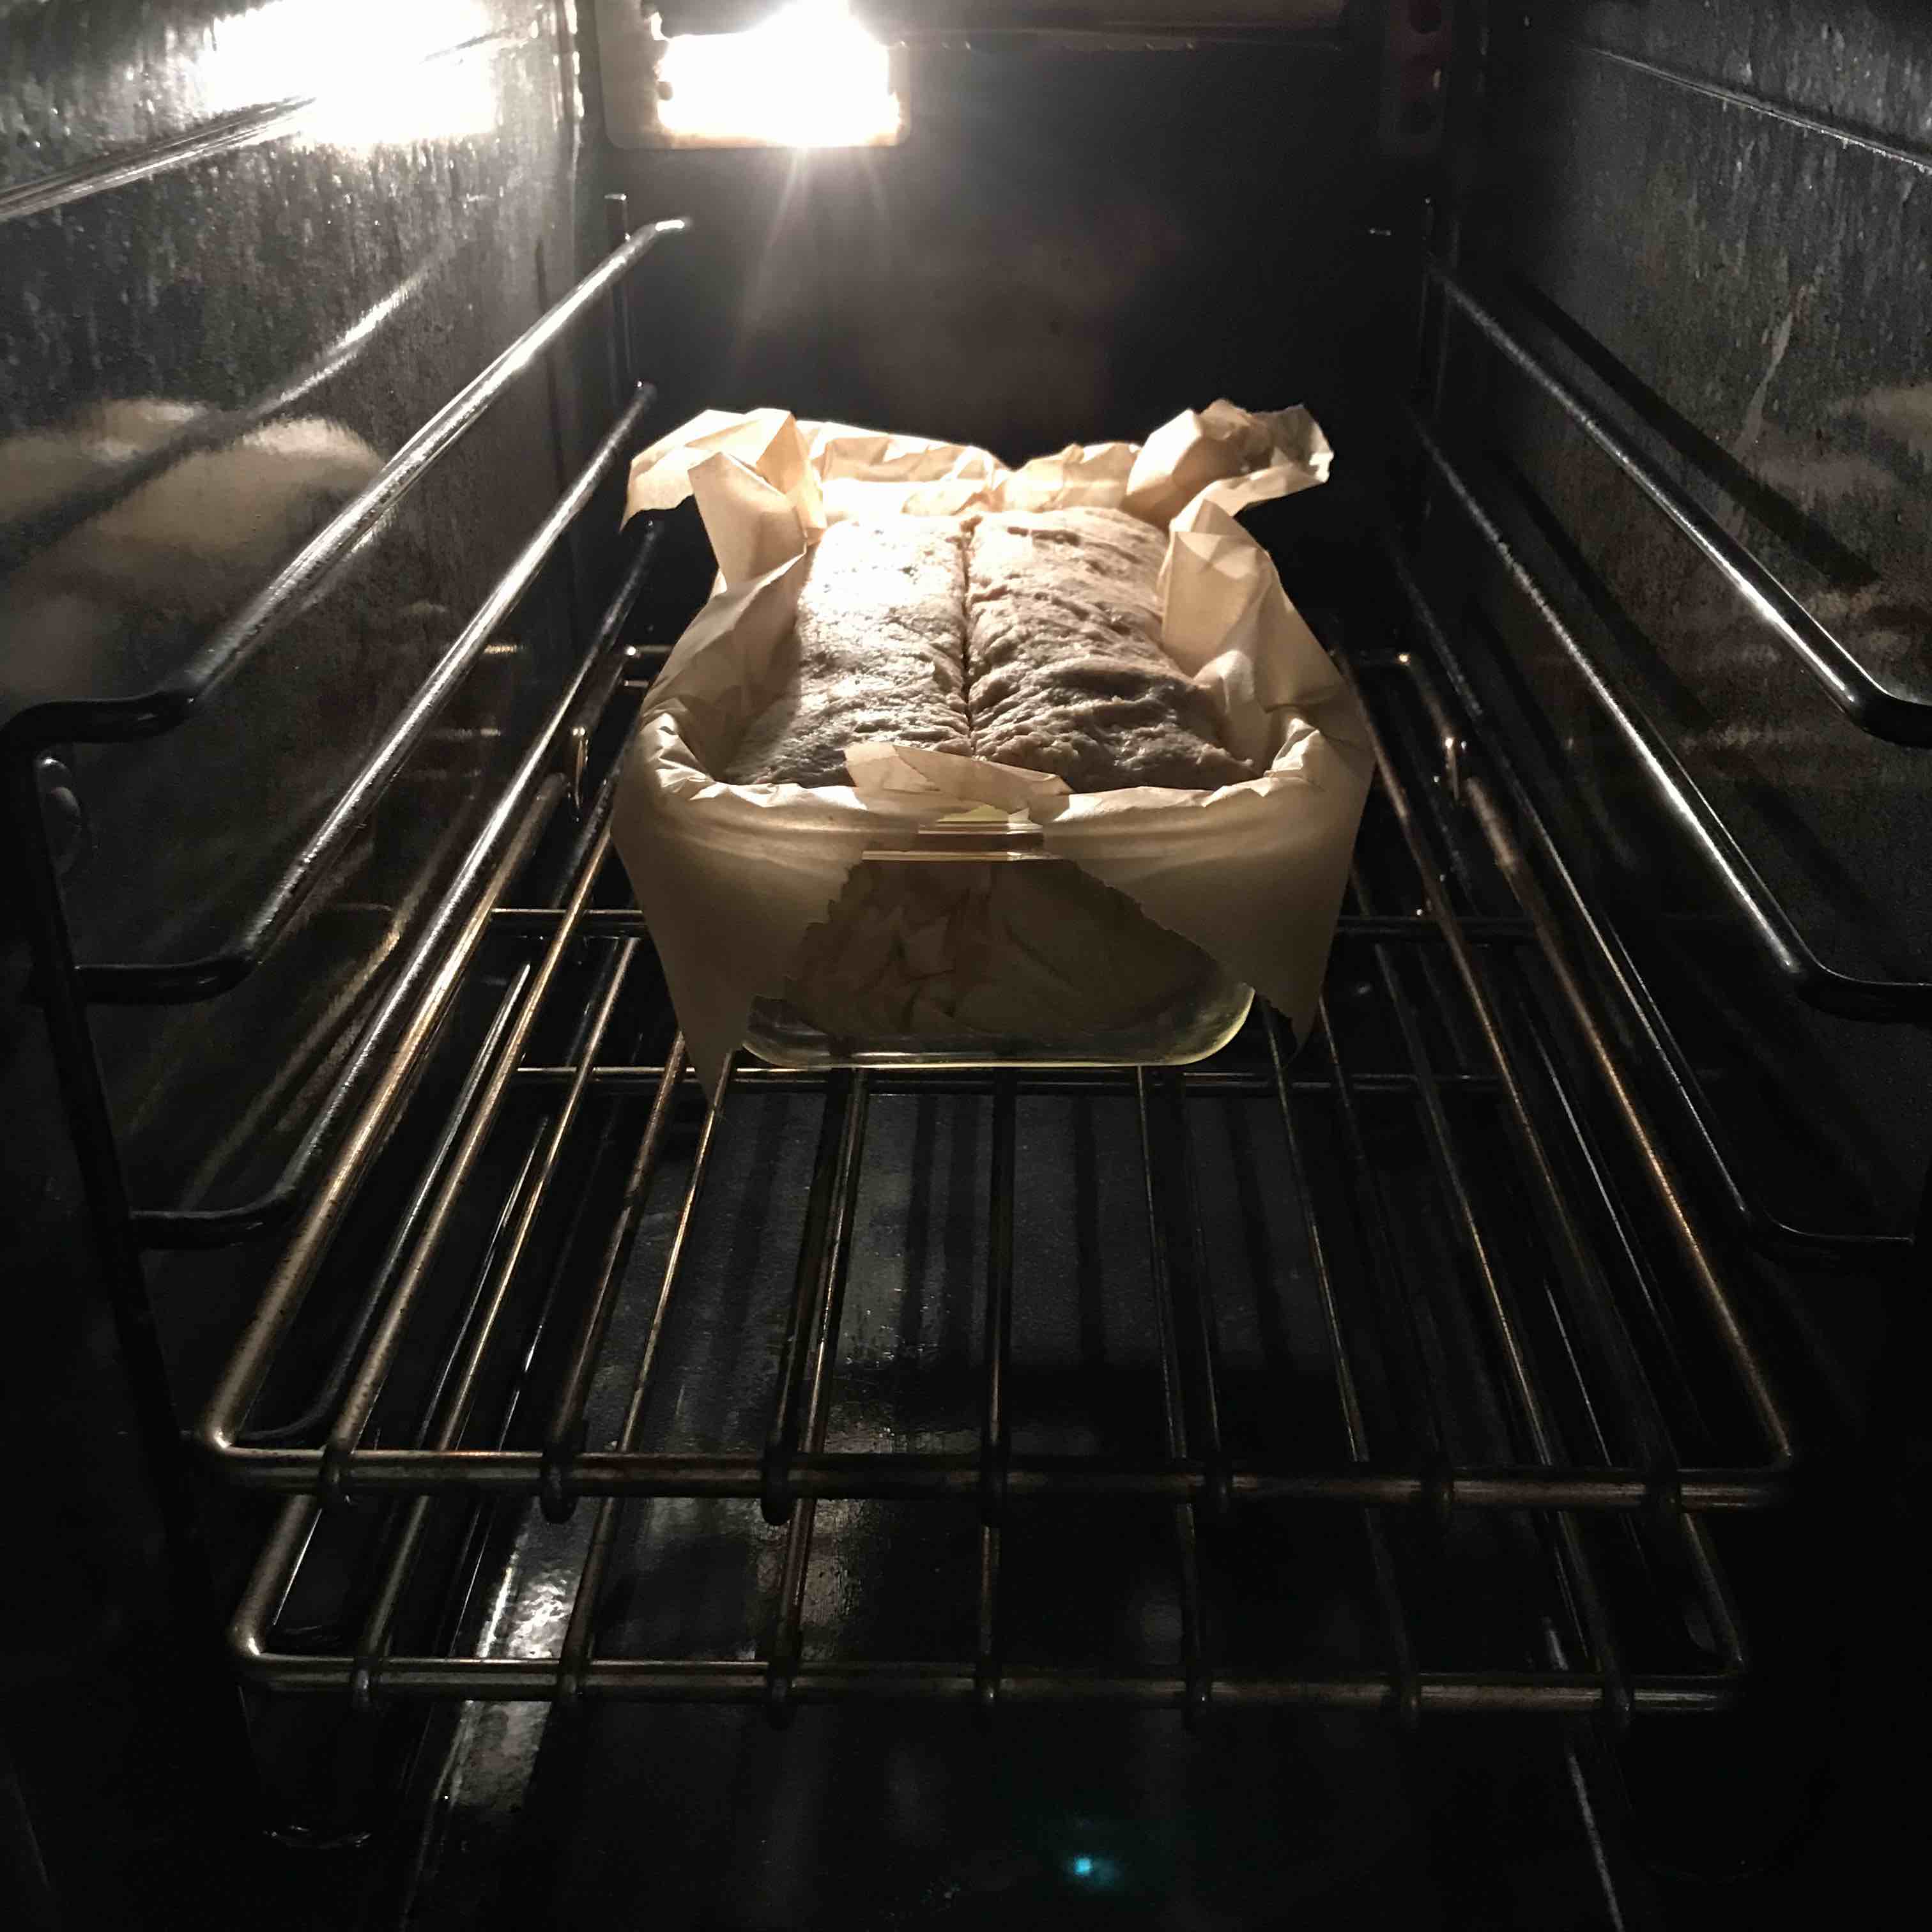
Step 20 - After 40 minutes, when the crust is brown and crispy, remove the loaf to a cooling rack.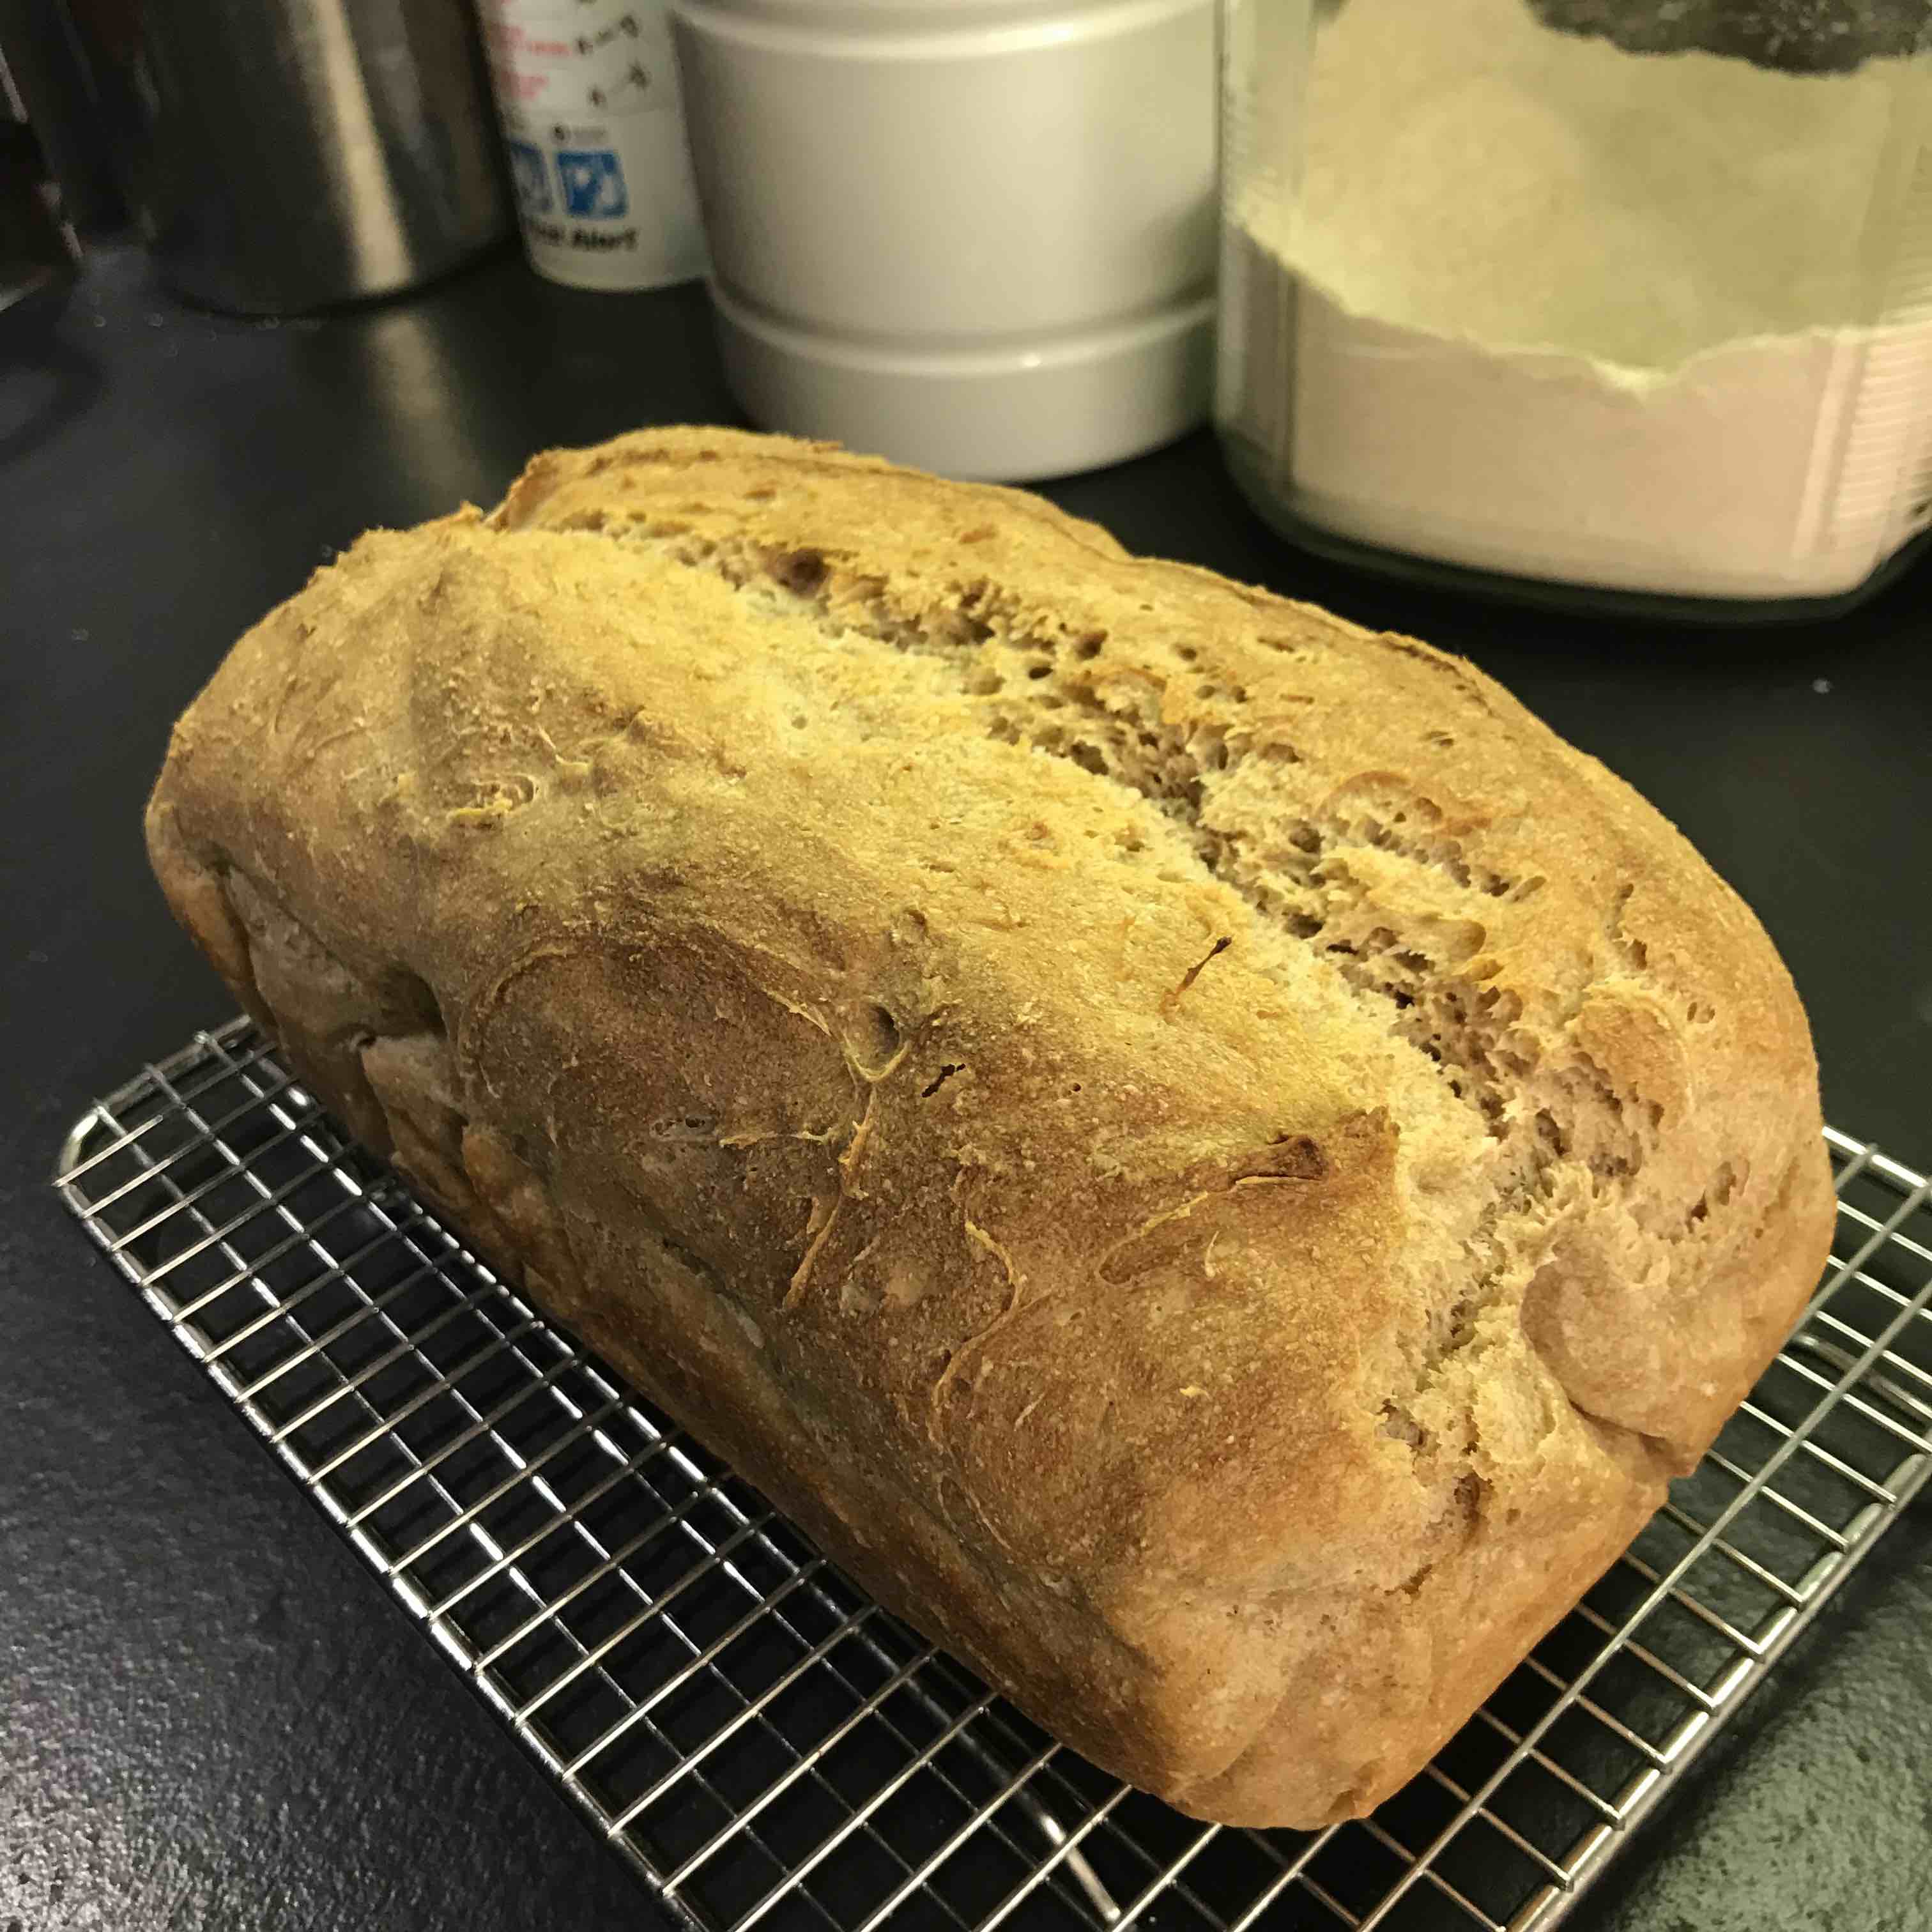
Enjoy! ...I know you will ...unless you have Celiac disease in which case you won't - sorry.
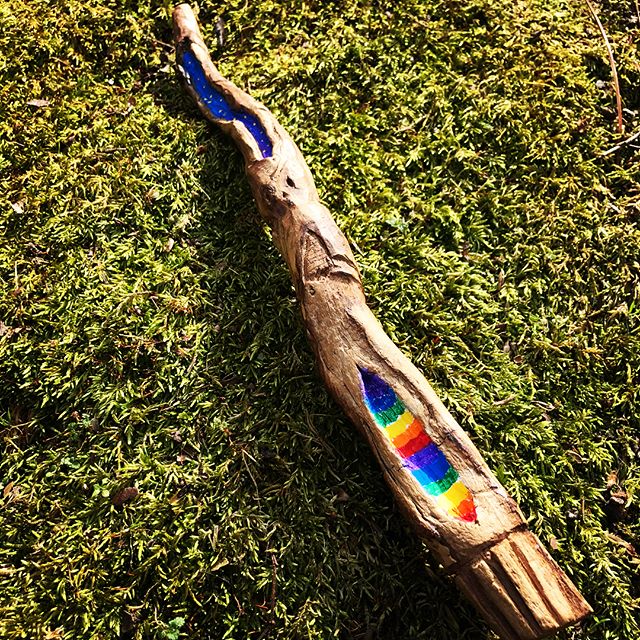
Magic Wand
A stick caught me eye one day. 'Magic wand' came to mind as it had the most wonderful swirling grain. Whipped out my pocket knife and made a rough pass at the shape. After an hour of carving and some bees wax to bring out the grain, it was done. It has been part of my kids' play-time ever since.
Last night when the kids were asleep I painted a starry night and rainbow pattern into the core areas then hid it in their play bin to be re-discovered. With just a little bit of paint I 'leveled up' the magic in their wand. They now pretend that it has sleep inducing powers which I'm only too happy to oblige.